
What is Dataverse REST Builder?
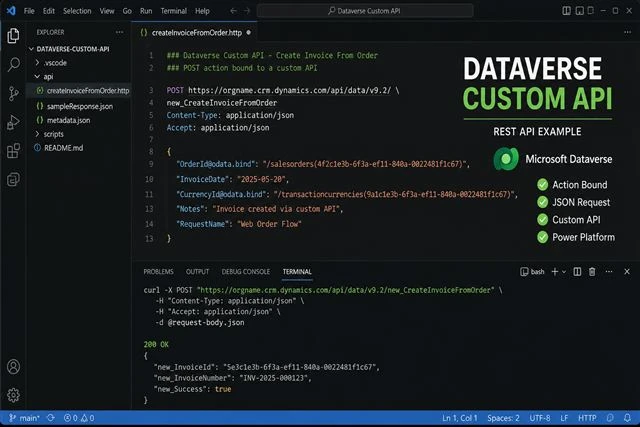
- Dataverse REST builder is a tool provided in XrmToolBox build by Guido Preite. the Dataverse REST Builder that runs in XrmToolbox, as a managed solution, and in Dataverse DevTools (VS Code). If you are a developer and you are working on d365 when you are writing any kind of query code and building the Apps, you are basically wanting to use this tool that would generate code for you.
- It also supports generating code snippets for other types of requests such as creating, updating, and deleting records, executing actions and functions, retrieving metadata, and more.
In this blog we are showing how the Dataverse REST Builder runs in
SCENARIO 1: XrmToolbox,
SCENARIO 2: Using the managed solution in CRM
SCENARIO 1: XrmToolbox,
- First, we are going to see how you install it and run it in XrmToolBox.
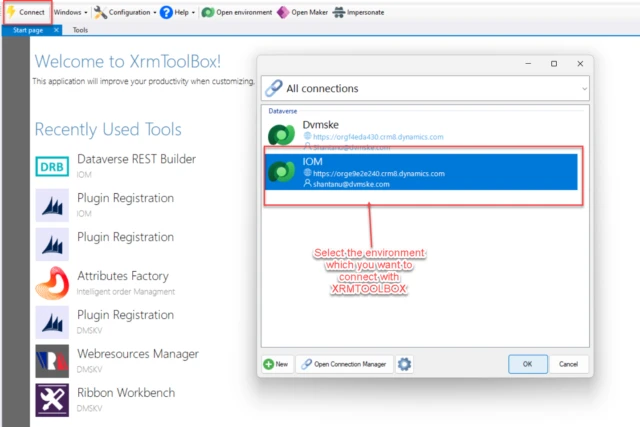
- Open YourXrmToolBox and connect it with your organization select connect and connect with your organization.
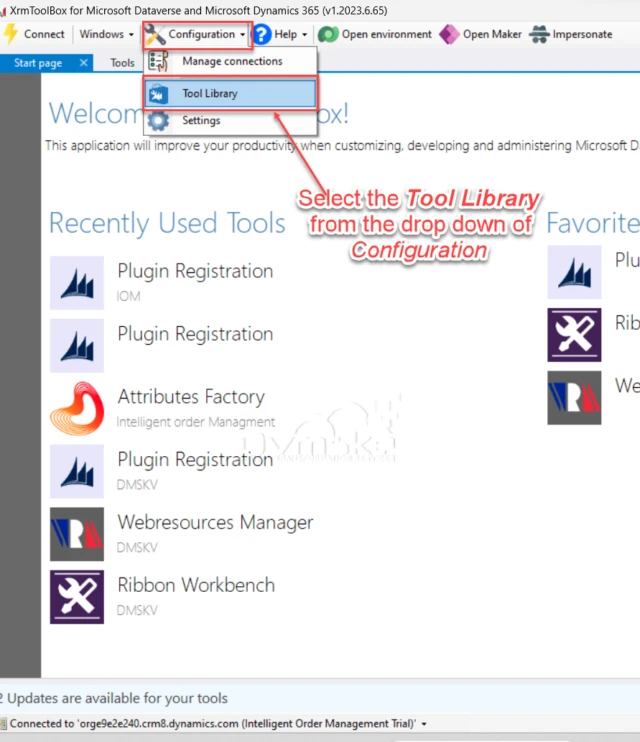
- After connecting with your organization select Configuration icon from the top and from the drop down select Tool Library.
- Search REST in search area and select Dataverse REST builder from the result and install it.
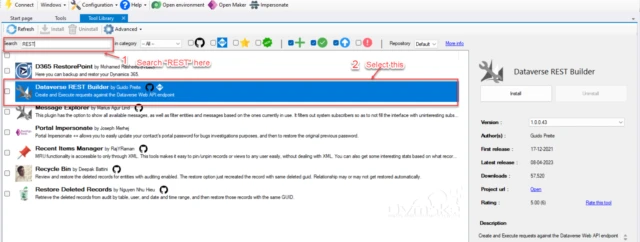
- After Installing the tool > Open it.
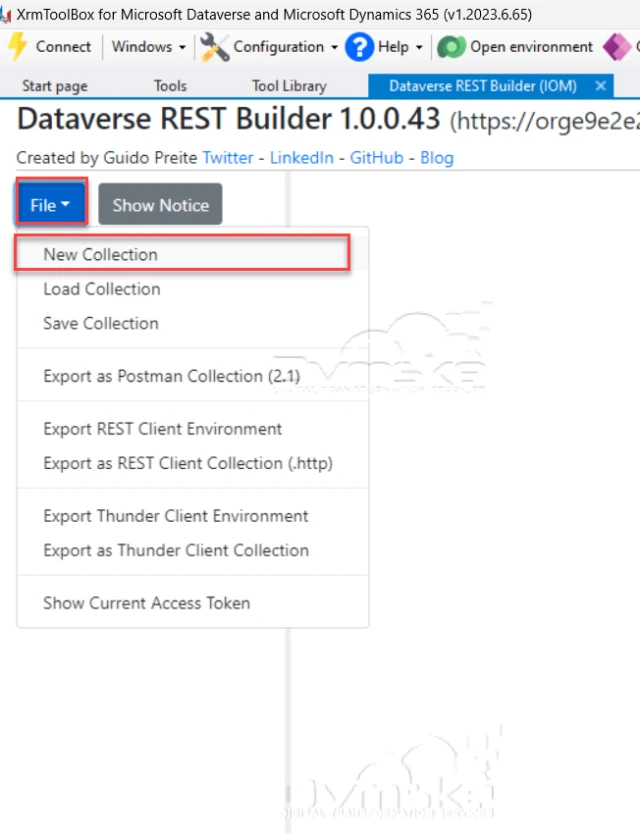
- Click on file and Select New Collection , for this blog we are selecting new collection otherwise you can perform many action such as shown in next image:
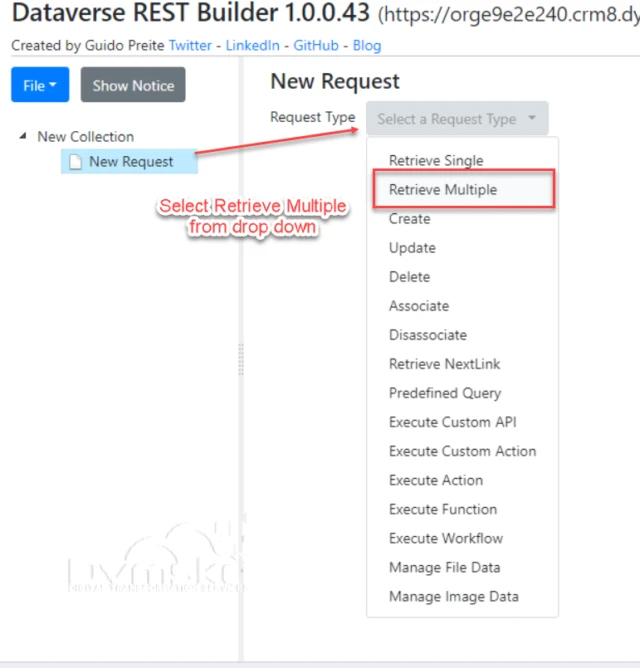
- You can Rename the collection and request. After that click on Request type and from the drop down We are selecting Retrieve multiple for our scenario.
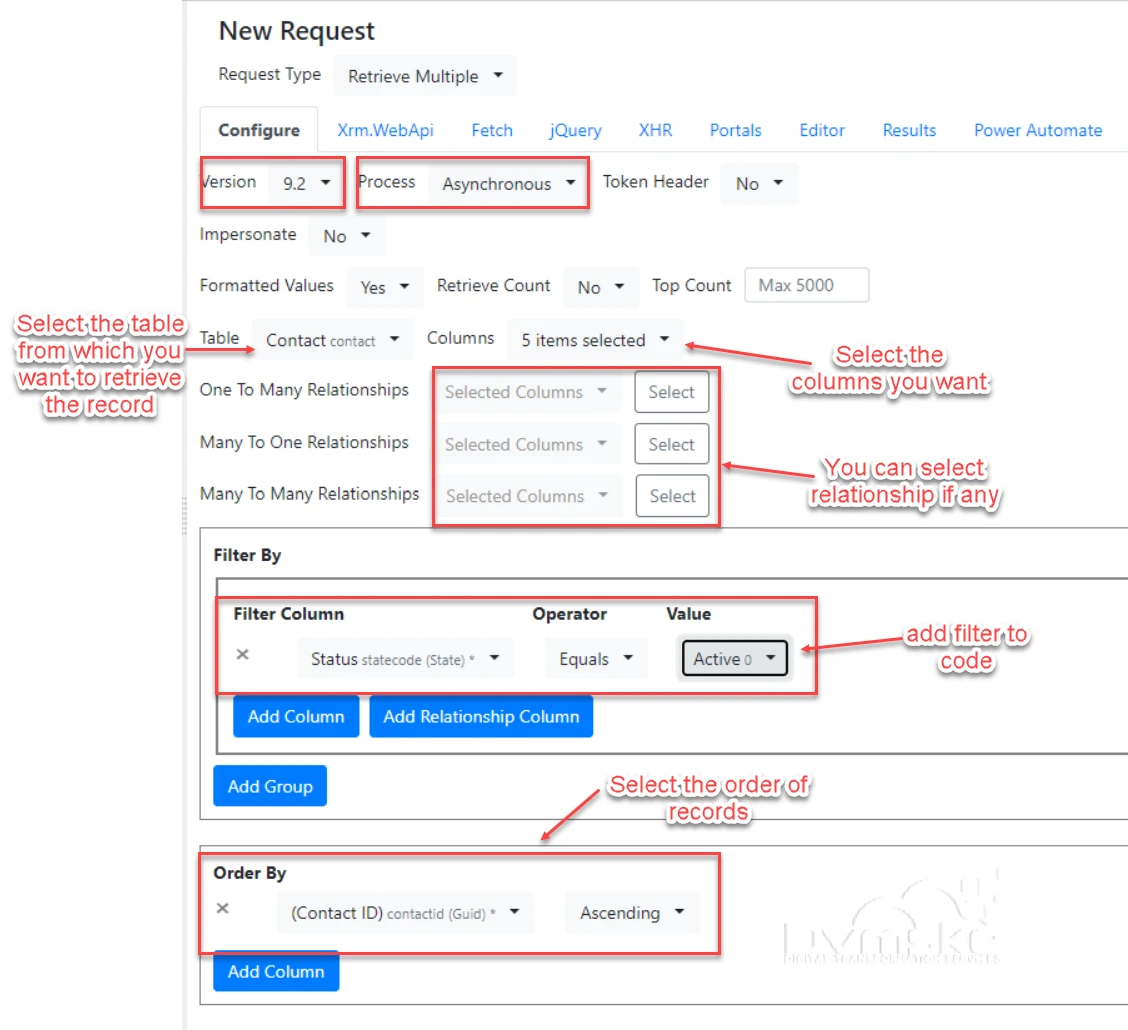
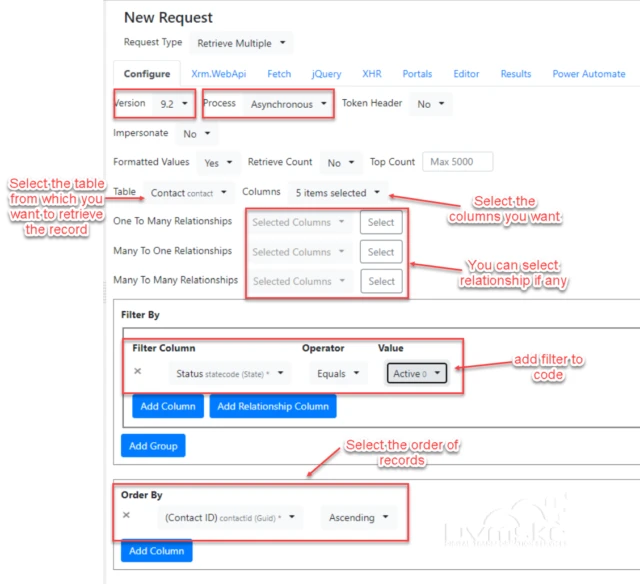
- In the Retrieve multiple, click on Configure you can select whatever query you want to use in your code, for example-I have selected contact table and 5 columns of it and the I added a filter as Status is active and Order of record in Ascending order.
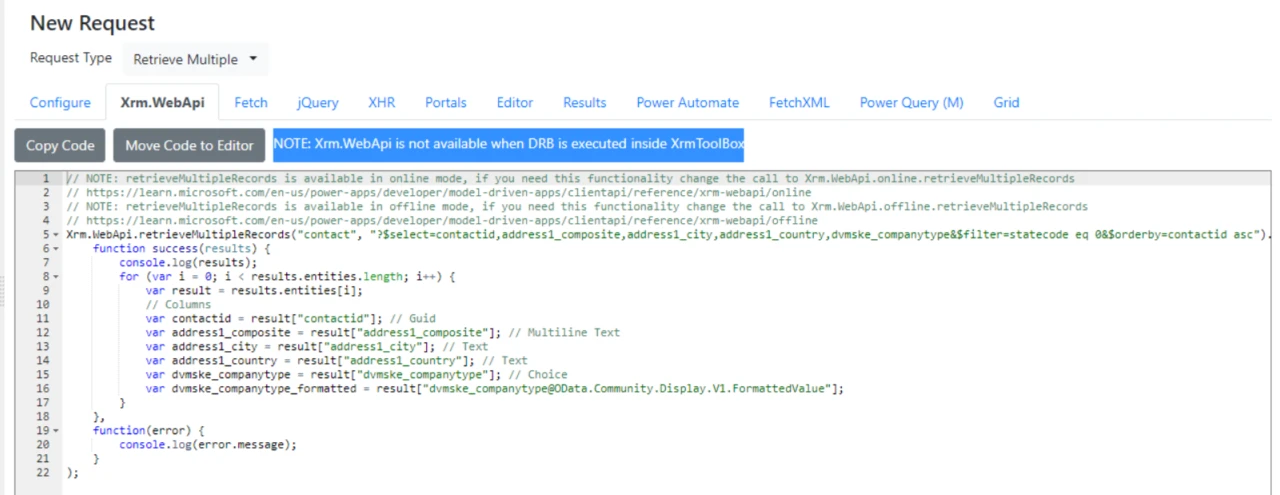
- Once our query is complete, click on one of the tabs to see the query. If we select Xrm.WebApi, we see our code:
Note the option to Move Code to Editor, which allows us to execute the code. But this functionality won’t run inside of XrmToolbox (as per the message below) – it will run in the app, as we will see in upcoming steps:
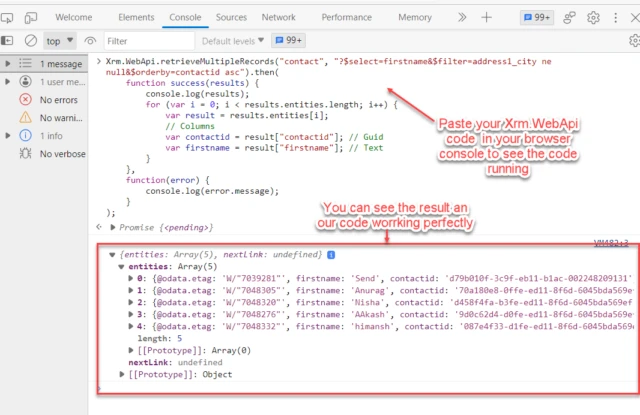
- Copying the generated code to a browser console, we see it works perfectly:
You also get other code formats, as well as the Power Automate list rows connector format:
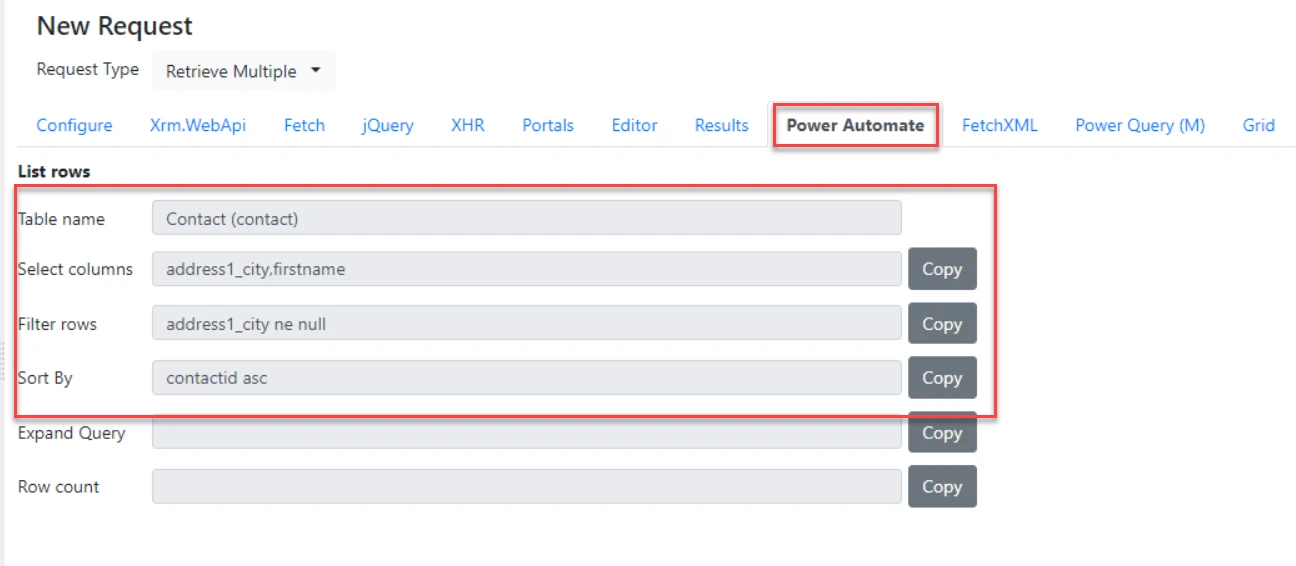
- You can use this on power automate flows.
SCENARIO 2: Using the managed solution in CRM
- Click To run it as a managed solution, download the file from the link given below here
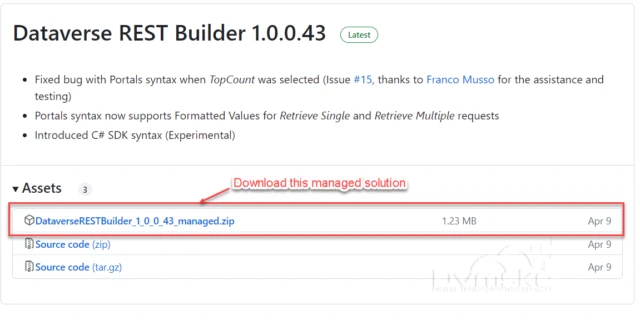
- And install it through the Power Apps Maker portal:
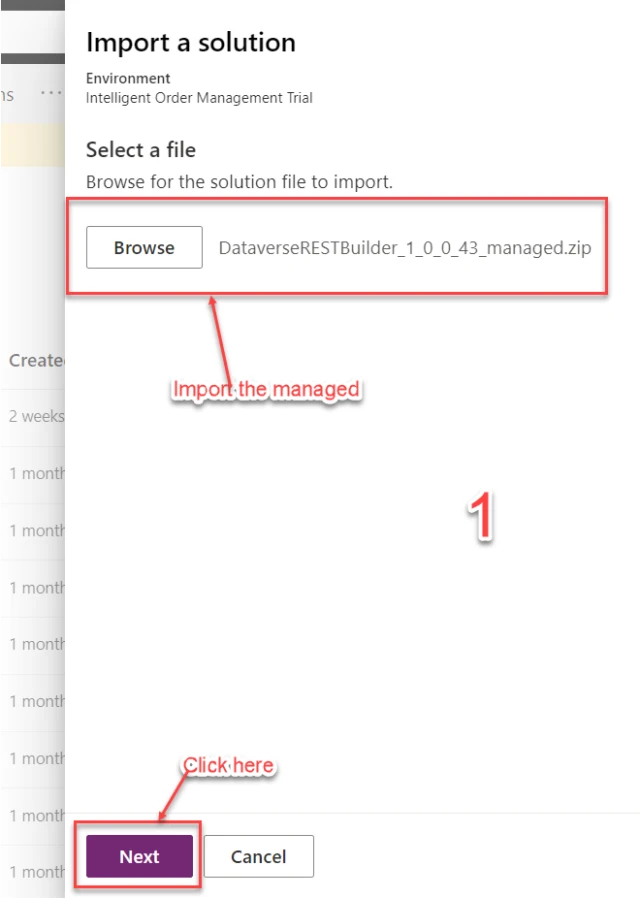
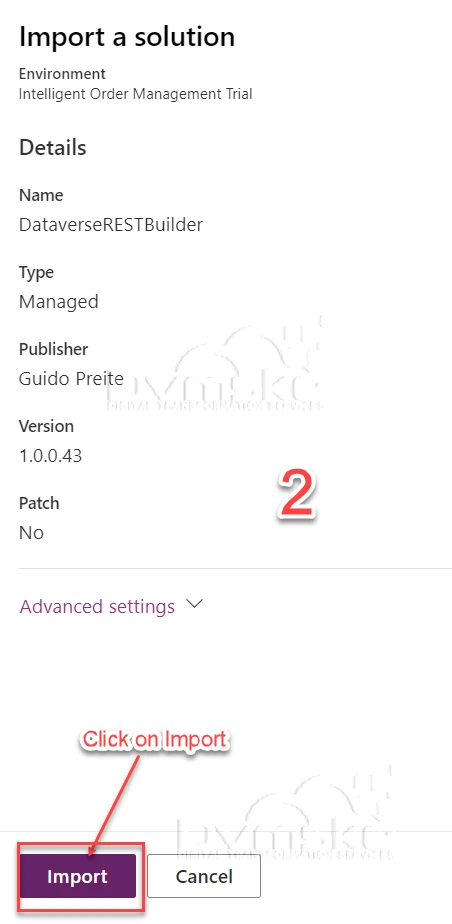
- Publish, and you will see it in your list of apps:
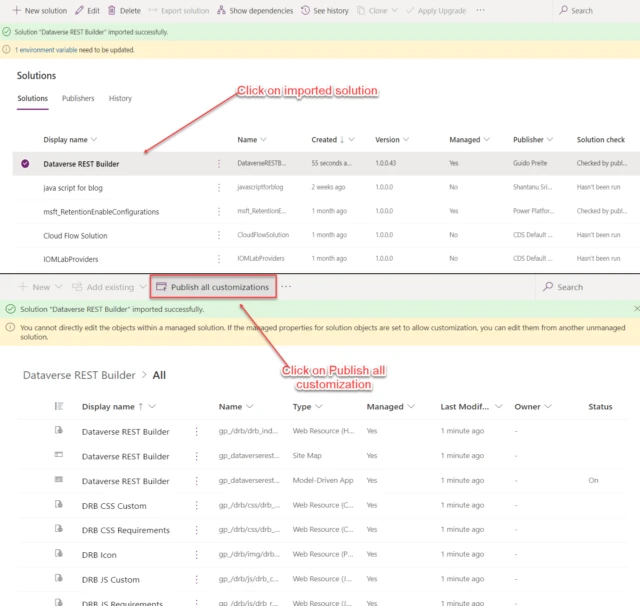
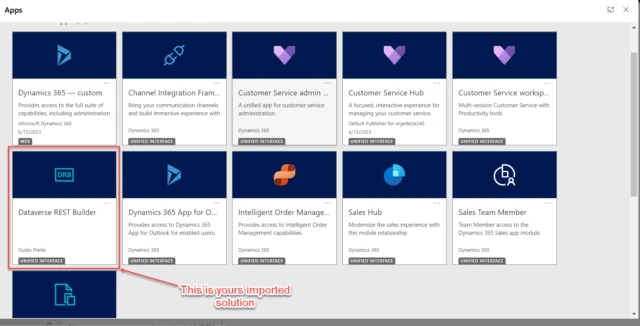
- We can see the interface is the same as when running this through XrmToolbox, and we can execute successfully the query we built earlier:
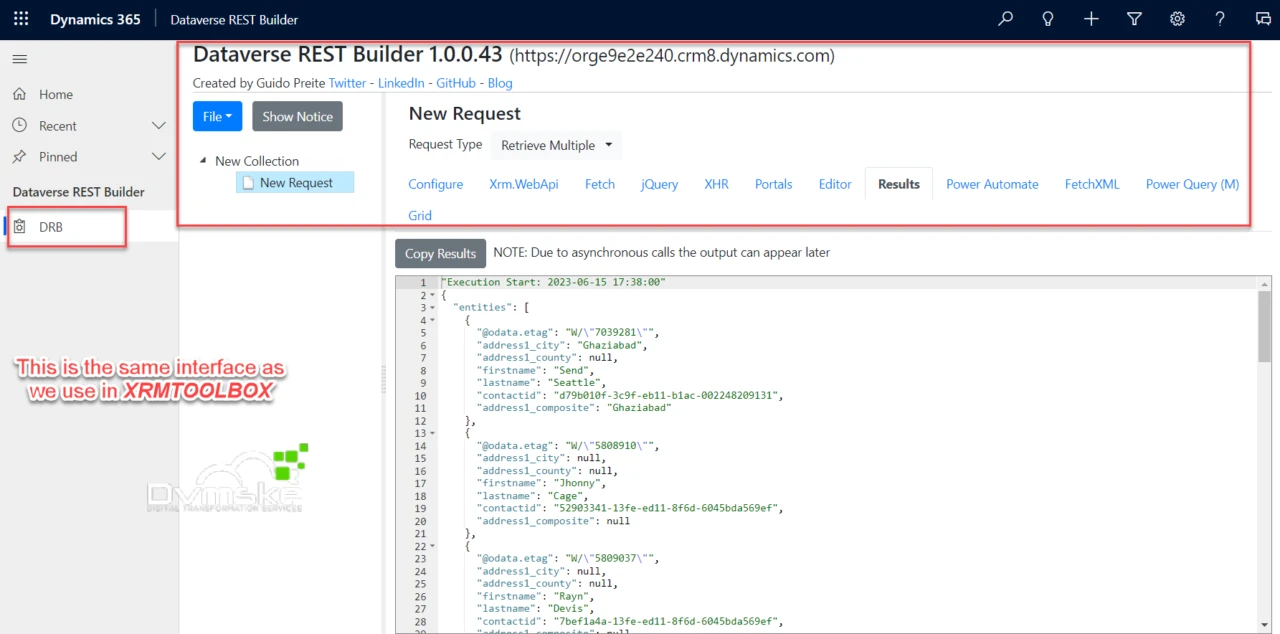
- The tool looks like a great way to build queries, and Its many of its features are very user friendly.
THANKS FOR READING. BEFORE YOU LEAVE, please leave comment.