
Make fields Mandatory/Recommended/Optional On Form Using Javascript
In Dynamics 365 we can use setRequired method to make a field required/recommended/Optional using Javascript.
Scenario
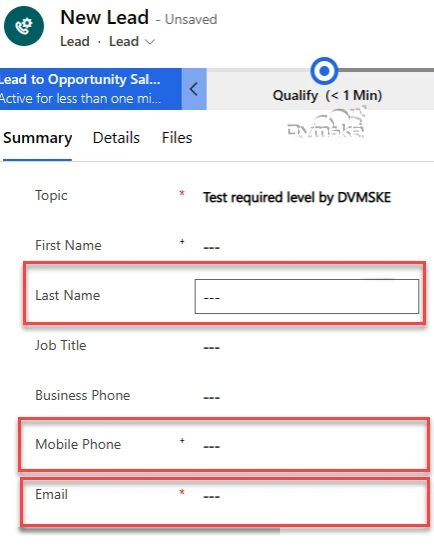
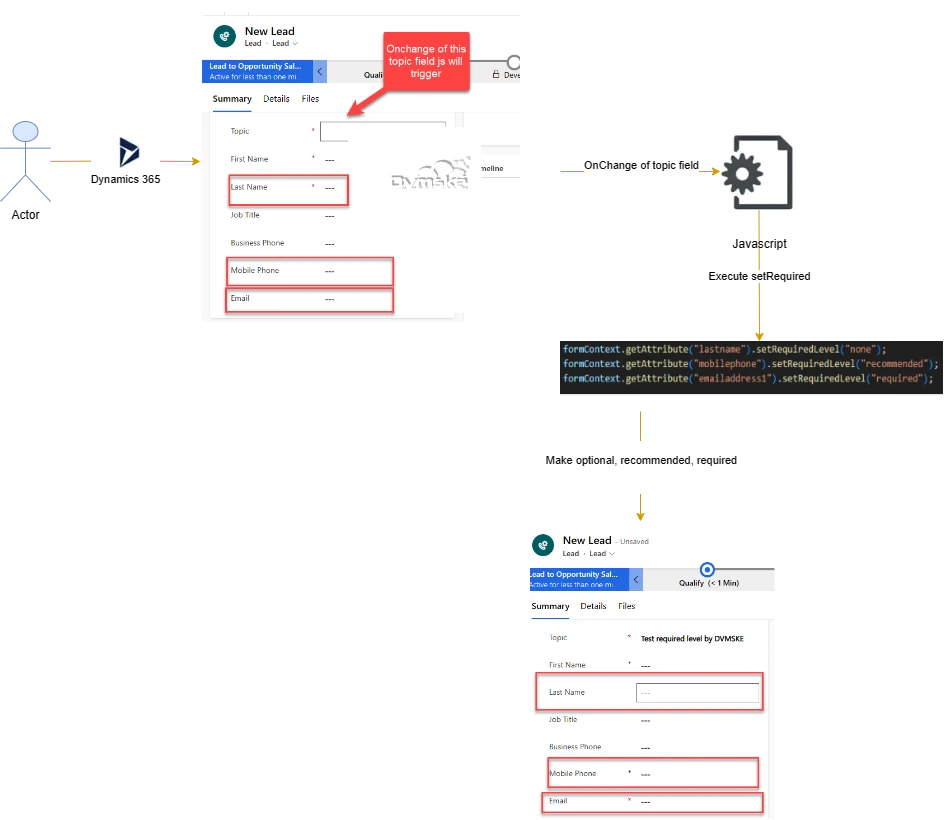
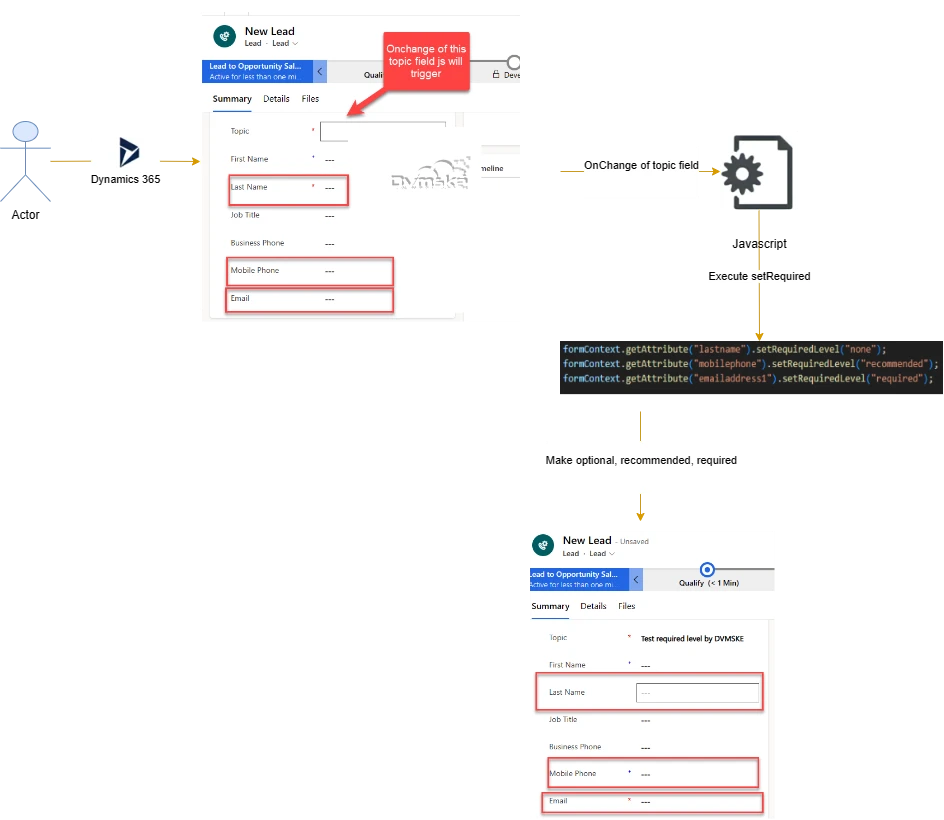
- We have a requirement of “mobile phone” field as recommended, “email” field as required and “last name” field as optional whenever the value of “Topic” field changes on Lead Entity.
- On change of Topic field, JavaScript will execute and make the “mobile phone” field as recommended, “email” field as required and “last name” field as optional.
- JavaScript (Event Handler) will be added on Lead entity. and On Change Event of Topic of lead. So, JavaScript function will trigger on change of Topic field.
Syntax
Below is the latest syntax available for making field required, recommended and optional in Dynamics 365 using JavaScript.
formContext.getAttribute("lastname").setRequiredLevel("none");formContext.getAttribute("mobilephone").setRequiredLevel("recommended");formContext.getAttribute("emailaddress1").setRequiredLevel("required");Parameters
| Name | Type | Required | Description |
| setRequiredLevel(“none”) | string | yes | Make the field optional |
| setRequiredLevel(“recommended”) | string | yes | Make the field business recommended |
| setRequiredLevel(“required”) | string | yes | Make the field required. |
setRequired Usecase Example
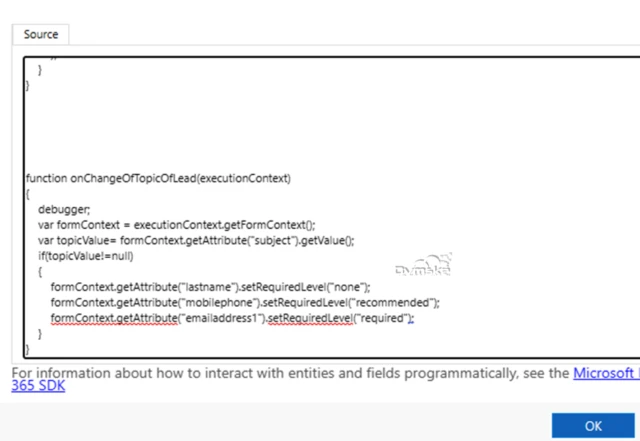
Below is the JavaScript function “onChangeOfTopicOfLead”
- 1st create form context from execution context passed as 1st parameter
- Get the value of topic field, if it is not null.
- Make the lastname field optional.
- Make the mobile phone field recommended.
- Make the email field as required.
function onChangeOfTopicOfLead(executionContext)

{

debugger;

var formContext = executionContext.getFormContext();

var topicValue= formContext.getAttribute("subject").getValue();

if(topicValue!=null)

{

formContext.getAttribute("lastname").setRequiredLevel("none");

formContext.getAttribute("mobilephone").setRequiredLevel("recommended");

formContext.getAttribute("emailaddress1").setRequiredLevel("required");

} }
How to Register JavaScript on OnChange Event of Form
- Create a New Solution and Name it appropriately, In your solution, add Lead entity then select lead form.
- From component section select Lead entity added and open Form editor
- From From editor , click on Form Properties.

- Either Create new Web Resource or add JavaScript Function to existing Web Resource.
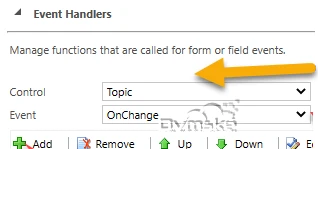
- In the event handler, in control select the “Topic” field and event as on change. Click on add.
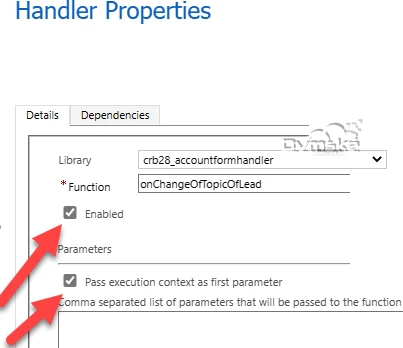
- In the library select the library where you add your code. And in function copy your js function. And check both the checkboxes. Click on ok.
- Click on save and publish. Wait until publish.
OUTPUT