
If your organization uses multi-factor authentication (MFA) for Microsoft 365, the Microsoft Authenticator smartphone app is the easiest verification method. No need to enter a 6-digit code, just one click. Also, there are no roaming charges for using it while traveling.
STEP 1: Download and install Microsoft Authenticator app
Two-step verification: The standard verification method, where one of the factors is your password. After you sign in using your username and password, you can either approve a notification or enter a provided verification code.
Install the latest version of the Authenticator app, based on your operating system:
- Google Android. On your Android device, go to Google Play to download and install the Authenticator app.
- Apple iOS. On your Apple iOS device, go to the App Store to download and install the Authenticator app.
STEP 2: Navigate to MFA setup Portal
- Navigate to Below URL : aka.ms/mfasetup

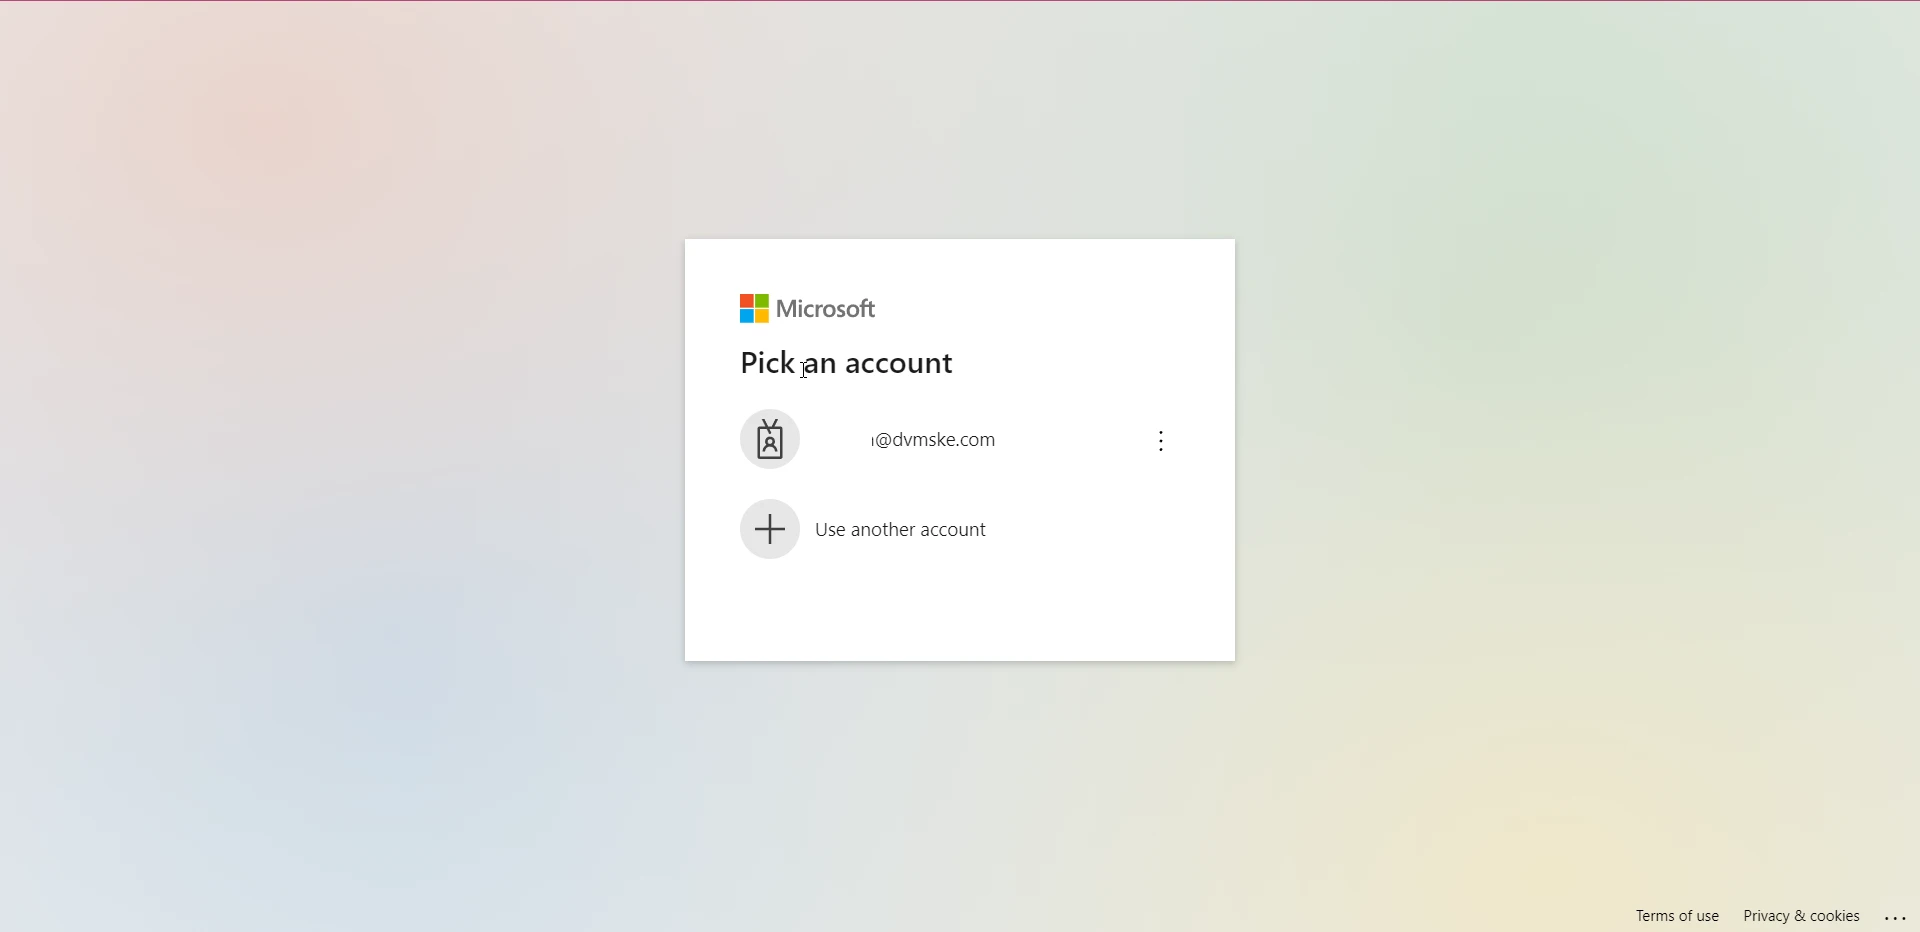
STEP 2: Navigate to MFA setup Portal — screenshot 1 View full size - Login with the provided Credentials

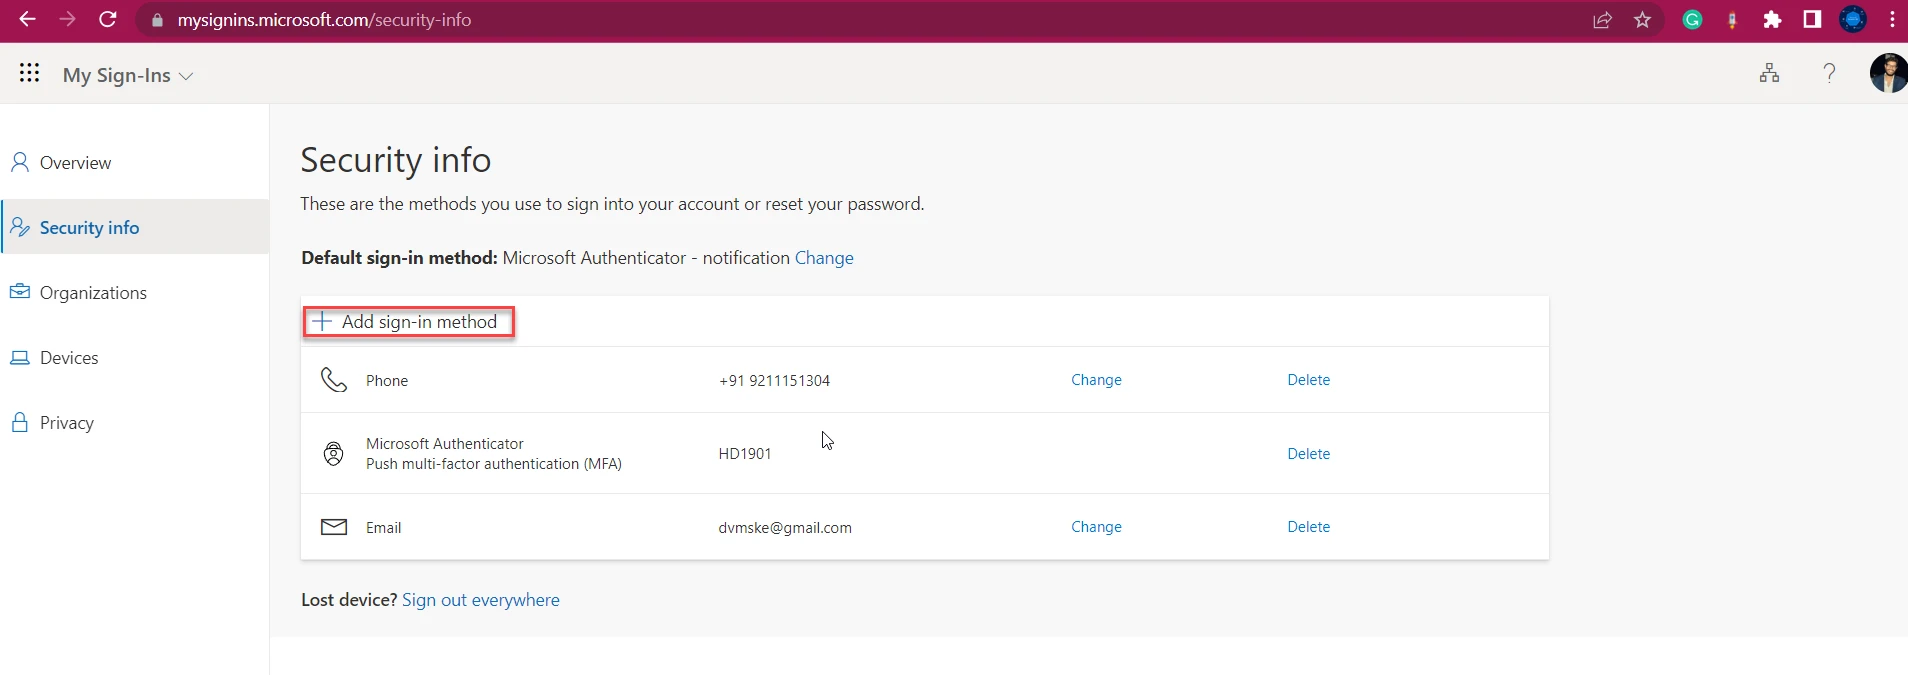
STEP 2: Navigate to MFA setup Portal — screenshot 2 View full size - Click “Add Sign-In Method”

STEP 2: Navigate to MFA setup Portal — screenshot 3 View full size

STEP 3: Select "Authenticator App" from Method
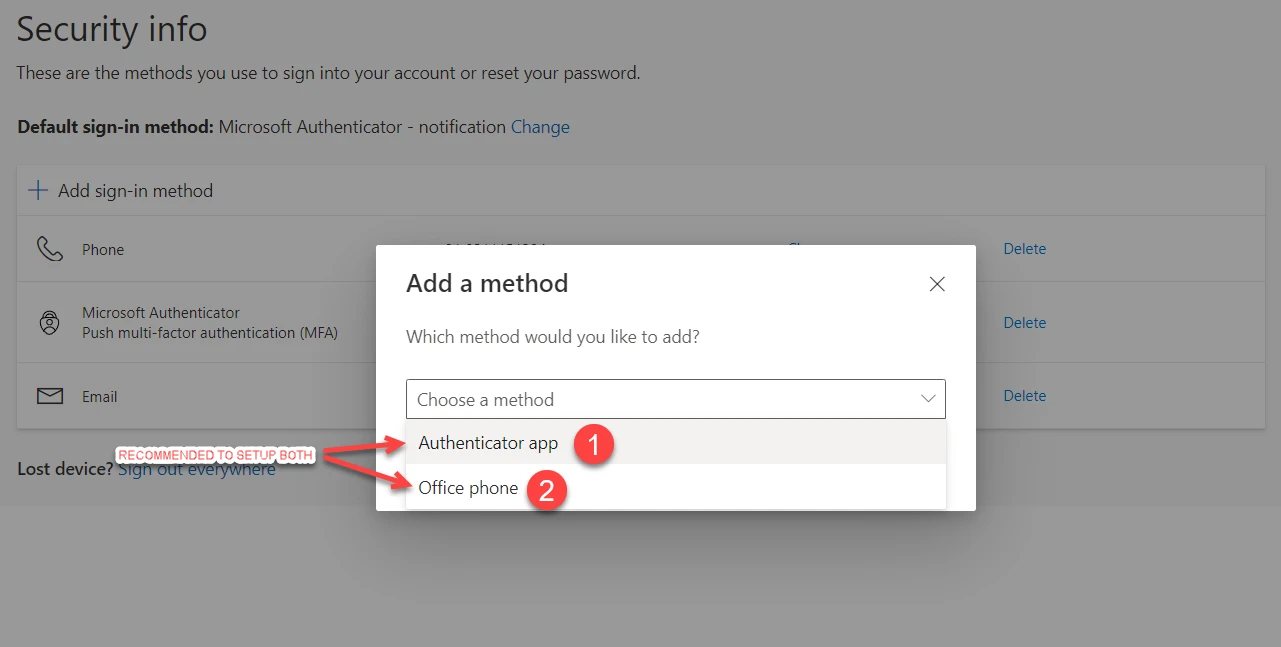
- Select “Authenticator App” from the selection, recommendation is to configure more.

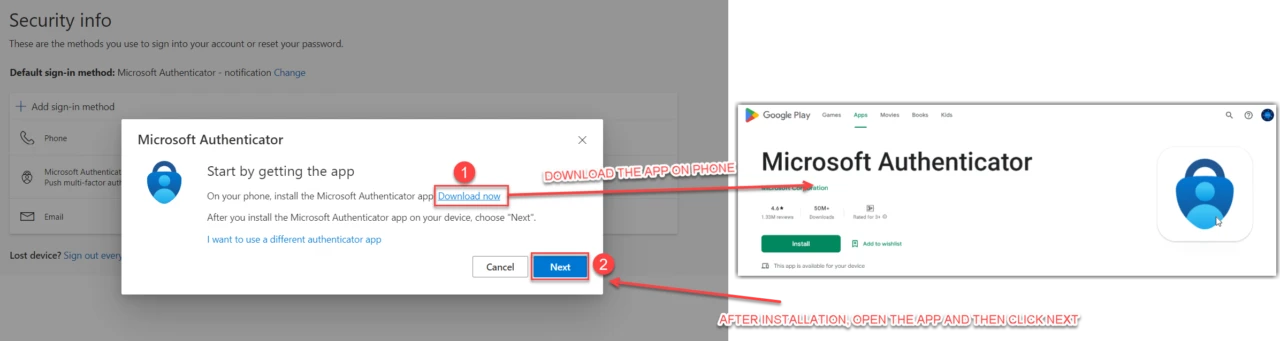
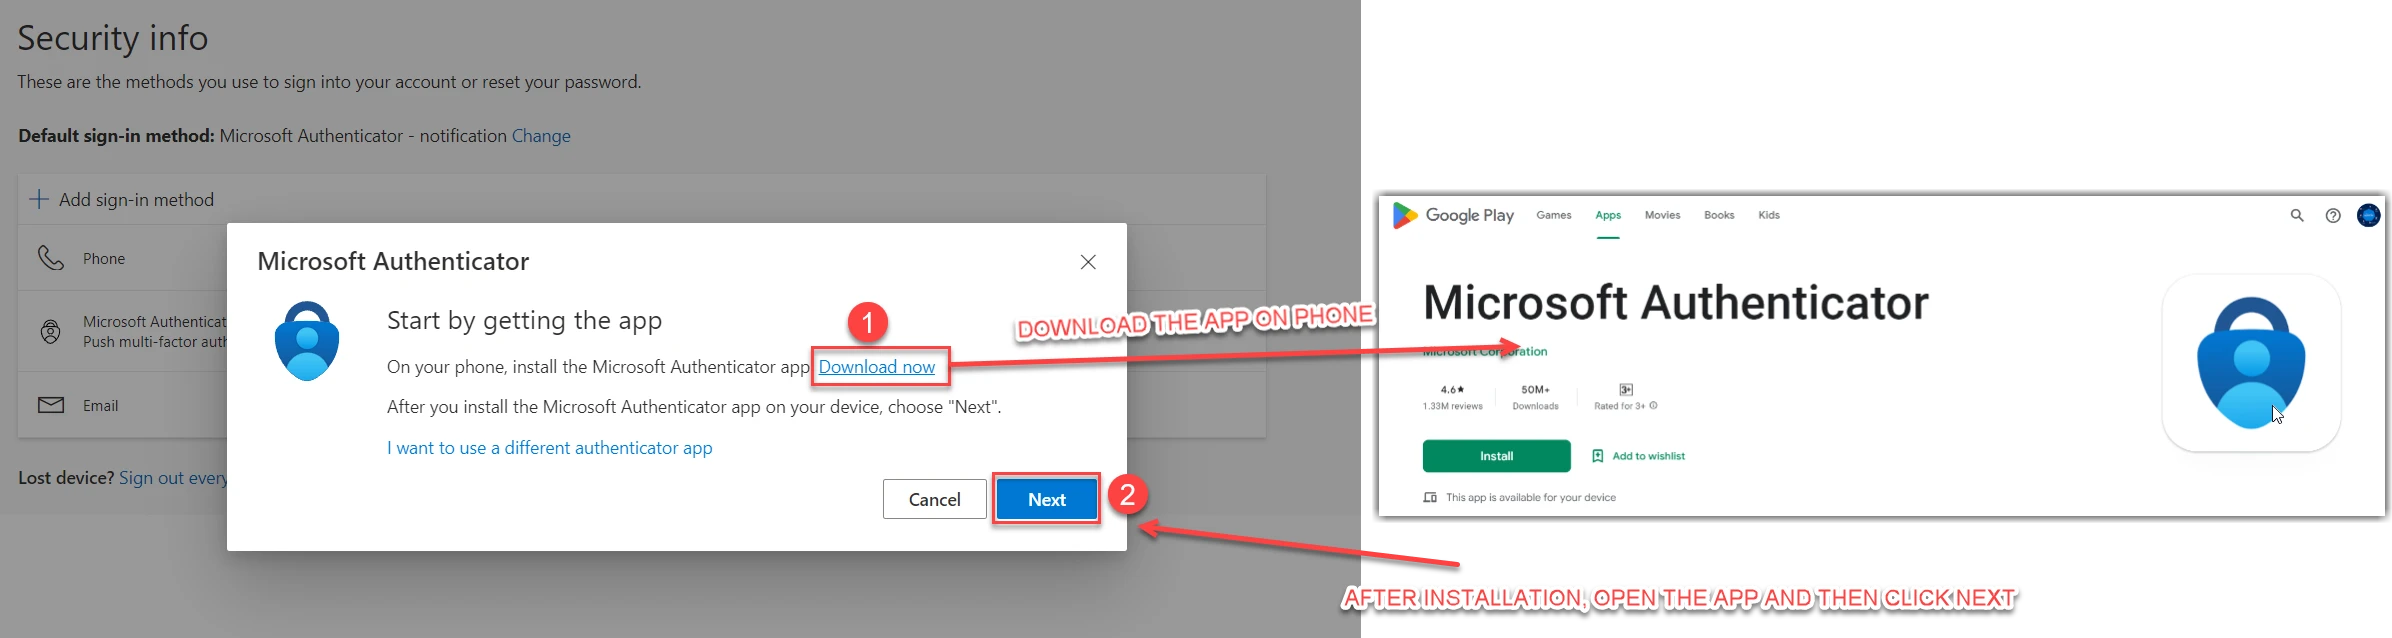
STEP 3: Select "Authenticator App" from Method — screenshot 4 View full size - Download the Mobile app as confirmed above, Open the App and then Click Next

STEP 3: Select "Authenticator App" from Method — screenshot 5 View full size 
STEP 3: Select "Authenticator App" from Method — screenshot 6 View full size
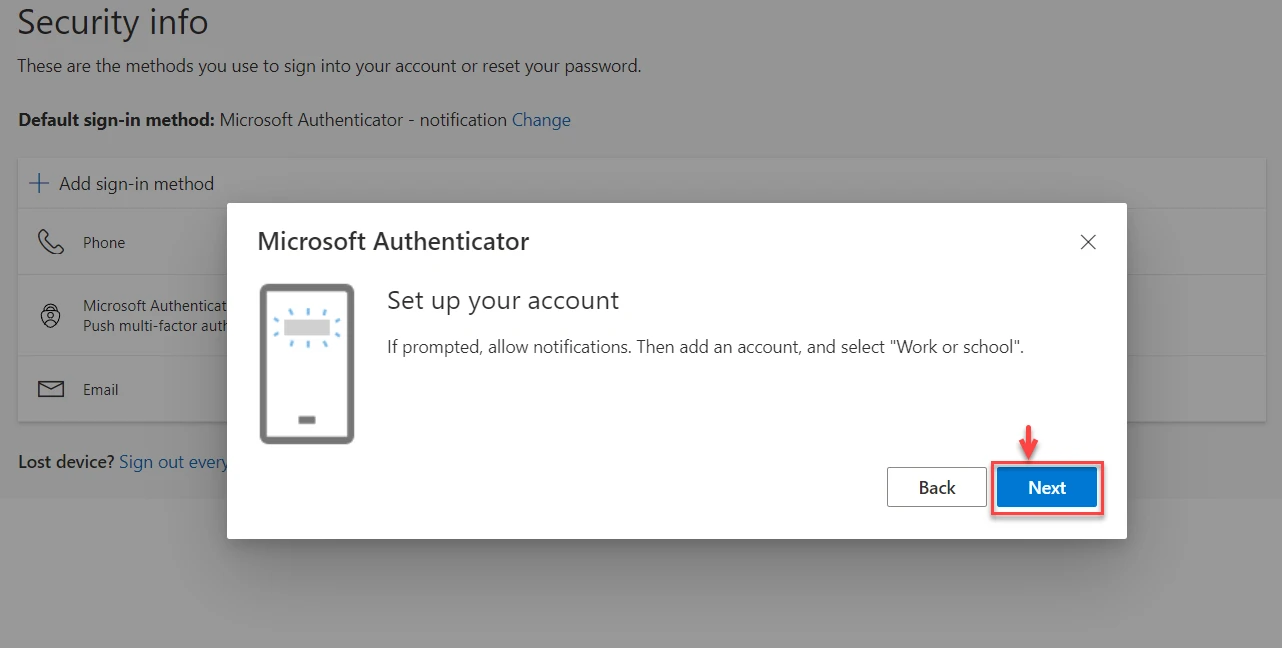
STEP 4: Add Work Account to "Microsoft Authenticator App"
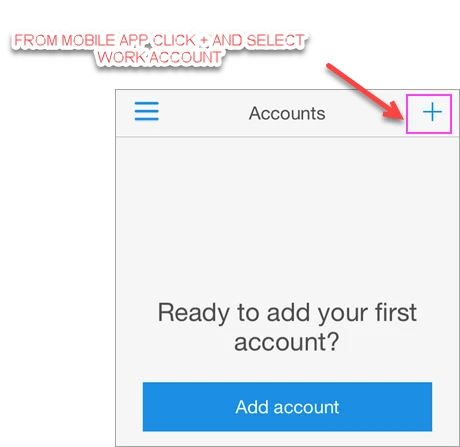
- Open the Microsoft Authenticator app on your phone.ap the + > Work or school account. then select ” Scan the QR Code”

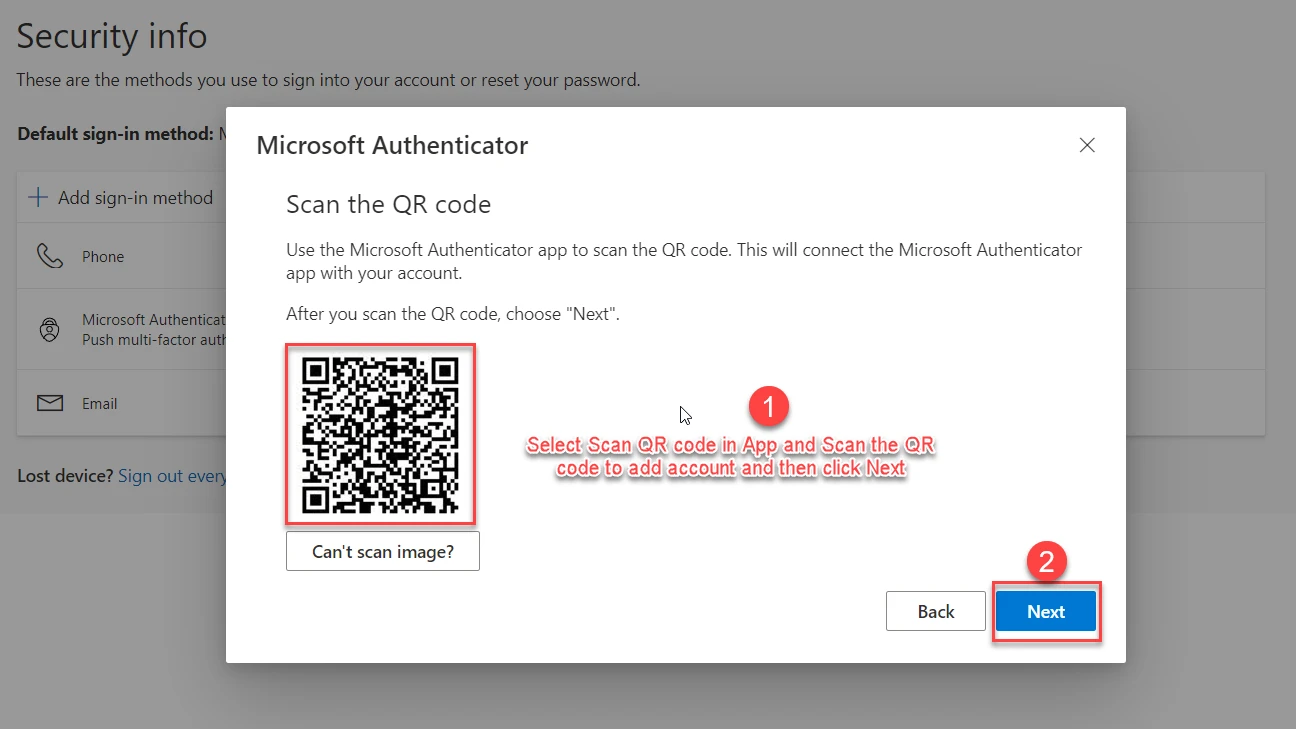
STEP 4: Add Work Account to "Microsoft Authenticator App" — screenshot 7 View full size - Use your phone to scan the QR square that is on your computer screen. and Click Next.

STEP 4: Add Work Account to "Microsoft Authenticator App" — screenshot 8 View full size - Your account will be added automatically to the app
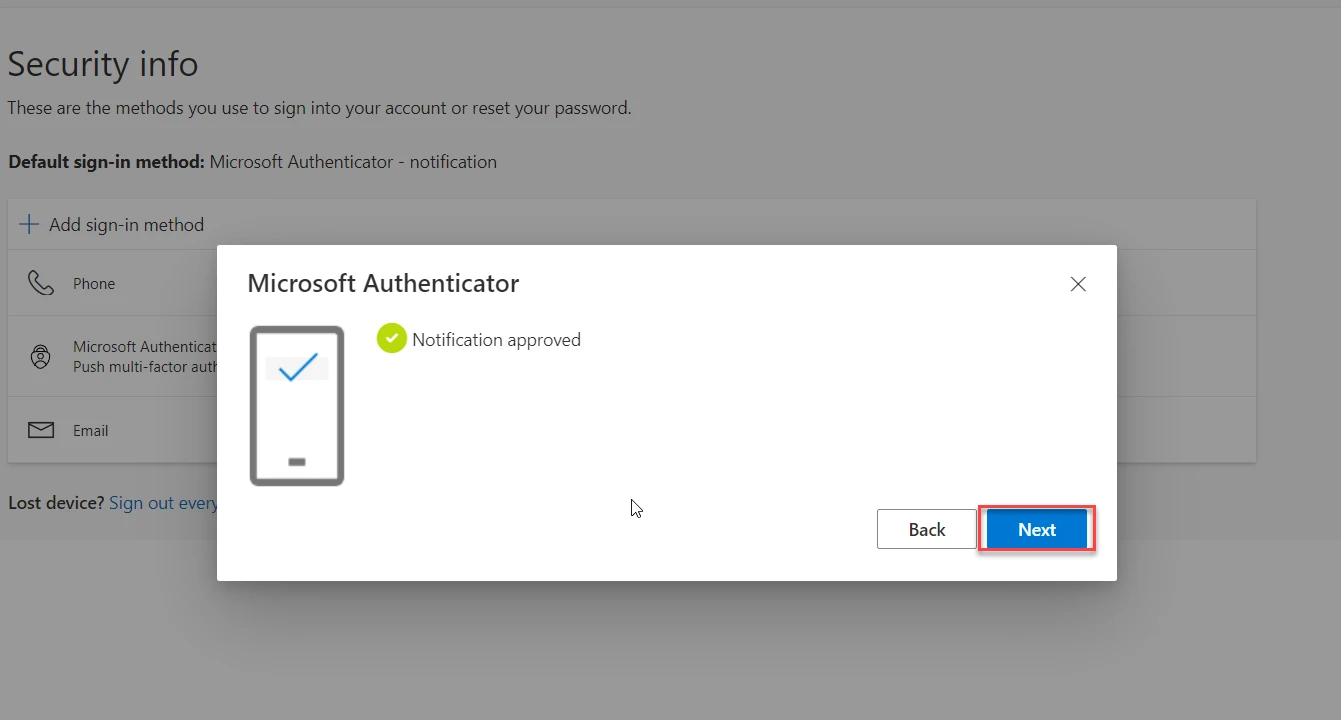
STEP 5: Approve sign in on your phone
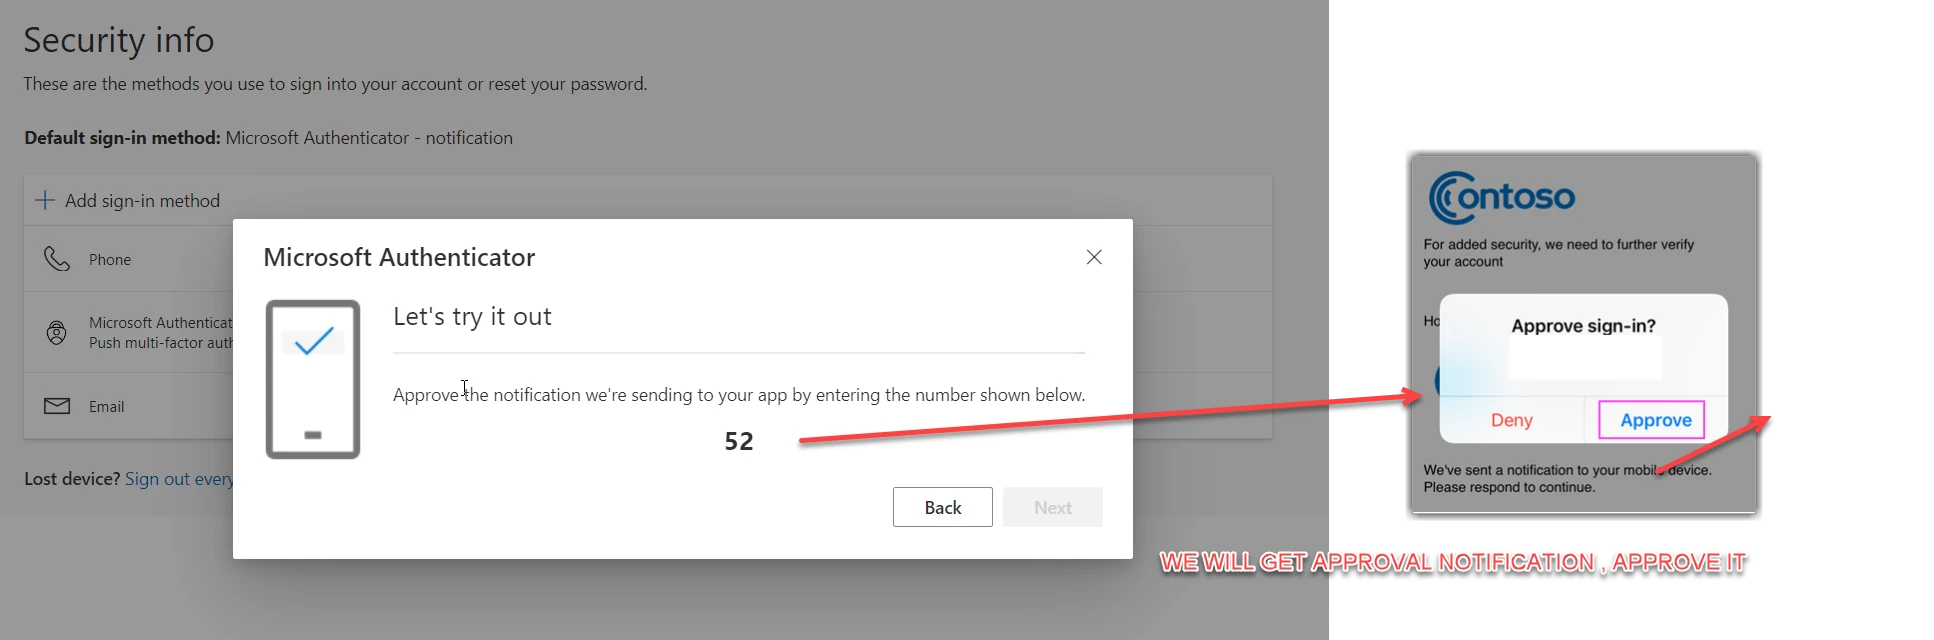
- Switch back to your phone and you’ll see a notification for a new sign in.
- Go to the Microsoft Authenticator app.
- Tap Approve to allow it.

STEP 5: Approve sign in on your phone — screenshot 9 View full size
Authenticator set up is completed.