
What you’ll build
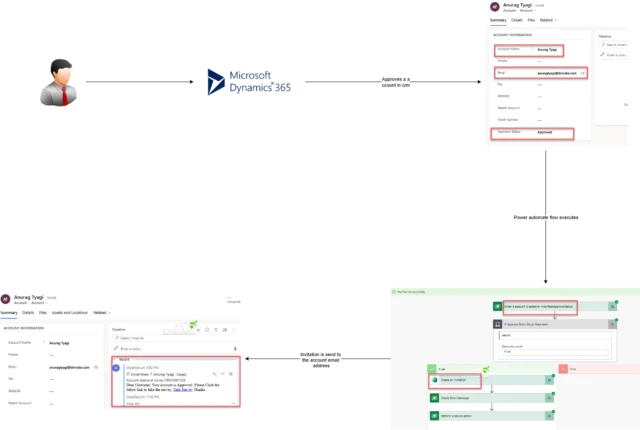
An approved account starts a flow that creates a personalised Customer Voice survey link, sends it in a Dynamics 365 email and lets you review the response.
The scenario: an account form has an Approval status choice with Approved and Rejected options. When the account is approved, the flow creates an invitation for the survey, passes its variable values and associates it with that account.
See the original survey example
Before you start
- A Customer Voice project and survey
- An account approval field
- Access to the right Power Platform environment
- Configured Customer Voice and Dataverse connections
Need a survey first? Follow the guide to creating a Customer Voice survey . Add any survey variables you want the flow to populate before configuring the invitation action.
Build the flow
Prepare your survey and solution
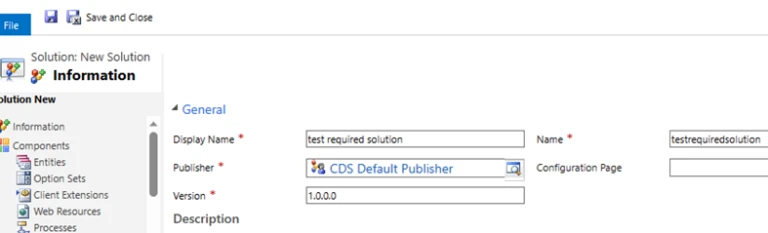
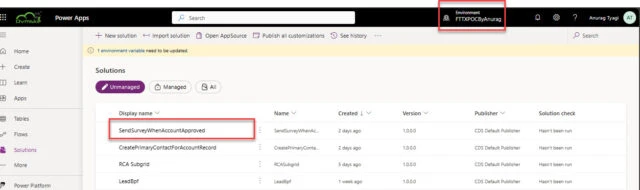
Open Power Apps, select the environment that contains your survey and create or open a solution. Confirm the survey and the variables you want to pass, then create the flow inside this solution.
See the original screenshot for this step

Select the correct environment and prepare a solution for the flow. View full size Trigger the flow and check approval
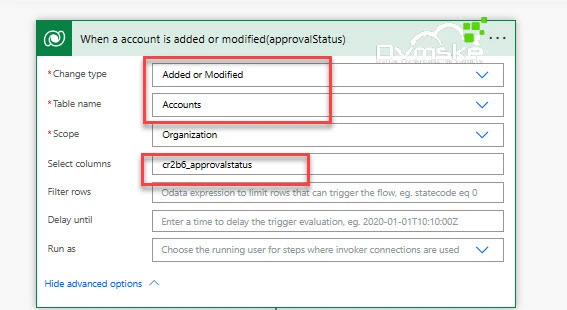
Create an automated cloud flow with the Dataverse trigger When a row is added, modified or deleted. Select the Accounts table and the change type for added or modified rows. In Select columns, enter the logical name of your approval field to filter which updates trigger the flow.
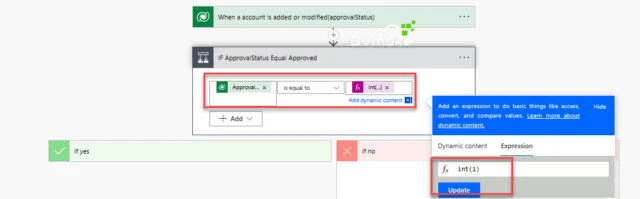
Add a condition that checks whether Approval status equals Approved. Put the invitation and email actions in the If yes branch.
See the original screenshots for this step

Trigger the flow when the account is added or its selected approval column changes. View full size 
The original condition uses option value 1. Use the Approved value from your own environment. View full size Create the survey invitation
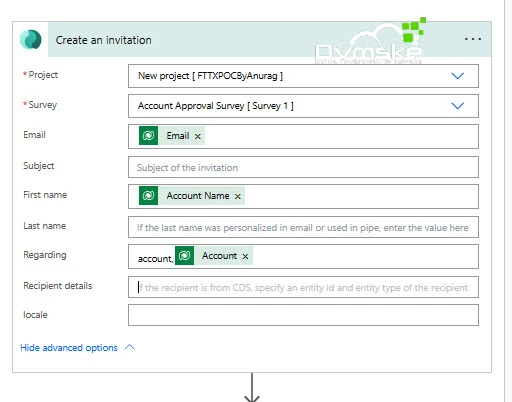
In the Customer Voice connector, add Create an invitation. Select the project and survey, supply the recipient’s email or recipient details, and map any survey variables to values from the account or related contact.
Set Regarding to associate the invitation and response with the account. The format is the table logical name followed by the record’s unique identifier, for example
account,<account GUID>. If you use Recipient details, select a Dataverse contact.Create an invitationIllustrative configuration- Project
- Customer feedback
- Survey
- Account approval feedback
- Contact email
- Regarding
account,Account record ID- First name variable
- Contact first name
Map the invitation to the right customer and record. Variable names depend on your survey. See the original screenshots for this step

Select the project and survey, then populate the recipient and survey variables. View full size 
Associate the invitation with the account using its table logical name and record ID. View full size Add the link to your email
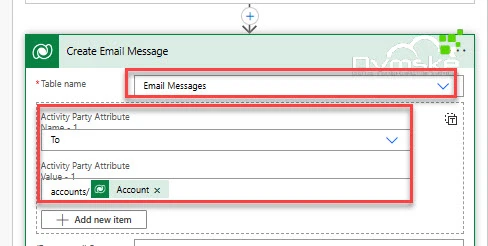
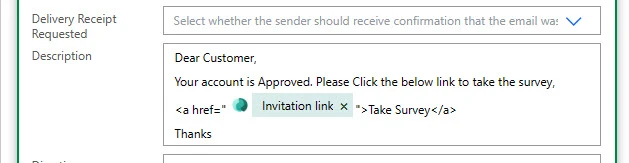
Use Dataverse to create an Email messages record. Set the sender and recipient, relate the email to the account, and enter the subject and description. Insert the Invitation link returned by the Customer Voice action into the email body.
Take the survey: [Invitation link]Replace
[Invitation link]with the action’s dynamic output. This example is a placeholder, not a working survey URL.See the original screenshots for this step

Create the email message record and configure its content. View full size 
Complete the email fields using values from your account and recipient. View full size 
Include the generated invitation link in the email description. View full size 
Set the email’s regarding account and check the remaining field mappings. View full size Send the email message
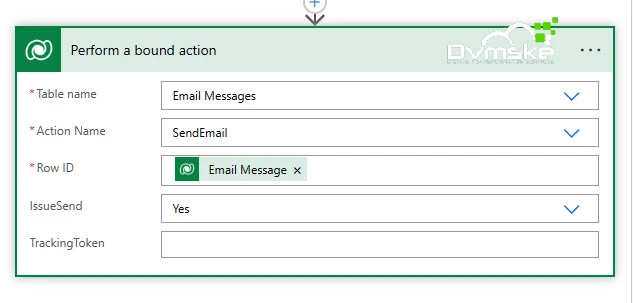
Add the Dataverse Perform a bound action action. Choose Email messages, select SendEmail, and use the unique ID of the email record created in the previous step. Set IssueSend to Yes.
Perform a bound actionIllustrative configuration- Table name
- Email messages
- Action name
- SendEmail
- Row ID
- Created email ID
- IssueSend
- Yes
Send the Dataverse email record created in the previous step. See the original screenshot for this step

Use the SendEmail bound action to send the created email message. View full size Run the flow and review the response
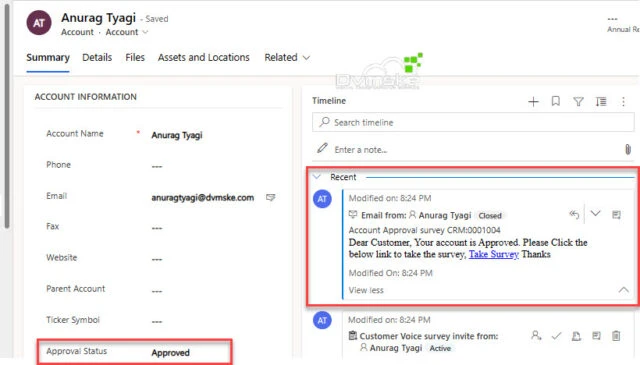
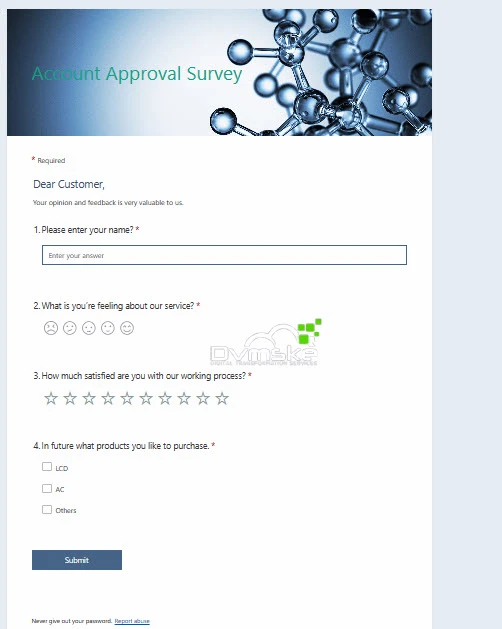
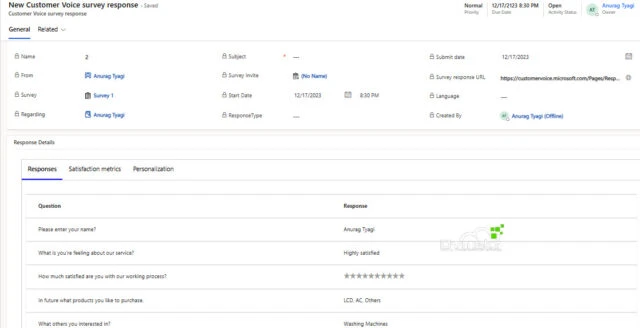
Save the flow, approve a test account and review the run history. Confirm that the survey invitation was created and the email was sent to the intended recipient. Open the email, select Take the survey, complete the survey and check the response record in Customer Voice.
See the original test and response screenshots

Approve a test account to start the flow. View full size 
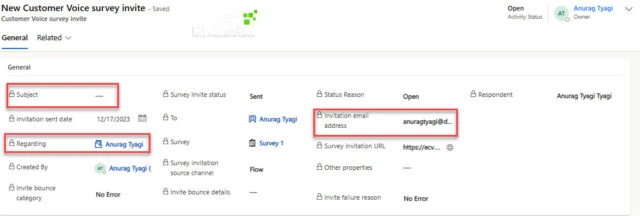
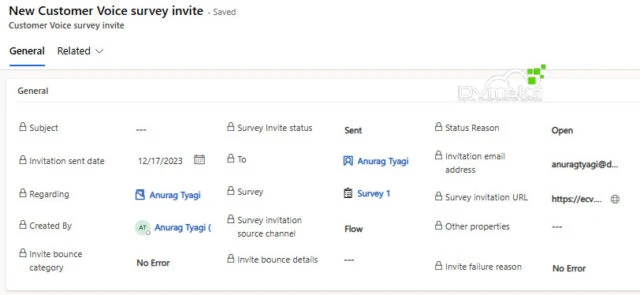
Check that the invitation has been created. View full size 
Open the received email and follow its personalised survey link. View full size 
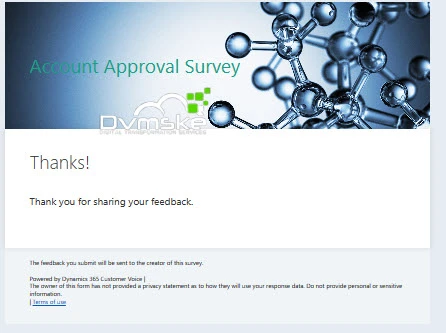
Submit a test response through the generated invitation. View full size 
Review the new response record in Customer Voice. View full size


Check that it worked
- The survey invitation was created
- The email was sent to the intended recipient
- The response appears in Customer Voice
If something doesn’t look right
The flow sends more than one invitation
Check the trigger’s selected columns and the approval condition. Updating an account that is already approved can run the flow again if the selected trigger column is included in the update. If your process requires one invitation per approval, add a sent-status check and update it after a successful send.
Survey variables are missing
Confirm that the variables exist in the selected survey and that the action points to the correct project, survey and environment. Re-select the survey in Create an invitation if its fields have changed, then map each variable and inspect the action’s inputs in the test run.
For current connector fields and requirements, see Microsoft’s Create a survey invitation documentation and Customer Voice connector reference. Original screenshots show the interface used when this guide was written.