
Microsoft Dynamics 365 Intelligent Order Management IOM Step by Step Tutorial
Follow Below Steps
Step 1 - COMPLETEDCreate the free 30 Days Trial Version Environment for the Microsoft Dynamics 365 Intelligent Order Management
Step 2 - COMPLETEDSet up an IOM environment / Configure platform connection references in Microsoft Dynamics 365 Intelligent order Management
Step 3 - COMPLETEDCreate a new solution for PROVIDER Customization in Microsoft Dynamics 365 IOM / Create a provider solution
Step 4 - COMPLETEDCreate RequestBin Custom connector (Power Platform) for Step by Step Microsoft IOM Tutorial
Step 5 - COMPLETEDCreate new intake provider definition for Step by Step IOM Tutorial Scenario- Microsoft Dynamics 365 Intelligent Order Management / Register a new Provider in Library
Step 6 - COMPLETEDCreate a provider message request handler for Quick Start Lab Scenario for Microsoft Intelligent order Management IOM tutorial
Step 7 - COMPLETEDCreate Fulfillment provider in Microsoft Dynamics Intelligent Order Management IOM – Order to Fulfillment in IOM
Step 8 - COMPLETEDAdd a provider definition logic definition to the Outlook Provider Definition in Microsoft Dynamics Intelligent Management IOM
Step 9 - COMPLETEDCreate a provider action - Power Automate Flow - to send a fulfillment Order payload to RequestBin
Step 10 - COMPLETEDActivate the Intake, Fulfillment, & Internal Application Service provider created in Previous Step by Step IOM Tutorial
Step 11 - COMPLETEDCreate Orchestration policies and their associated rules for Quick Start Lab Scenario in Microsoft Dynamics 365 Intelligent Order Management IOM
Step 12 - COMPLETEDCreate Sales Order Orchestration flow in Microsoft Dynamics Intelligent Order Management IOM
Step 13Set up Customer(Account) and product mapping in Microsoft Dynamics Intelligent order Management IOM
Step 14Run a sample order orchestration flow in Microsoft Dynamics 365 Intelligent Order Management - END TO END DEMO IOM
In this blog we will see required steps to Run the sample order in Microsoft Dynamics 365 Intelligent order management
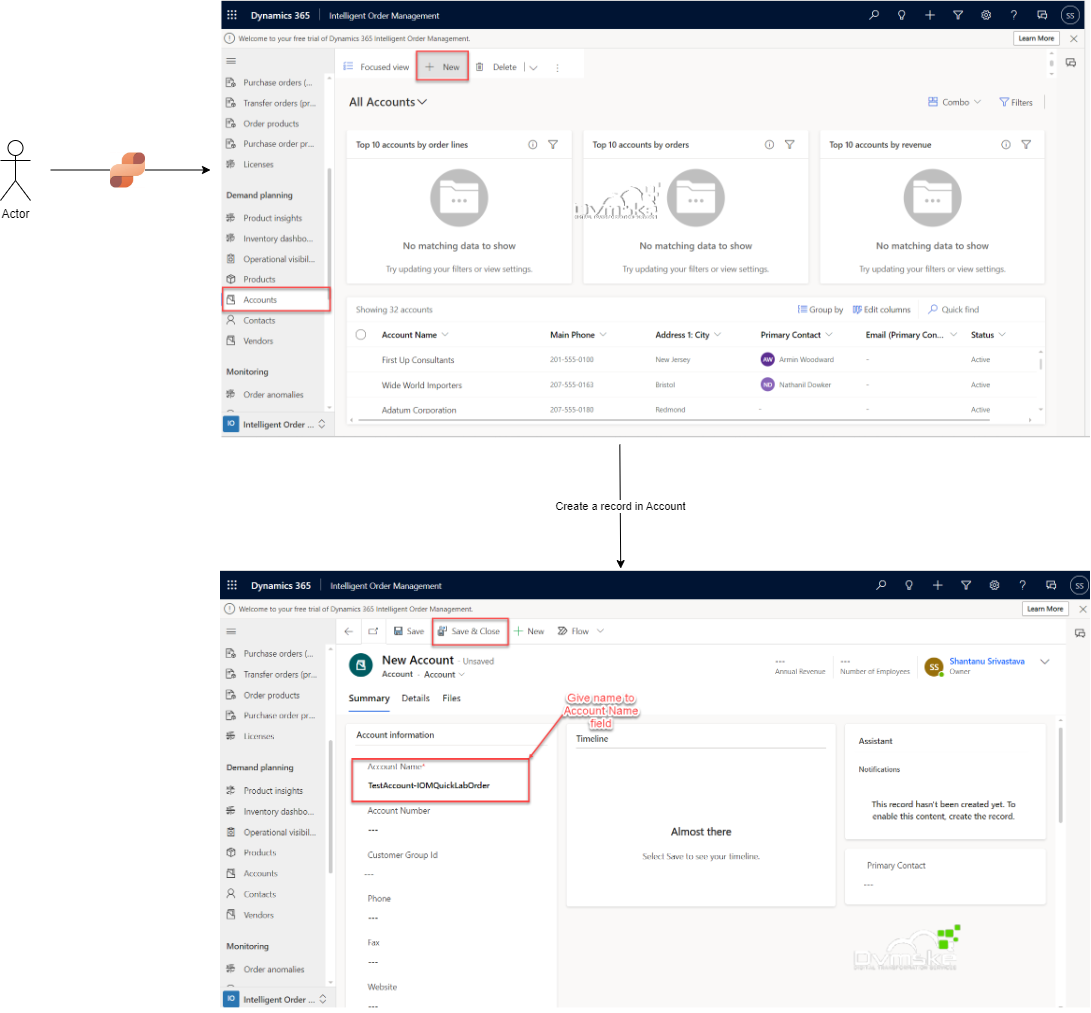
Step1.Set up customer account
- To set up a customer, follow these steps.
- Go to Customers > Accounts.
- Select New.
- For Account Name, enter “TestAccount-IOMQuickLabOrder”.
- Select Save & close.

Step2.Set up account mapping
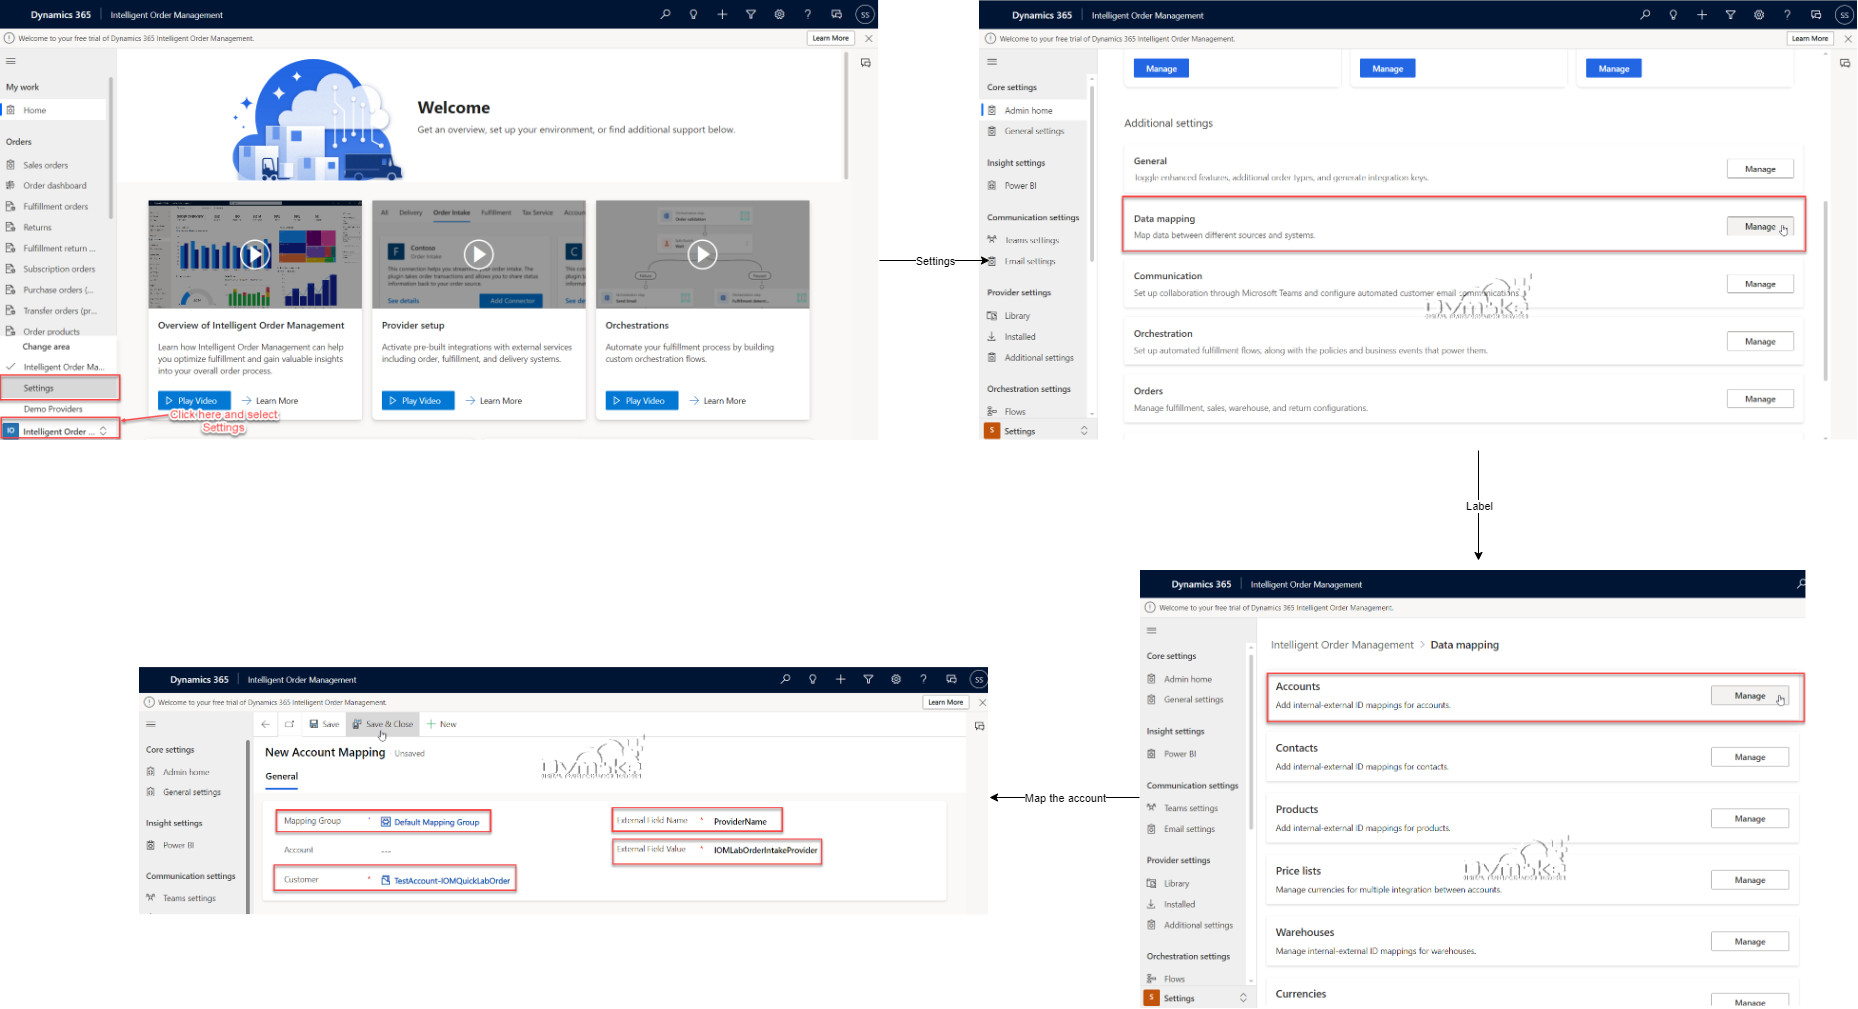
- To set up account mapping, follow these steps.
- In the lower right corner of your Intelligent Order Management application screen, change the area from IOM to Configurations. If you use a left-to-right (LTR) language, this setting is located in the lower left corner of your application screen.
- Go to Mappings > Accounts.
- Select New.
- On the New IOM Account Mapping page, do the following:
a.For Mapping Group, enter “Default Mapping Group”.
b.For Customer, enter “TestAccount-IOMQuickLabOrder”.
c.For External Field Name, enter “ProviderName”.
d.For External Field Value, enter “IOMLabOrderIntakeProvider”.
5.Select Save & close.
Step3.Set up pricelist mapping
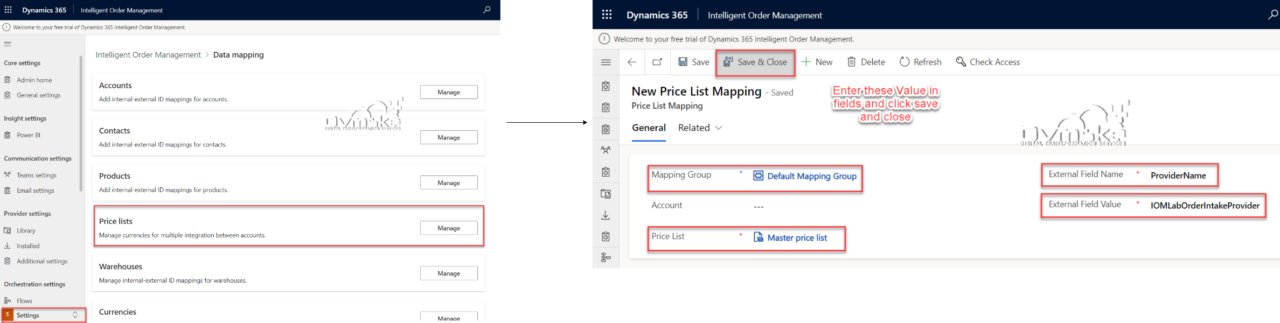
- To set up pricelist mapping, follow these steps.
- Go to Mappings > Price Lists.
- Select New.
- On the New IOM Price List Mapping page, do the following:
- For Mapping group, enter “Default Mapping Group”.
- For Price list, enter “MasterPriceList”.
- For External Field Name, enter “ProviderName”.
- For External Field Value, enter “IOMLabOrderIntakeProvider”.
- Select Save & close.
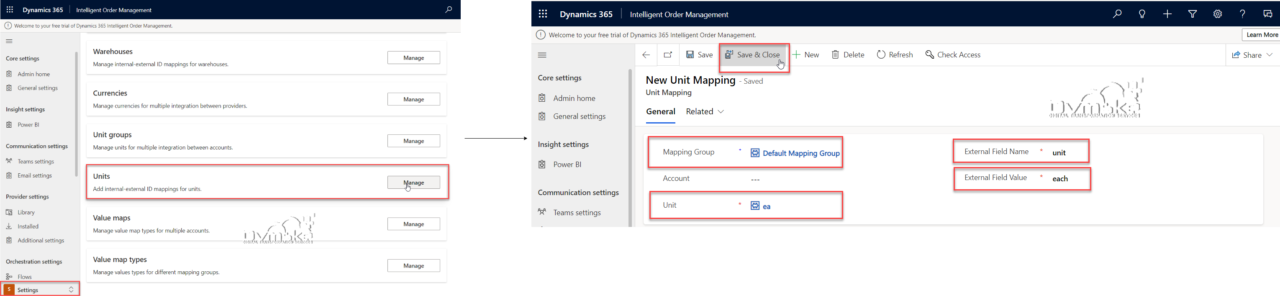
Step4.Set up unit mapping
- To set up unit mapping, follow these steps.
- Go to Mappings > Units.
- Select New.
- On the New IOM Unit Mapping page, do the following:
- For IOM Provider, enter “IOMLabOrderIntakeProvider”.
- For Unit, enter “ea”.
- For External Field Name, enter “unit”.
- For External Field Value, enter “each”.
- Select Save & close.
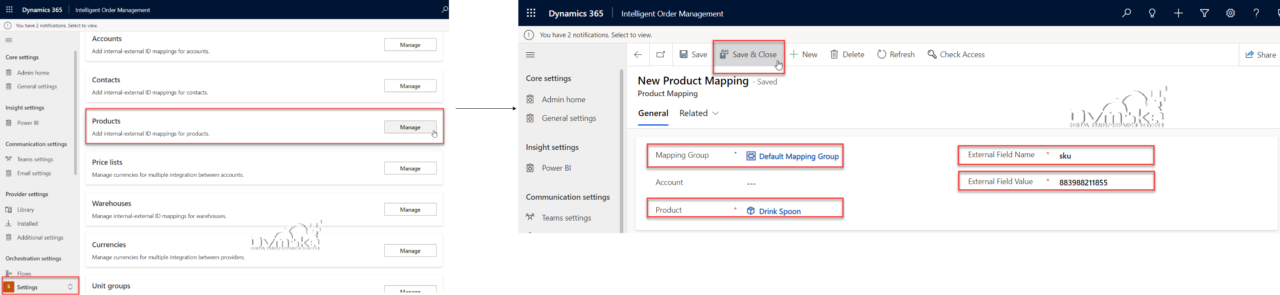
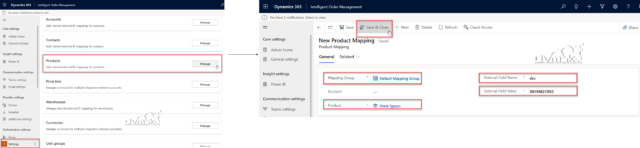
Step5.Set up product mapping
To set up product mapping, follow these steps.
- Go to Mappings > Products.
- Select New.
- On the New IOM Product Mapping page, do the following:
- For Mapping Group, enter “Default Mapping Group”.
- For Product, enter “Drink Spoon”.
- For External Field Name, enter “sku”.
- For External Field Value, enter “883988211855”.
- Select Save & close.
- For next step-Run a sample order orchestration flow in Microsoft Dynamics 365 Intelligent Order Management