Microsoft Dynamics 365 Intelligent Order Management IOM Step by Step Tutorial
Step 1 - COMPLETEDCreate the free 30 Days Trial Version Environment for the Microsoft Dynamics 365 Intelligent Order Management
Step 2 - COMPLETEDSet up an IOM environment / Configure platform connection references in Microsoft Dynamics 365 Intelligent order Management
Step 3 - COMPLETEDCreate a new solution for PROVIDER Customization in Microsoft Dynamics 365 IOM / Create a provider solution
Step 4 - COMPLETEDCreate RequestBin Custom connector (Power Platform) for Step by Step Microsoft IOM Tutorial
Step 5 - COMPLETEDCreate new intake provider definition for Step by Step IOM Tutorial Scenario- Microsoft Dynamics 365 Intelligent Order Management / Register a new Provider in Library
Step 6 - COMPLETEDCreate a provider message request handler for Quick Start Lab Scenario for Microsoft Intelligent order Management IOM tutorial
Step 7 - COMPLETEDCreate Fulfillment provider in Microsoft Dynamics Intelligent Order Management IOM – Order to Fulfillment in IOM
Step 8 - COMPLETEDAdd a provider definition logic definition to the Outlook Provider Definition in Microsoft Dynamics Intelligent Management IOM
Step 9Create a provider action - Power Automate Flow - to send a fulfillment Order payload to RequestBin
Step 10Activate the Intake, Fulfillment, & Internal Application Service provider created in Previous Step by Step IOM Tutorial
Step 11Create Orchestration policies and their associated rules for Quick Start Lab Scenario in Microsoft Dynamics 365 Intelligent Order Management IOM
Step 12Create Sales Order Orchestration flow in Microsoft Dynamics Intelligent Order Management IOM
Step 13Set up Customer(Account) and product mapping in Microsoft Dynamics Intelligent order Management IOM
Step 14Run a sample order orchestration flow in Microsoft Dynamics 365 Intelligent Order Management - END TO END DEMO IOM
PREVIOUS STEP 8 - COMPLETEDAdd a provider definition logic definition to the Outlook Provider Definition in Microsoft Dynamics Intelligent Management IOM
Create a provider action to send a fulfillment payload to RequestBin
To create a provider action to send a fulfillment payload to RequestBin, follow these steps.
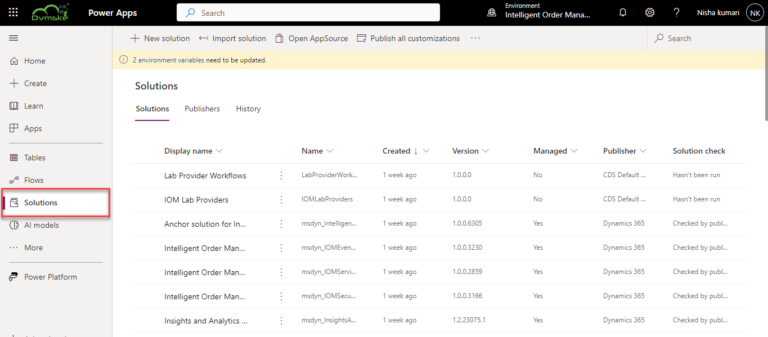
- Go to the Power App Maker portal and navigate to Solutions.
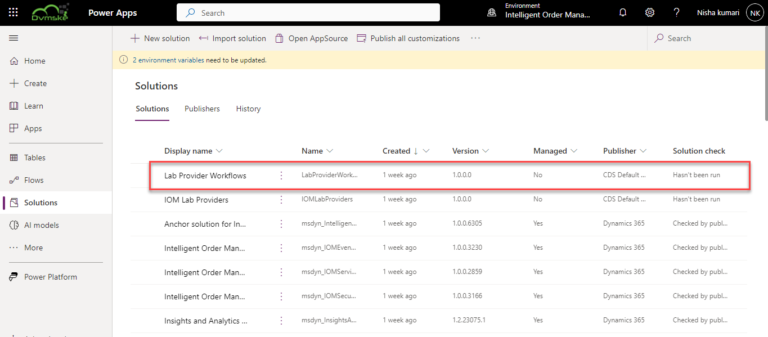
2. Open the Lab Providers Workflow Solution.
3. Select New.
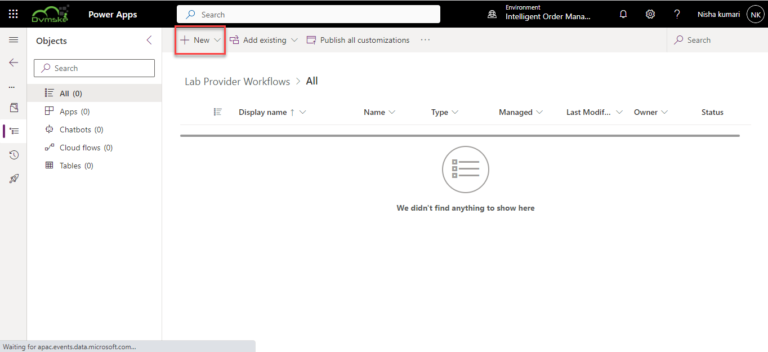
4.Expand the new then select Automation-> Cloud Flow -> Automated.
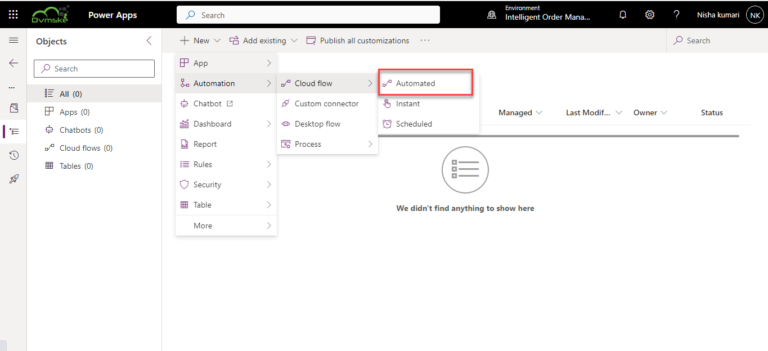
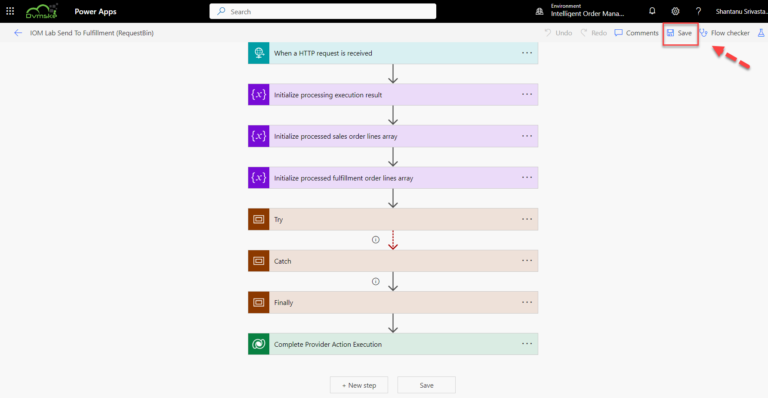
5.Give the name “IOM Lab Send To Fulfillment (RequestBin)”.
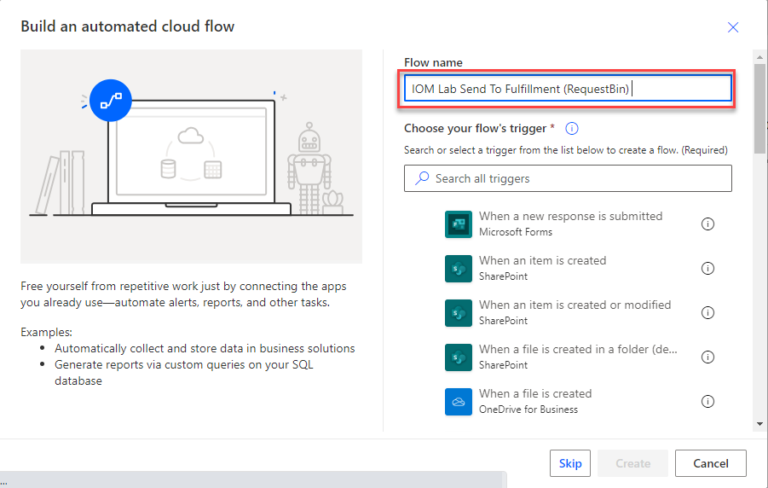
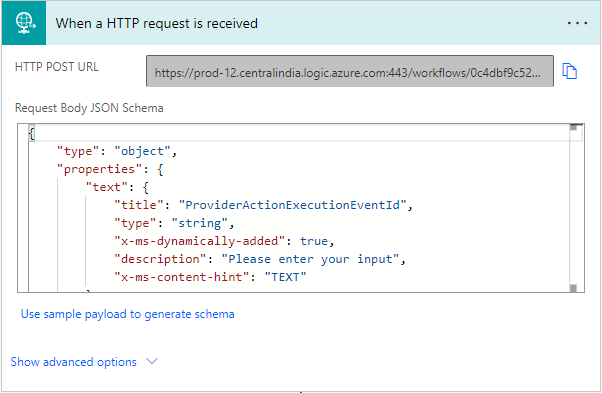
6.Search for the Trigger – When a HTTP request is received
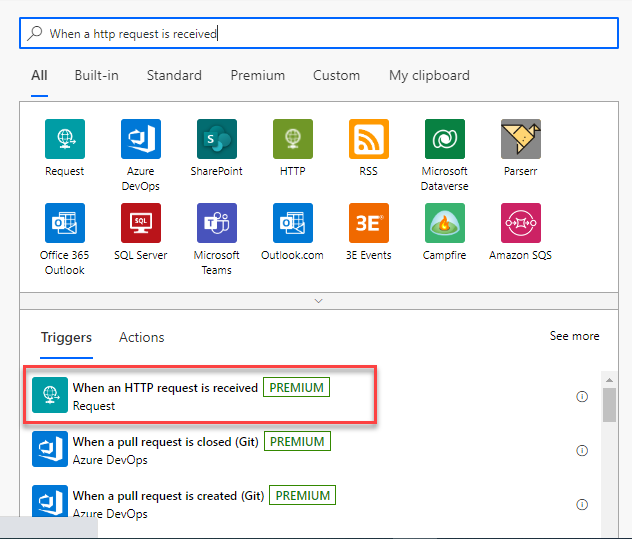
7. In the Trigger – When a HTTP request is received copy the Code in the Request body Schema .
{
"type": "object",
"properties": {
"text": {
"title": "ProviderActionExecutionEventId",
"type": "string",
"x-ms-dynamically-added": true,
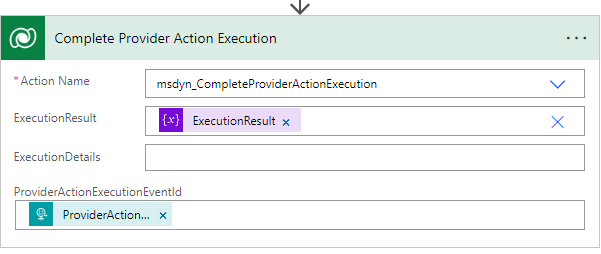
"description": "Please enter your input",
"x-ms-content-hint": "TEXT"
},
"text_1": {
"title": "EntityRecordId",
"type": "string",
"x-ms-dynamically-added": true,
"description": "Please enter your input",
"x-ms-content-hint": "TEXT"
}
},
"required": [
"text",
"text_1"
]
}
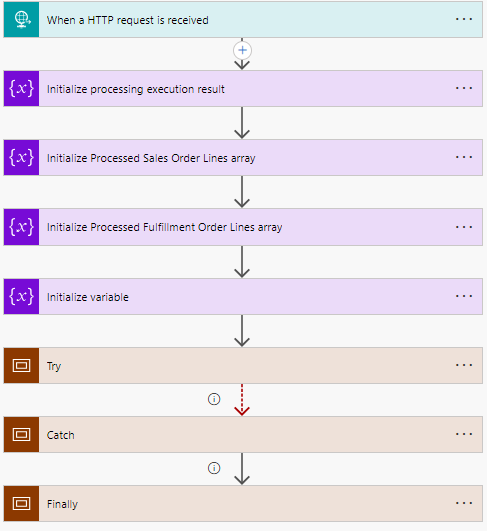
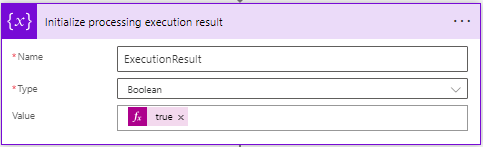
8. Create a variable initialization action , rename it as ” Initialize processing execution result” and enter the values as follows :
- For Name, enter “ExecutionResult”.
- For Type, select Boolean.
- For Value, enter “true”
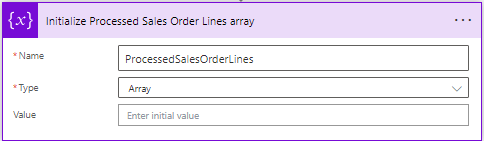
9. Create a second variable initialization action , rename it as ” Initialize processed Sales Order Lines array” and enter the values as follows :
- For Name, enter “ProcessedSaleOrderLines”.
- For Type, select Array.
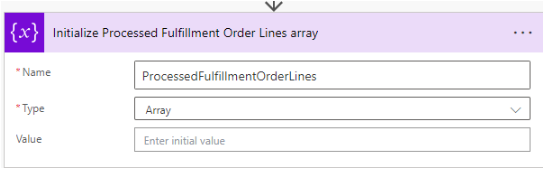
10. Create a third variable initialization action rename it as ” Initialize processed Fulfillment Order Lines array” and enter the values as follows ::
- For Name, enter “ProcessedFulfillmentOrderLines”.
- For Type, select Array.
11. Add a Scope Control .
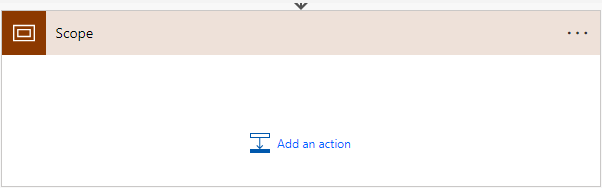
12. Rename it as Try scope, add a Perform an unbound action action as follows:
- ProviderActionExecutionEventId: Under Dynamic content, select ProviderActionExecutionEventId.
- PowerAutomateRunId: Specify the following as an expression:
workflow()['run']?['name']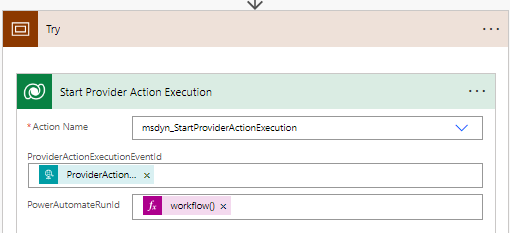
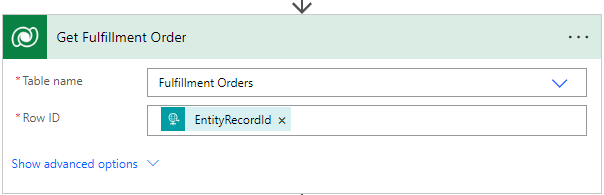
13. .Add a Get a row by ID action , rename it as Get Fulfillment order and configure it as follows:
- For Table name, enter “Fulfillment Orders”.
- For Row ID, select EntityRecordId under Dynamic content.
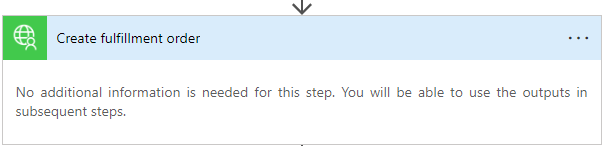
14. Add a Create fulfillment order action from the RequestBin connector,
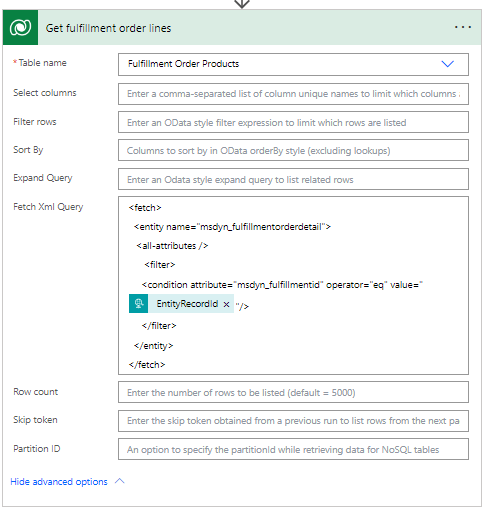
15. Add a List rows action ,rename it as Get Fulfillment order lines and enter the values as follows:
- For Table name, enter “Fulfillment Order Products”.
- For Fetch Xml query enter the following:
<fetch>
<entity name="msdyn_fulfillmentorderdetail">
<all-attributes />
<filter>
<condition attribute="msdyn_fulfillmentid" operator="eq" value="@{triggerBody()['text_1']}"/>
</filter>
</entity>
</fetch>
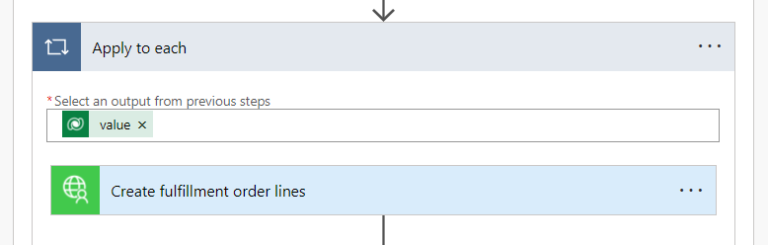
16. Add an “Apply to each” control with a Create fulfillment order lines action from the RequestBin connection as follows:
- value is obtained from the Get fulfillment order line step under Dynamic content.
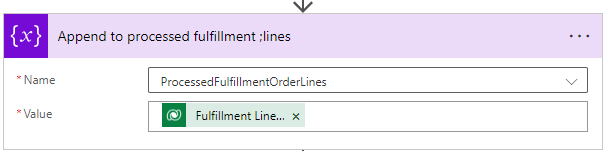
17. Within the loop, add an Append to array variable action , rename it as “Append to processed fulfillment lines “and enter the values as follows:
- For Name, enter “ProcessedFulfillmentOrderLines”.
- For Value, select Fulfillment line ID from under Dynamic content.
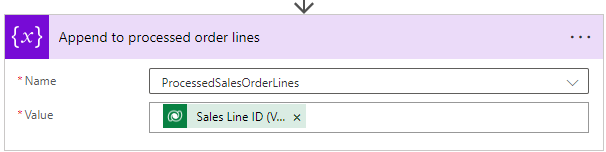
18. Within the loop, add another Append to array variable action , rename it as ” Append to processed order lines” and enter the as follows:
- For Name, enter “ProcessedSalesOrderLines”.
- For Value, select Sales line ID from under Dynamic content.
19. Collapse the Try scope by selecting its title bar.
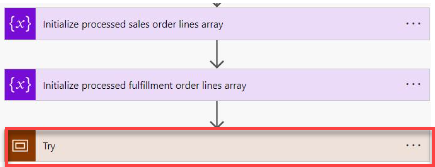
20. Select New step and add another scope renamed “Catch”.
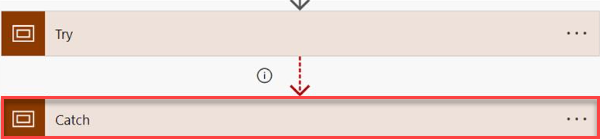
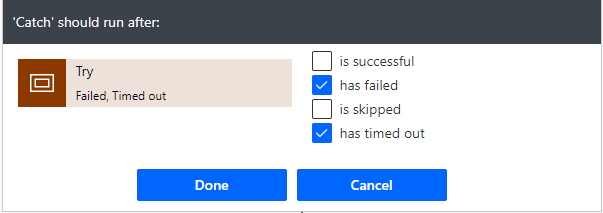
21. On the Catch scope, select the ellipsis (“…“), select Configure run after, and configure as follows:
- Select the has failed checkbox.
- Select the has timed out checkbox.
22. In the Catch scope, select Add an action and add a Set variable action, and rename it “Set the execution result to failed”.
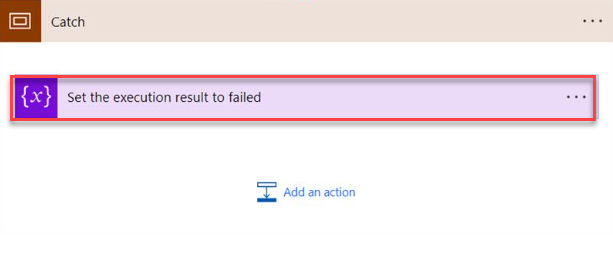
23. Configure the properties as follows:
- For Name, enter “ExecutionResult”.
- For Value, enter “false”.
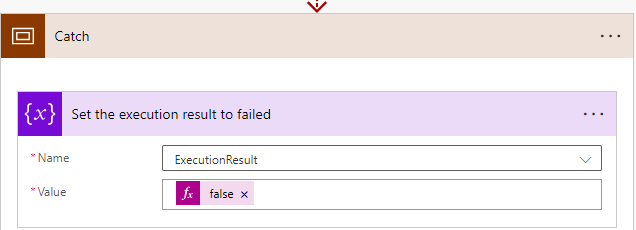
24. Select New step, and add another scope renamed “Finally”
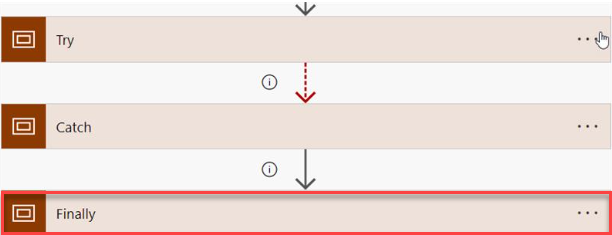
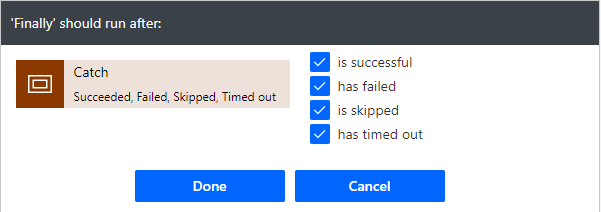
25. In the Finally scope, select the ellipsis (“…“), select Configure run after, and configure as follows:
- Select the is successful checkbox.
- Select the has timed out checkbox.
- Select the is skipped checkbox.
- Select the has timed out checkbox.
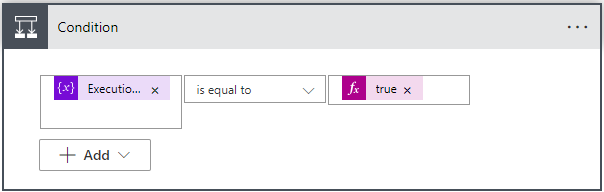
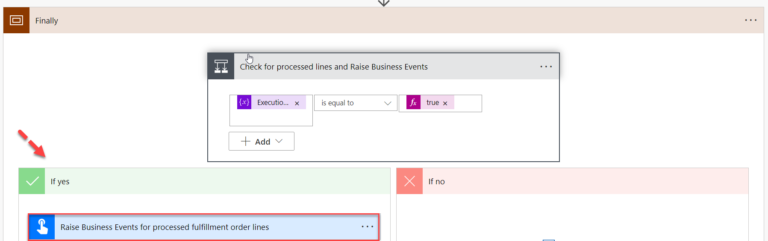
26. In the Finally scope, add a “condition” step and compare the ExecutionResult variable to “true” as follows:
- In the first field, select the ExecutionResult variable.
- In the second field, select is equal to.
- In the third field, select true.
27. In the If yes branch, add a Run a child flow action and rename it “Raise Business Events for processed fulfillment order lines”.
28. Configure the properties as follows:
- For Child flow, enter “IOM Raise Business Event”.
- For BusinessEventDefinitionId, enter “063d85c8-60a4-eb11-9443-000d3a313675”.
- For EntityRecordId, specify the following as expressions:
string(variables('ProcessedFulfillmentOrderLines'))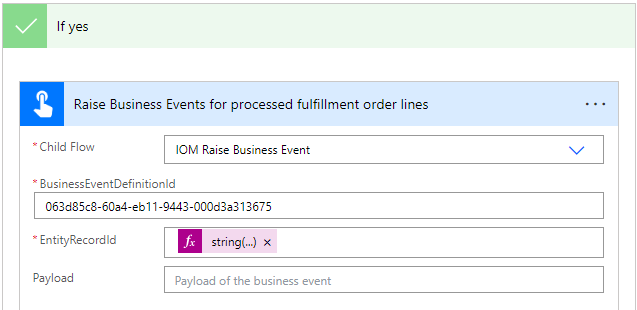
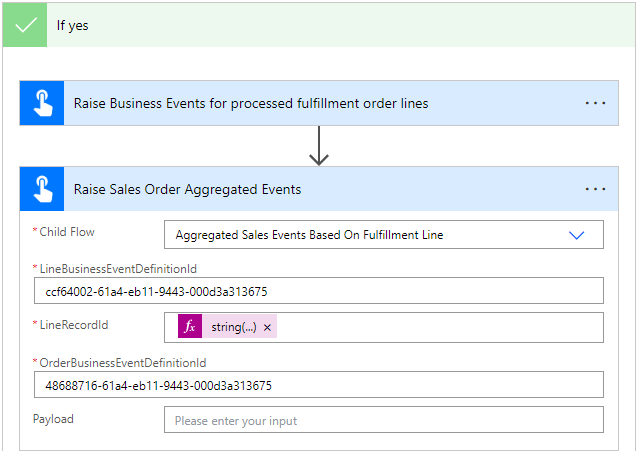
29. In the If yes branch, add another Run a child flow action and rename it “Raise Sales Order Aggregated Events”.
30. Configure the properties as follows:
- For LineBusinessEventDefinitionId, enter “ccf64002-61a4-eb11-9443-000d3a313675”.
- For LineRecordId, specify the following as an expression:
string(variables('ProcessedSalesOrderLines')).- For OrderBusinessEventDefinitionId, enter “48688716-61a4-eb11-9443-000d3a313675”.
31. Collapse the condition step.
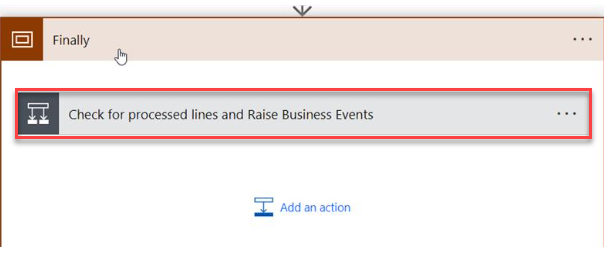
32. Add a Perform an unbound action action as follows:
- For Action name, enter “msdyn_CompleteProviderActionExecution”.
- For ExecutionResult, select the ExecutionResult variable from under Dynamic content.
- For ProviderActionExecutionEventId, select ProviderActionExecutionEventId from under Dynamic content.
33. Select Save.
Add provider definition logic definition to the provider definition (RequestBin)
To add a provider definition logic definition to the RequestBin provider definition, follow these steps.
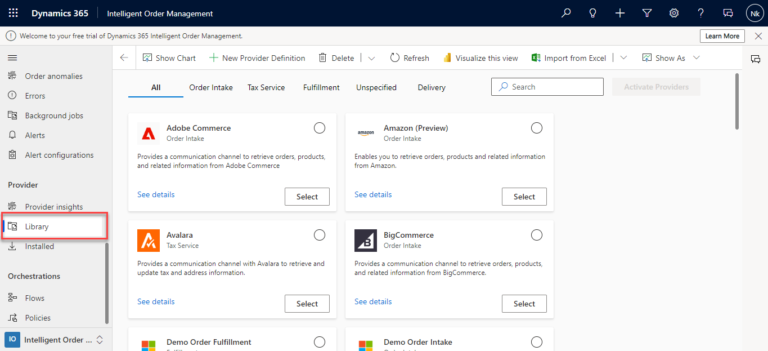
- Go to Providers > Library
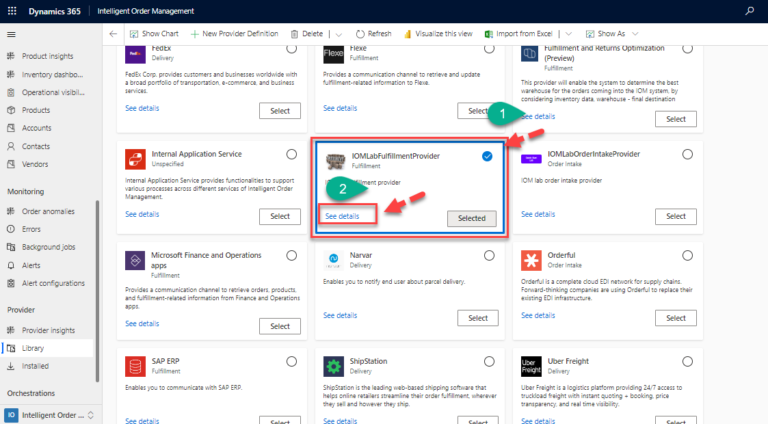
2. Select the newly-created IOMLabFulfillmentProvider and click on See details .
3. Select the Logic definitions tab.
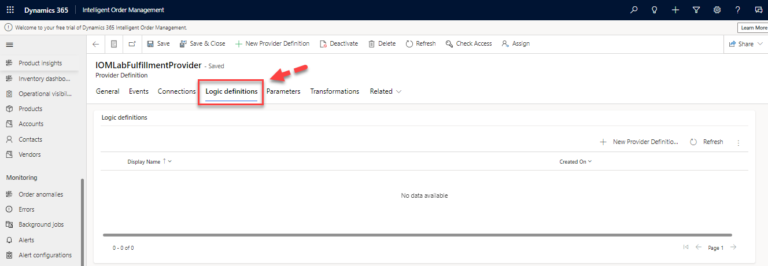
4.Select + New IOM Provider Definition Logic Definition
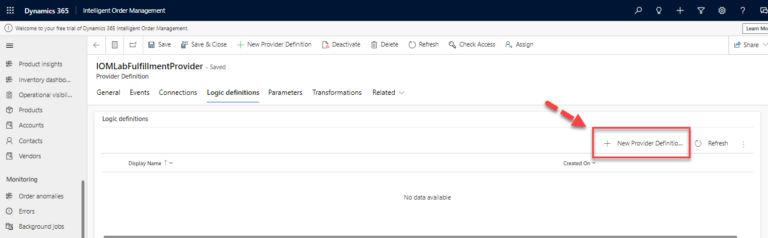
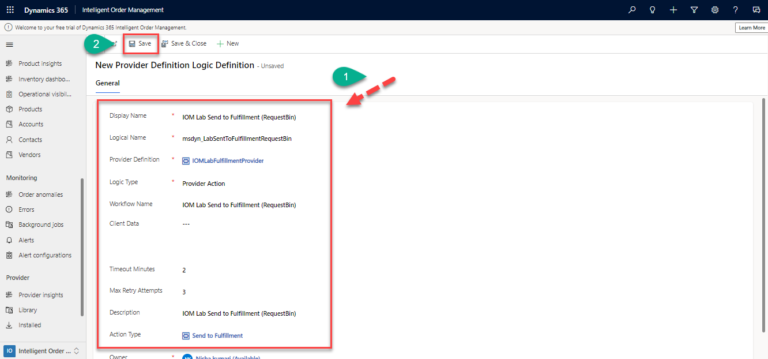
5. n the New Provider Definition Logic Definition dialog box, do the following:
- For Display Name, enter “IOM Lab Send to Fulfillment (Outlook)”.
- For Logical Name, enter “msdyn_LabSentToFulfillmentOutlook”.
- For Provider Definition, enter “IOMLabFulfillmentProvider”.
- For Logic Type, enter “Provider Action”.
- For Workflow Name, enter “IOM Lab Send to Fulfillment (Outlook)”.
- For Timeout Minutes, enter “2”.
- For Max Retry Attempts, enter “3”.
- For Description, enter “IOM Lab Send to Fulfillment (Outlook)”.
- For Action Type, enter “Send to Fulfillment”.
- Select Save.
6. After click on Save will generate a JSON representation of the message handler cloud flow and populate the Client Data field.
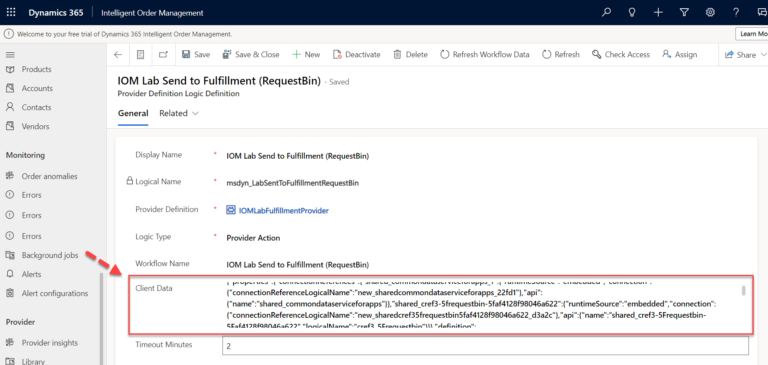
7. Select Save and close.
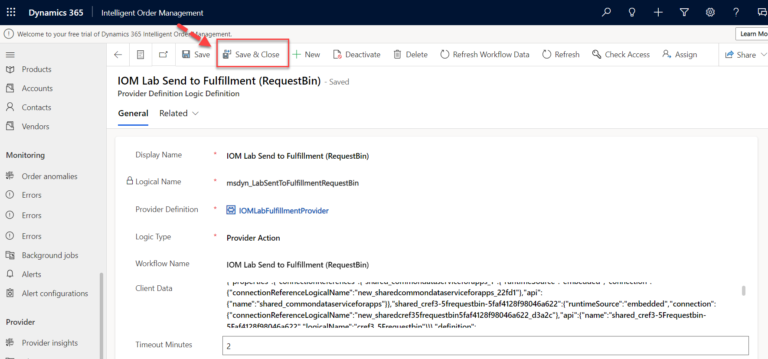
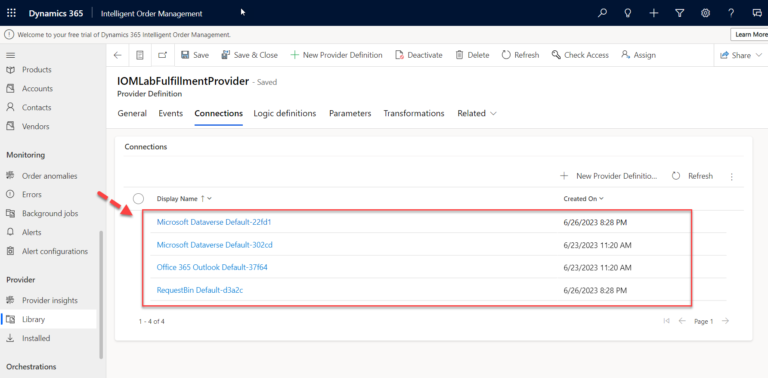
8. Select Connections. You should see the Microsoft Dataverse, Outlook.com, and RequestBin connection reference definitions listed.
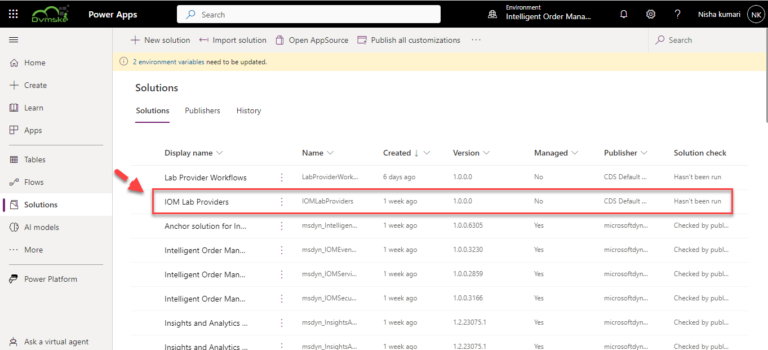
Add provider definition logic definition to IOMLabProviders solution (RequestBin)
To add a provider definition logic definition to the RequestBin IOMLabProviders solution, follow these steps.
- Go to the Power App Maker portal and navigate to the newly-created solution IOMLabProviders.
2. Select Add existing > More > Other > Provider Definition Logic Definition.
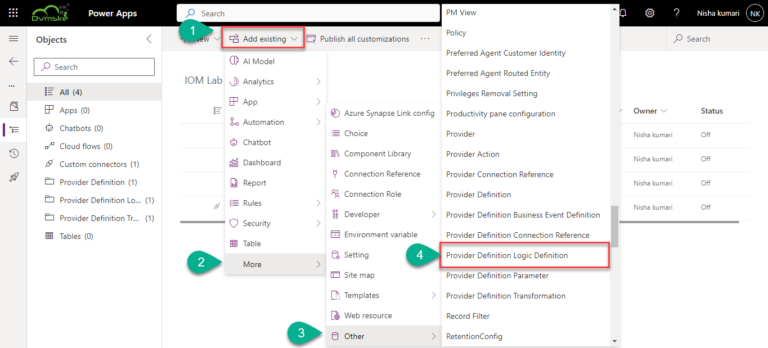
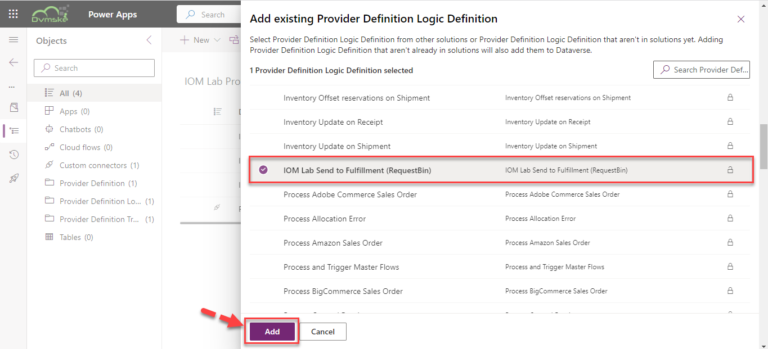
3. Select IOM Lab Send To Fulfillment (RequestBin) and then select Add to add it to the solution.
4. Select Add existing > More > Other > Provider Definition Connection Reference ..
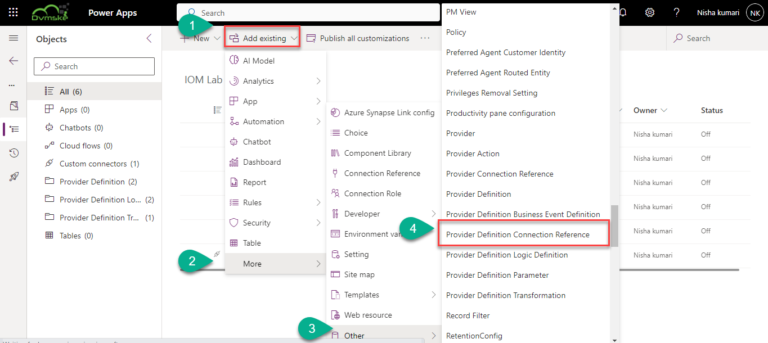
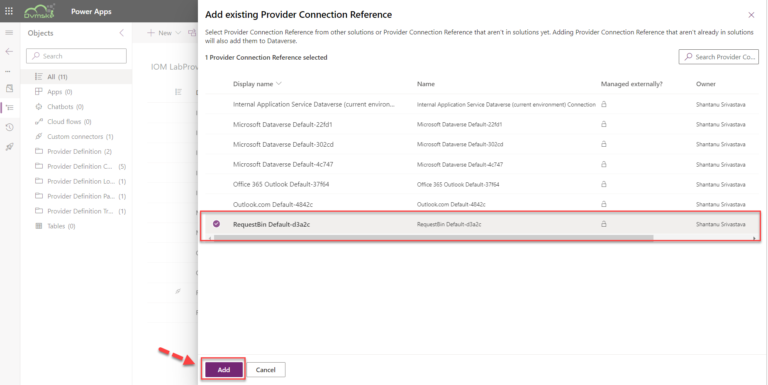
3. Select RequestBin and then select Add to add it to the solution.