How to Create a Web Resource in Microsoft Dynamics 365 CE/CRM
- First go the CRM -> Settings
- Select the Advanced Settings option ,
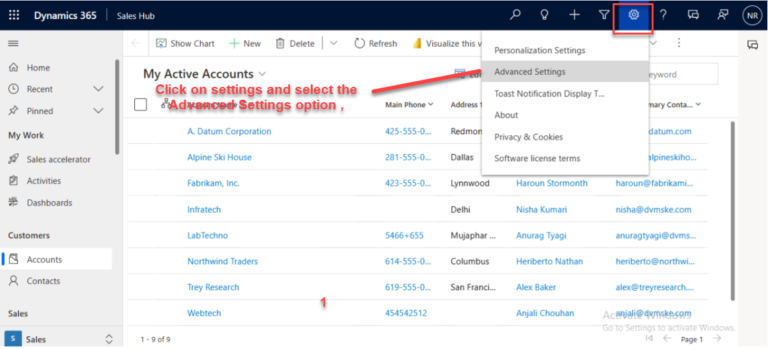
- Click in front of Settings and append it.
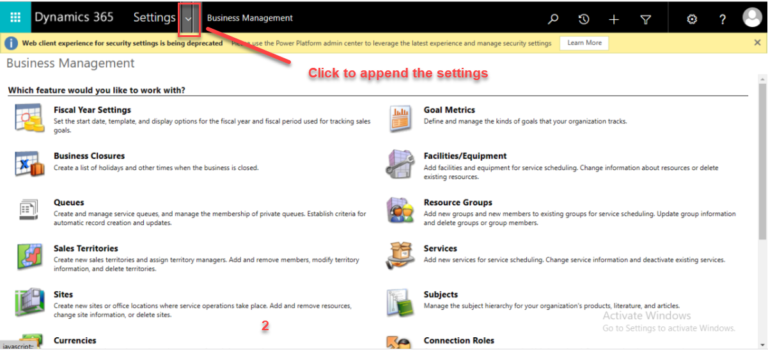
- Go to Customization Section ,
- click on Solutions option .
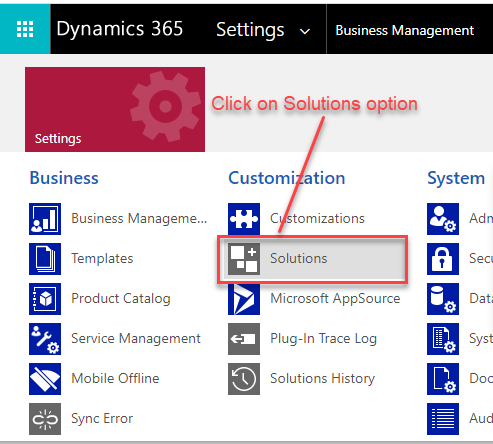
- Select the particular Solution in which you want to create the web resource.
- Or you can create your new solution.
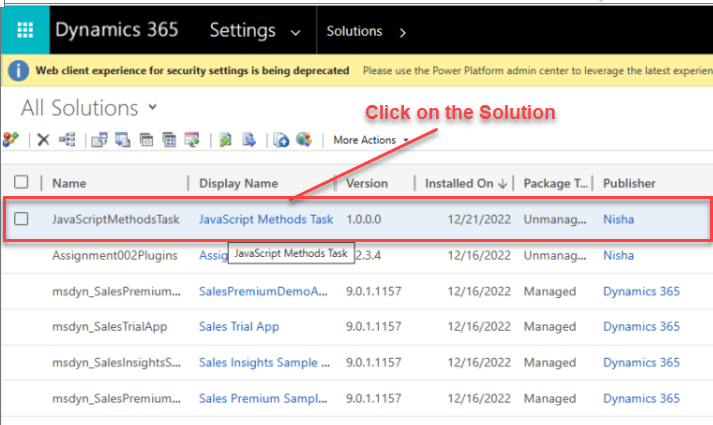
- On Solution that we have selected under Component
- Click on the Web Resource .
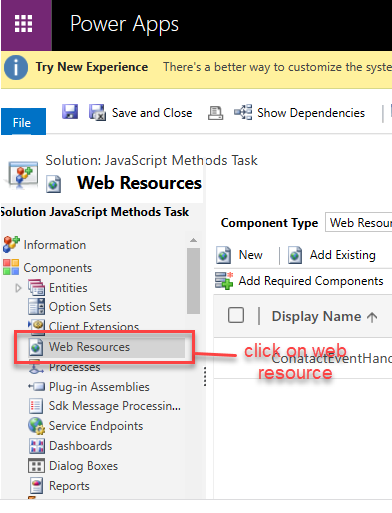
- Click on New to create a Web Resource.
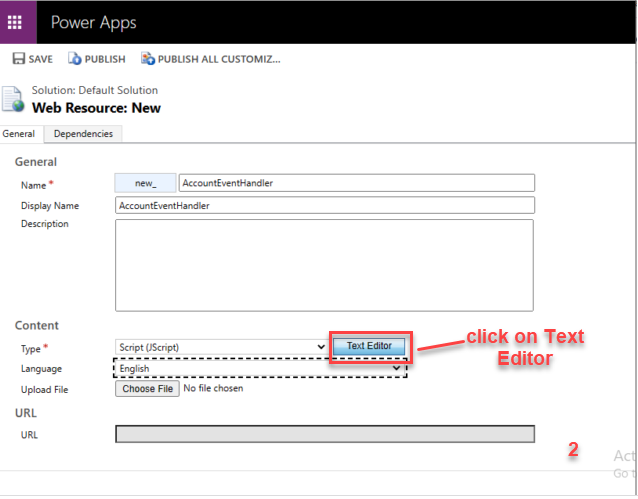
- Give appropriate Name to your Web Resource and
- Copy the same name to Display Name.
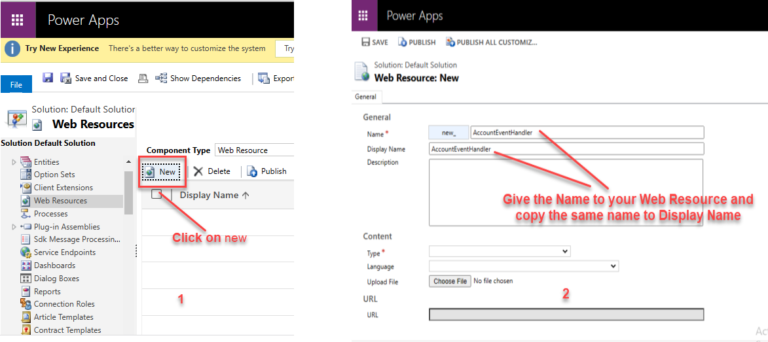
- On Content select Type of language on which you want to work on,
- We select Script(JScript).
- Select Language
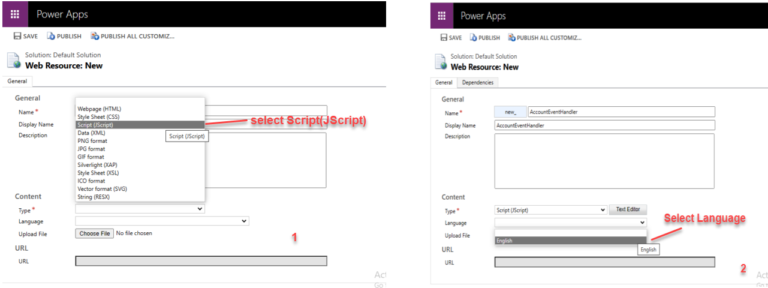
- Click on Text Editor to open it.
Scenario - How to get the GUID and logical name of a record of particular entity (table) using JavaScript in D365 CRM/CE.
In this scenario We have a requirement from a Customer to get the GUID and logical name of a record of the entity(table) while updating the record .
Syntax to get the GUID:
var recordId = formContext.data.entity.getId();Syntax to get the Entity Name:
var entityName = formContext.data.entity.getEntityName();Code:
function (executionContext) {
        var formContext = executionContext.getFormContext();
        var recordId = formContext.data.entity.getId();
        var entityName = formContext.data.entity.getEntityName();
        alert(`Record GUID: ${recordId} and Entity Name: ${entityName}`);
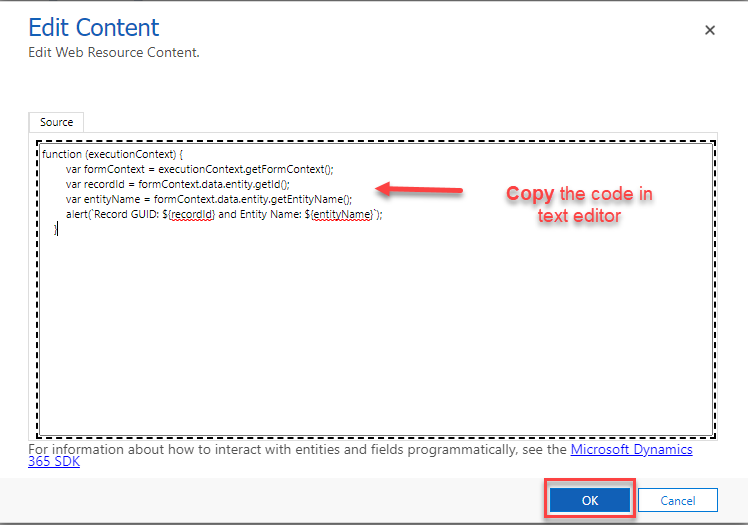
}- Copy the above code .
- Paste your Code in Text Editor.
- And click on ok.
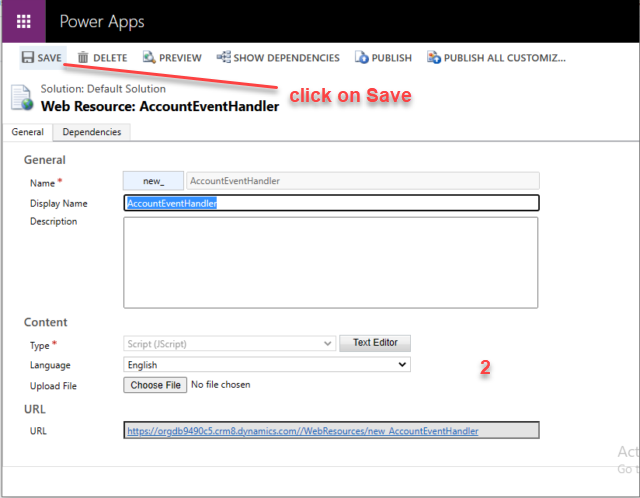
- After adding your code in Text Editor click on Save.
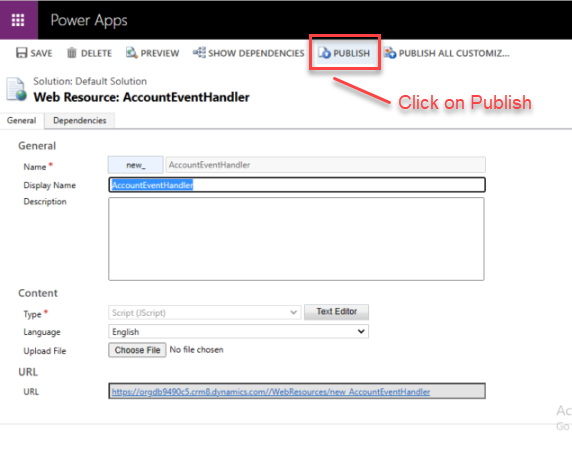
- Click on Publish to publish your Web Resource .
- As your customizations start publishing it will take few minutes to publish it.
OUTPUT
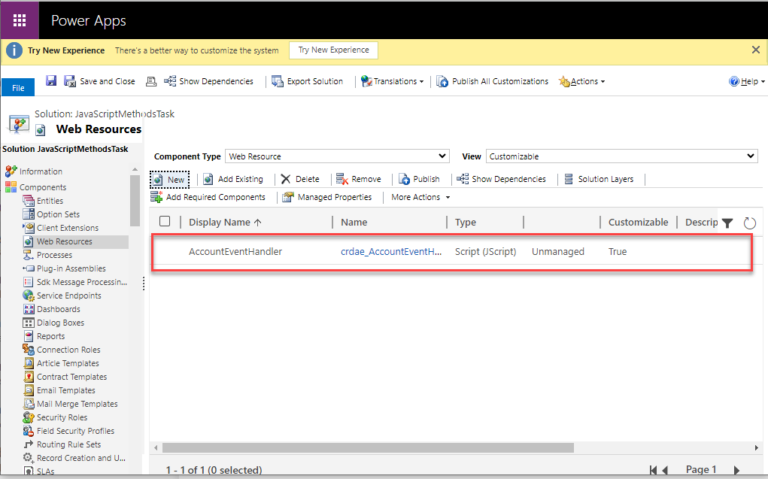
How to use a Web Resource in Microsoft Dynamics 365 CE/CRM ?
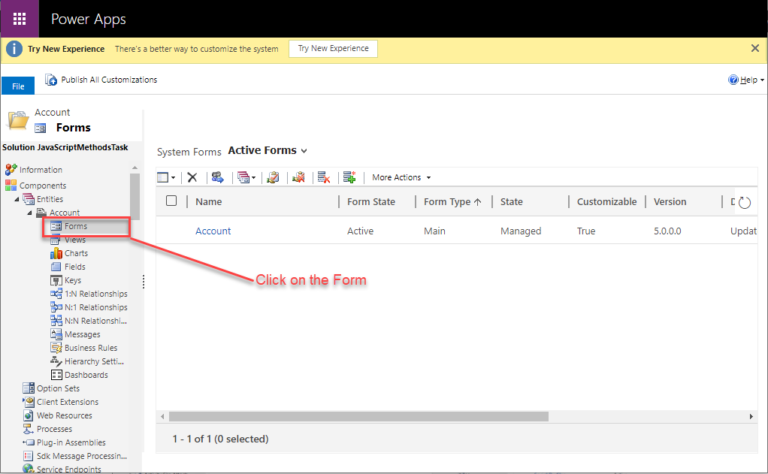
- Select the particular Entity on which you want to add your Web Resource .
- Expand it and click on Forms
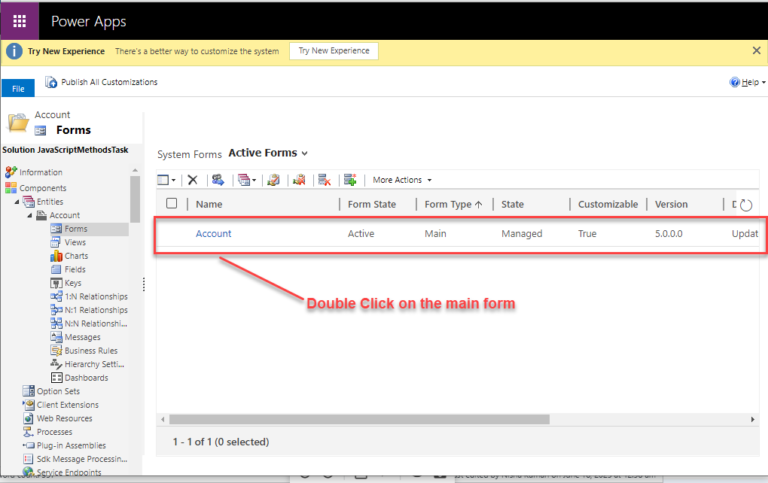
- Then again click on main form of your selected Entity.
- Open the form by Double click on main form of your selected Entity.
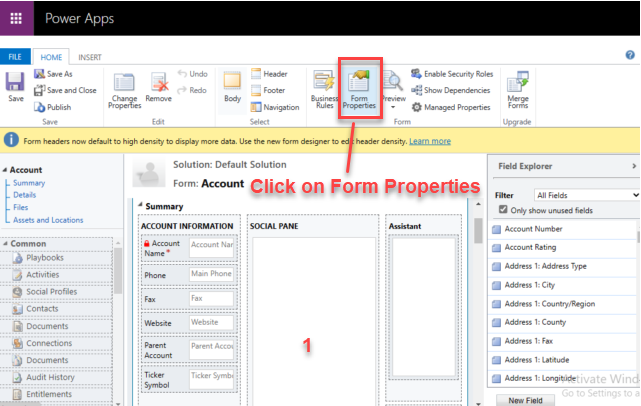
- Click on Form Properties to open it.
- On Form Properties page click on Add in Form Libraries to add the web resource.
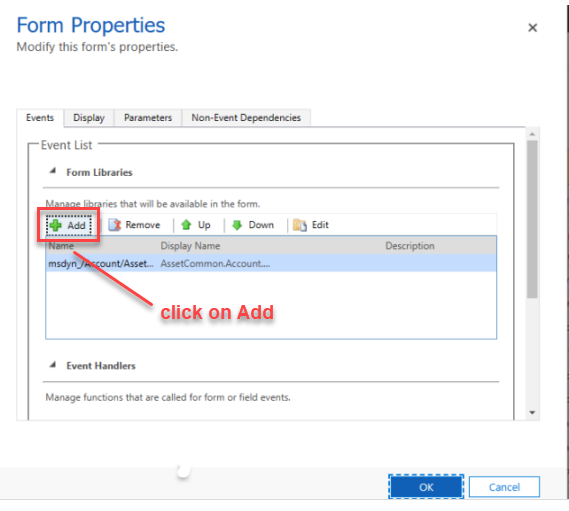
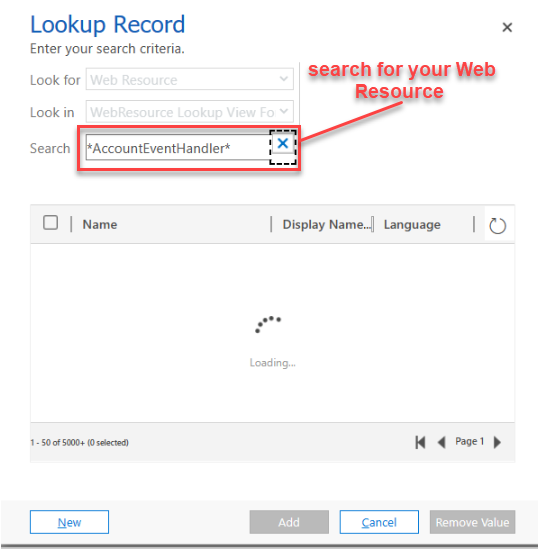
- On Lookup record page search for your Web Resource that you have created.
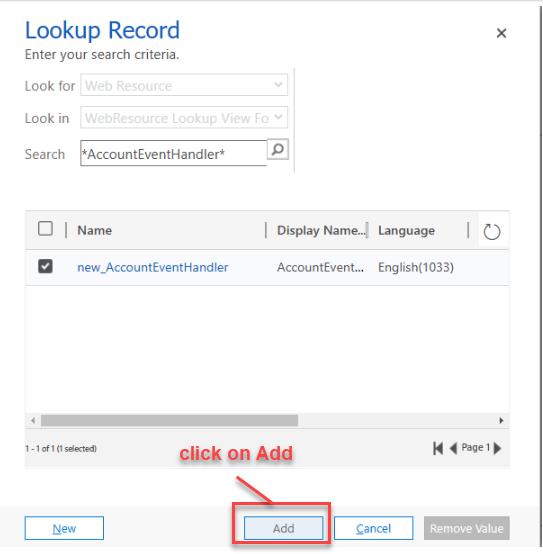
- and click on Add.
- After finding the web resource click on Add.
- After adding the web resource .
- Add the Event according to your requirements .
- Click on Add
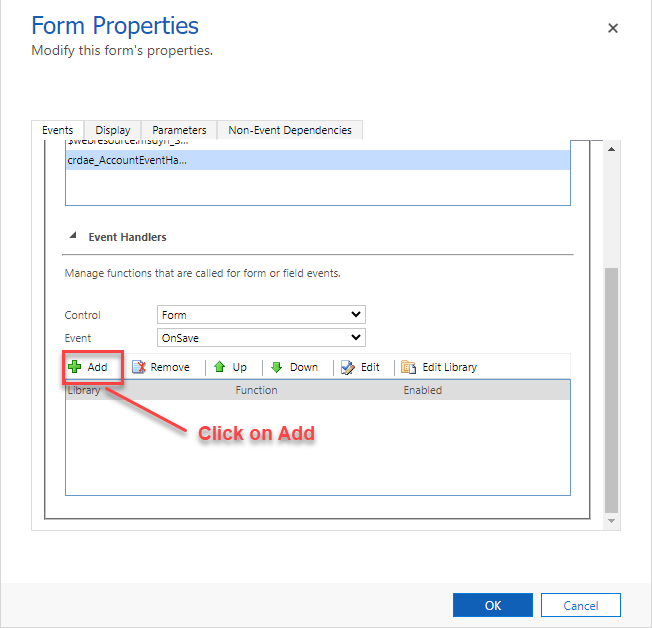
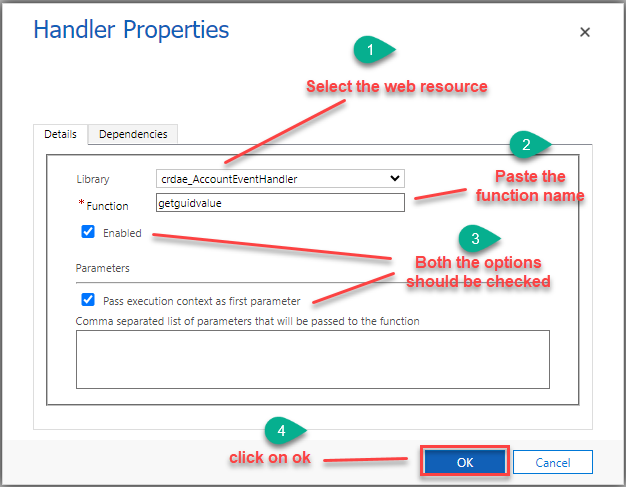
- Select the web resource in the Library option.
- Paste the name of the function in the Function option.
- Check both the option Enabled and Pass execution context as first parameter .
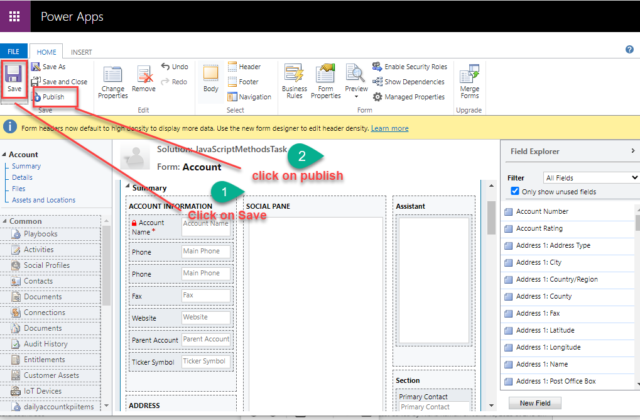
- Click on Save.
- After saving click on Publish to publish all the customizations.
- Go to CRM and click on Account Entity .
- Open the particular record on which you want to update.
- Suppose we want to update the Fax field
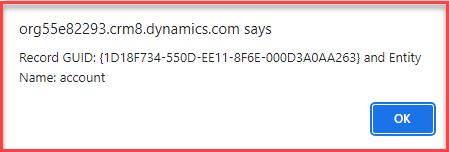
- After updating the fax field click on Save as you can se one alert message is pop-up containing record GUID and logical name of the Entity
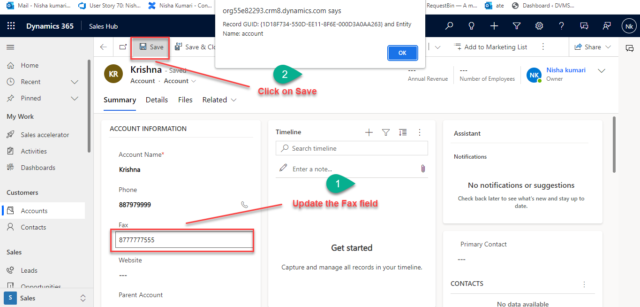
OUTPUT
