Microsoft Dynamics 365 Intelligent Order Management IOM Step by Step Tutorial
Follow Below Steps
Step 1 - COMPLETEDCreate the free 30 Days Trial Version Environment for the Microsoft Dynamics 365 Intelligent Order Management
Step 2 - COMPLETEDSet up an IOM environment / Configure platform connection references in Microsoft Dynamics 365 Intelligent order Management
Step 3 - COMPLETEDCreate a new solution for PROVIDER Customization in Microsoft Dynamics 365 IOM / Create a provider solution
Step 4 - COMPLETEDCreate RequestBin Custom connector (Power Platform) for Step by Step Microsoft IOM Tutorial
Step 5 - COMPLETEDCreate new intake provider definition for Step by Step IOM Tutorial Scenario- Microsoft Dynamics 365 Intelligent Order Management / Register a new Provider in Library
Step 6 - COMPLETEDCreate a provider message request handler for Quick Start Lab Scenario for Microsoft Intelligent order Management IOM tutorial
Step 7 - COMPLETEDCreate Fulfillment provider in Microsoft Dynamics Intelligent Order Management IOM – Order to Fulfillment in IOM
Step 8 - COMPLETEDAdd a provider definition logic definition to the Outlook Provider Definition in Microsoft Dynamics Intelligent Management IOM
Step 9 - COMPLETEDCreate a provider action - Power Automate Flow - to send a fulfillment Order payload to RequestBin
Step 10Activate the Intake, Fulfillment, & Internal Application Service provider created in Previous Step by Step IOM Tutorial
Step 11Create Orchestration policies and their associated rules for Quick Start Lab Scenario in Microsoft Dynamics 365 Intelligent Order Management IOM
Step 12Create Sales Order Orchestration flow in Microsoft Dynamics Intelligent Order Management IOM
Step 13Set up Customer(Account) and product mapping in Microsoft Dynamics Intelligent order Management IOM
Step 14Run a sample order orchestration flow in Microsoft Dynamics 365 Intelligent Order Management - END TO END DEMO IOM
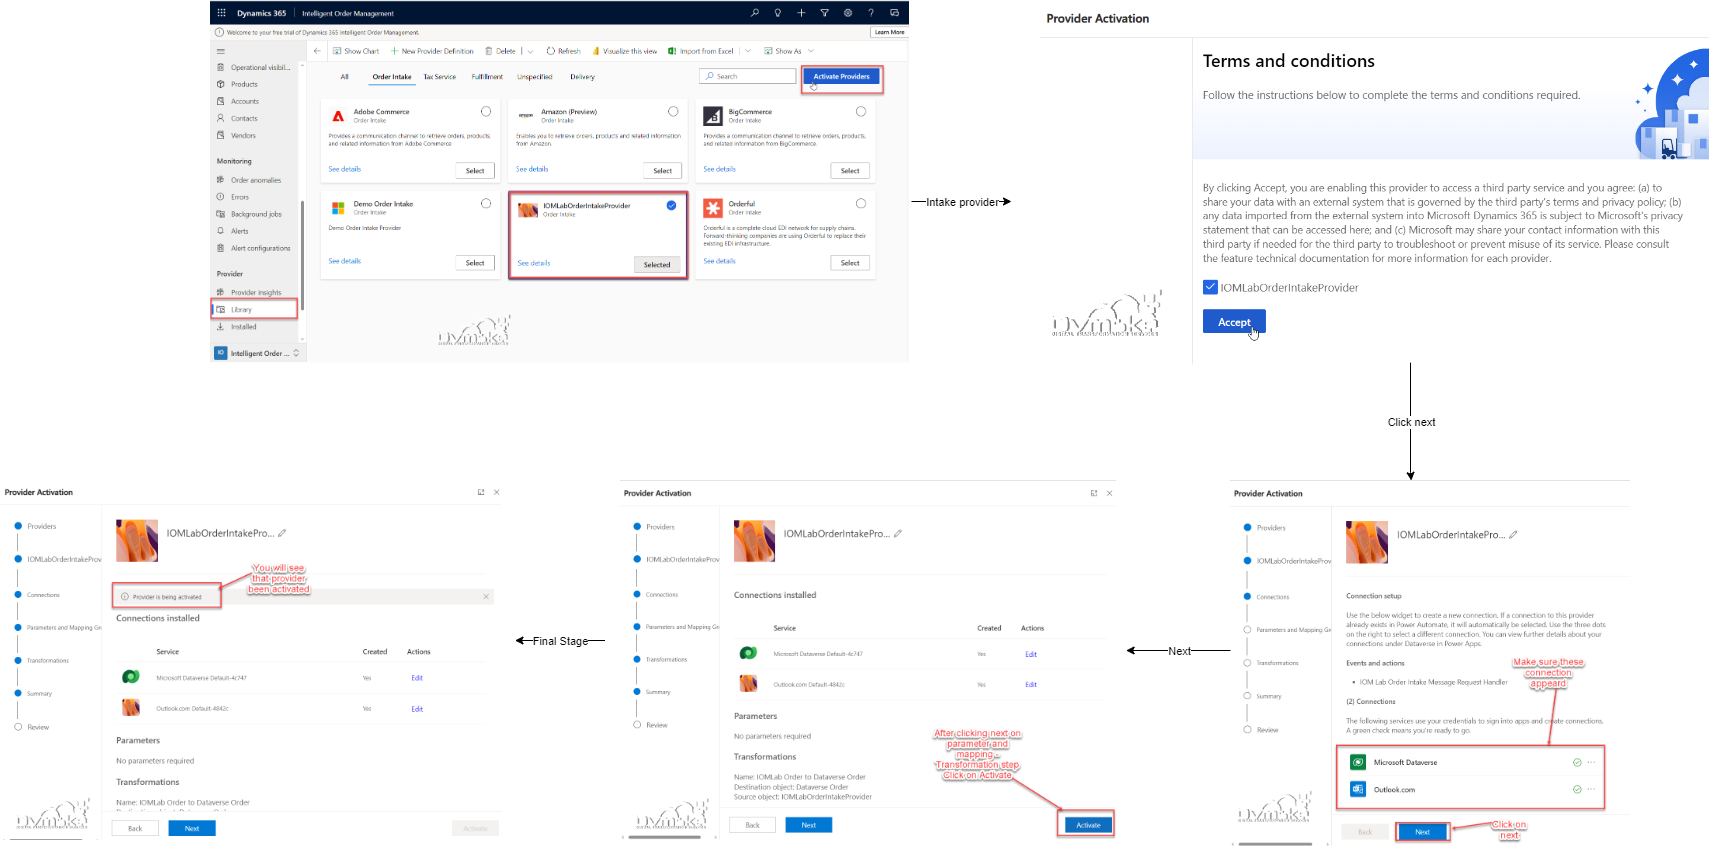
Step1.Activate the intake provider
Now we have configured our intake and fulfillment provider.
- To activate the intake provider:
- We will go to library.
- We will select the intake provider and then click on activate provider.
- Click on next on first step,
- Wait for some time till your connections showed up in connection step,
- Click on next on Parameter and mapping -transformation step.
- Click on activate in summary step.
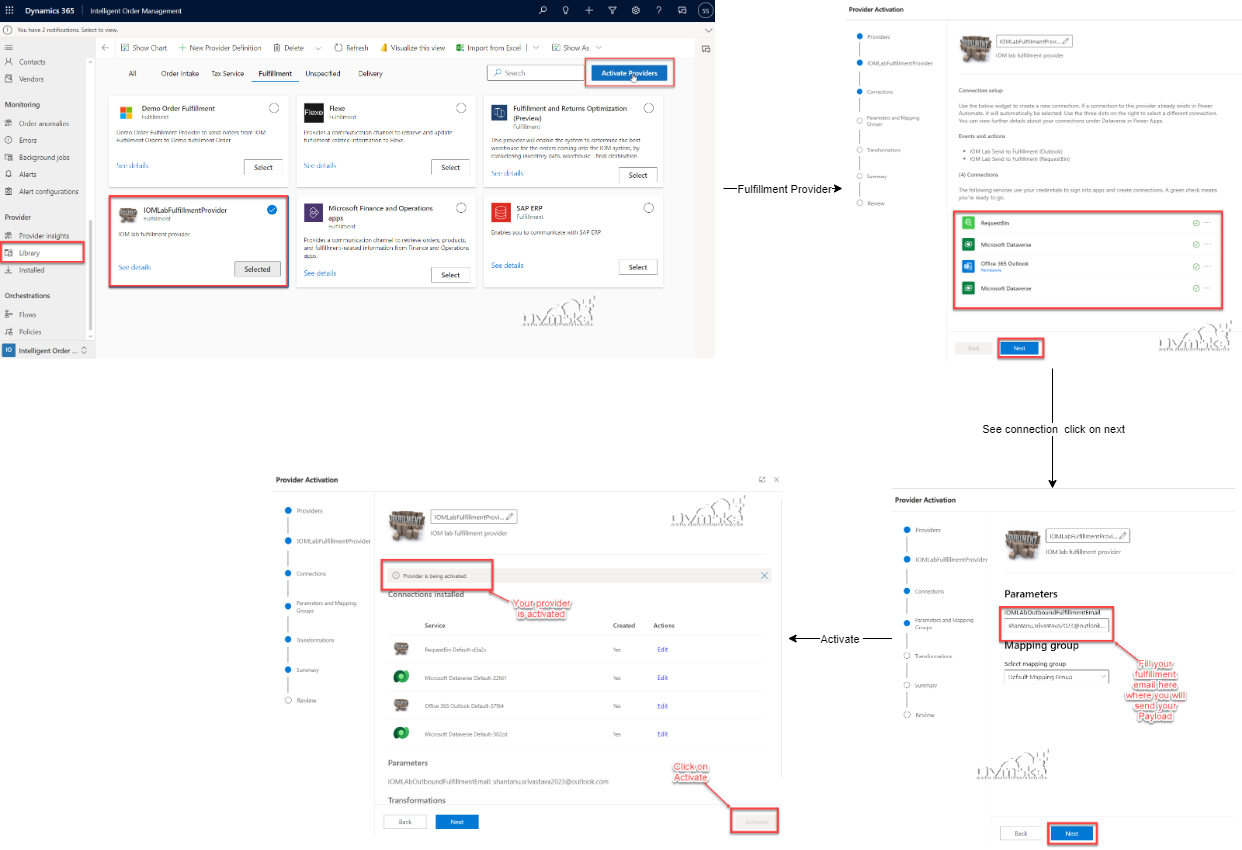
Step2.Activate the Fulfillment Provider
- To activate the Fulfillment provider:
- We will go to library.
- We will select theFulfillment provider and then click on activate provider.
- Click on next on first step,
- Wait for some time till your connections showed up in connection step,You will see 4 connections.
- Click on next on Parameter and mapping -transformation step here write down Email id where you want to send your order.
- Click next on transformation step.
- Click on activate in summary step.
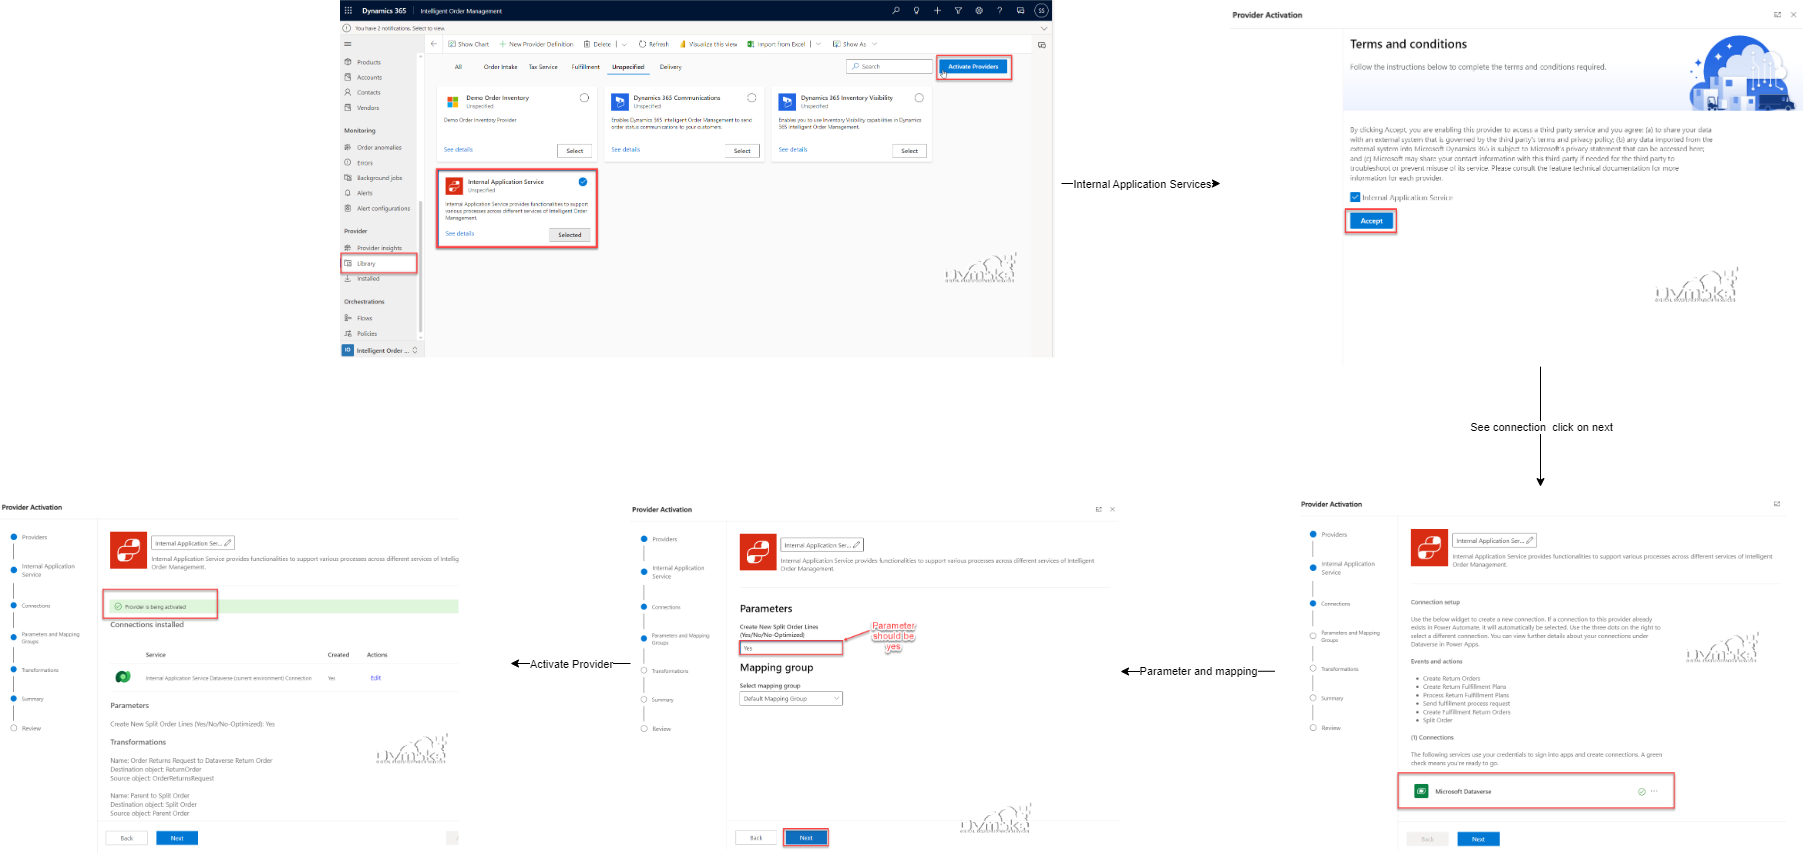
Step3.Activate the Internal Service application
- To activate the Internal Application Service provider:
- We will go to library.
- We will select Internal Application Service provider and then click on activate provider.
- Click on next on first step,
- Wait for some time till your connection showed up in connection step,You will see 1 connection.
- Click on next on Parameter and mapping -transformation step here write down Email id where you want to send your order.
- Click next on transformation step.
- Click on activate in summary step.
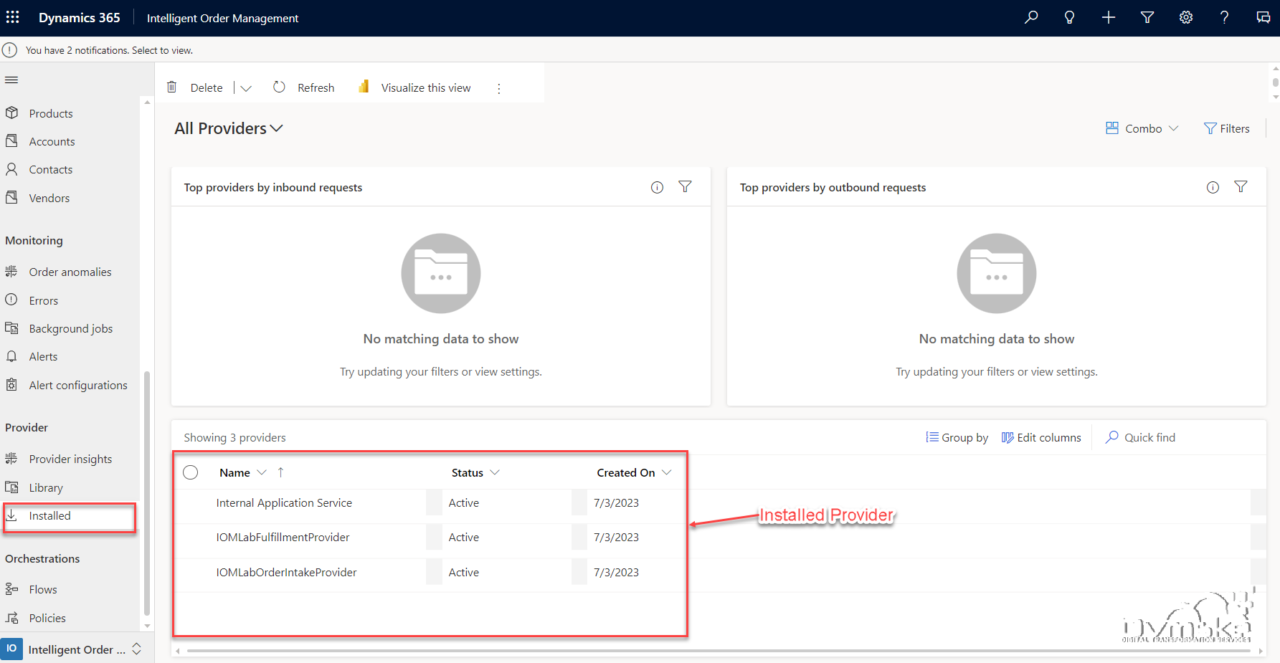
- You can see your Active Providers in Provider>Installed.