
Microsoft Dynamics 365 Intelligent Order Management IOM Step by Step Tutorial
Follow Below Steps
Step 1 - COMPLETEDCreate the free 30 Days Trial Version Environment for the Microsoft Dynamics 365 Intelligent Order Management
Step 2 - COMPLETEDSet up an IOM environment / Configure platform connection references in Microsoft Dynamics 365 Intelligent order Management
Step 3 - COMPLETEDCreate a new solution for PROVIDER Customization in Microsoft Dynamics 365 IOM / Create a provider solution
Step 4 - COMPLETEDCreate RequestBin Custom connector (Power Platform) for Step by Step Microsoft IOM Tutorial
Step 5 - COMPLETEDCreate new intake provider definition for Step by Step IOM Tutorial Scenario- Microsoft Dynamics 365 Intelligent Order Management / Register a new Provider in Library
Step 6 - COMPLETEDCreate a provider message request handler for Quick Start Lab Scenario for Microsoft Intelligent order Management IOM tutorial
Step 7 - COMPLETEDCreate Fulfillment provider in Microsoft Dynamics Intelligent Order Management IOM – Order to Fulfillment in IOM
Step 8 - COMPLETEDAdd a provider definition logic definition to the Outlook Provider Definition in Microsoft Dynamics Intelligent Management IOM
Step 9 - COMPLETEDCreate a provider action - Power Automate Flow - to send a fulfillment Order payload to RequestBin
Step 10 - COMPLETEDActivate the Intake, Fulfillment, & Internal Application Service provider created in Previous Step by Step IOM Tutorial
Step 11 - COMPLETEDCreate Orchestration policies and their associated rules for Quick Start Lab Scenario in Microsoft Dynamics 365 Intelligent Order Management IOM
Step 12 - COMPLETEDCreate Sales Order Orchestration flow in Microsoft Dynamics Intelligent Order Management IOM
Step 13 - COMPLETEDSet up Customer(Account) and product mapping in Microsoft Dynamics Intelligent order Management IOM
Step 14Run a sample order orchestration flow in Microsoft Dynamics 365 Intelligent Order Management - END TO END DEMO IOM
CLICK HERE FOR " HOW TO CREATE ORCHESTRATION FLOW - STEP 12Create Sales Order Orchestration flow in Microsoft Dynamics Intelligent Order Management IOM
Step1.Sample sales order Json payload for email attachment
In this blog we will see how we create order from email and order orchestration run step by step
{
  "ordernumber": "IOMLabOrder001",
  "shiptocity": "Tempa",
  "shiptostateorprovince": "Florida",
  "shiptocountry": "US",
  "shiptozip": "33592",
  "billtocity": "Tempa",
  "billtostateorprovince": "Florida",
  "billtocountry": "US",
  "billtozip": "33592",
  "orderdetails": [
    {
      "sku": "883988211855",
      "unit": "each",
      "quantity": 110
    }
  ]
}
Step2. Quick Lab scenario
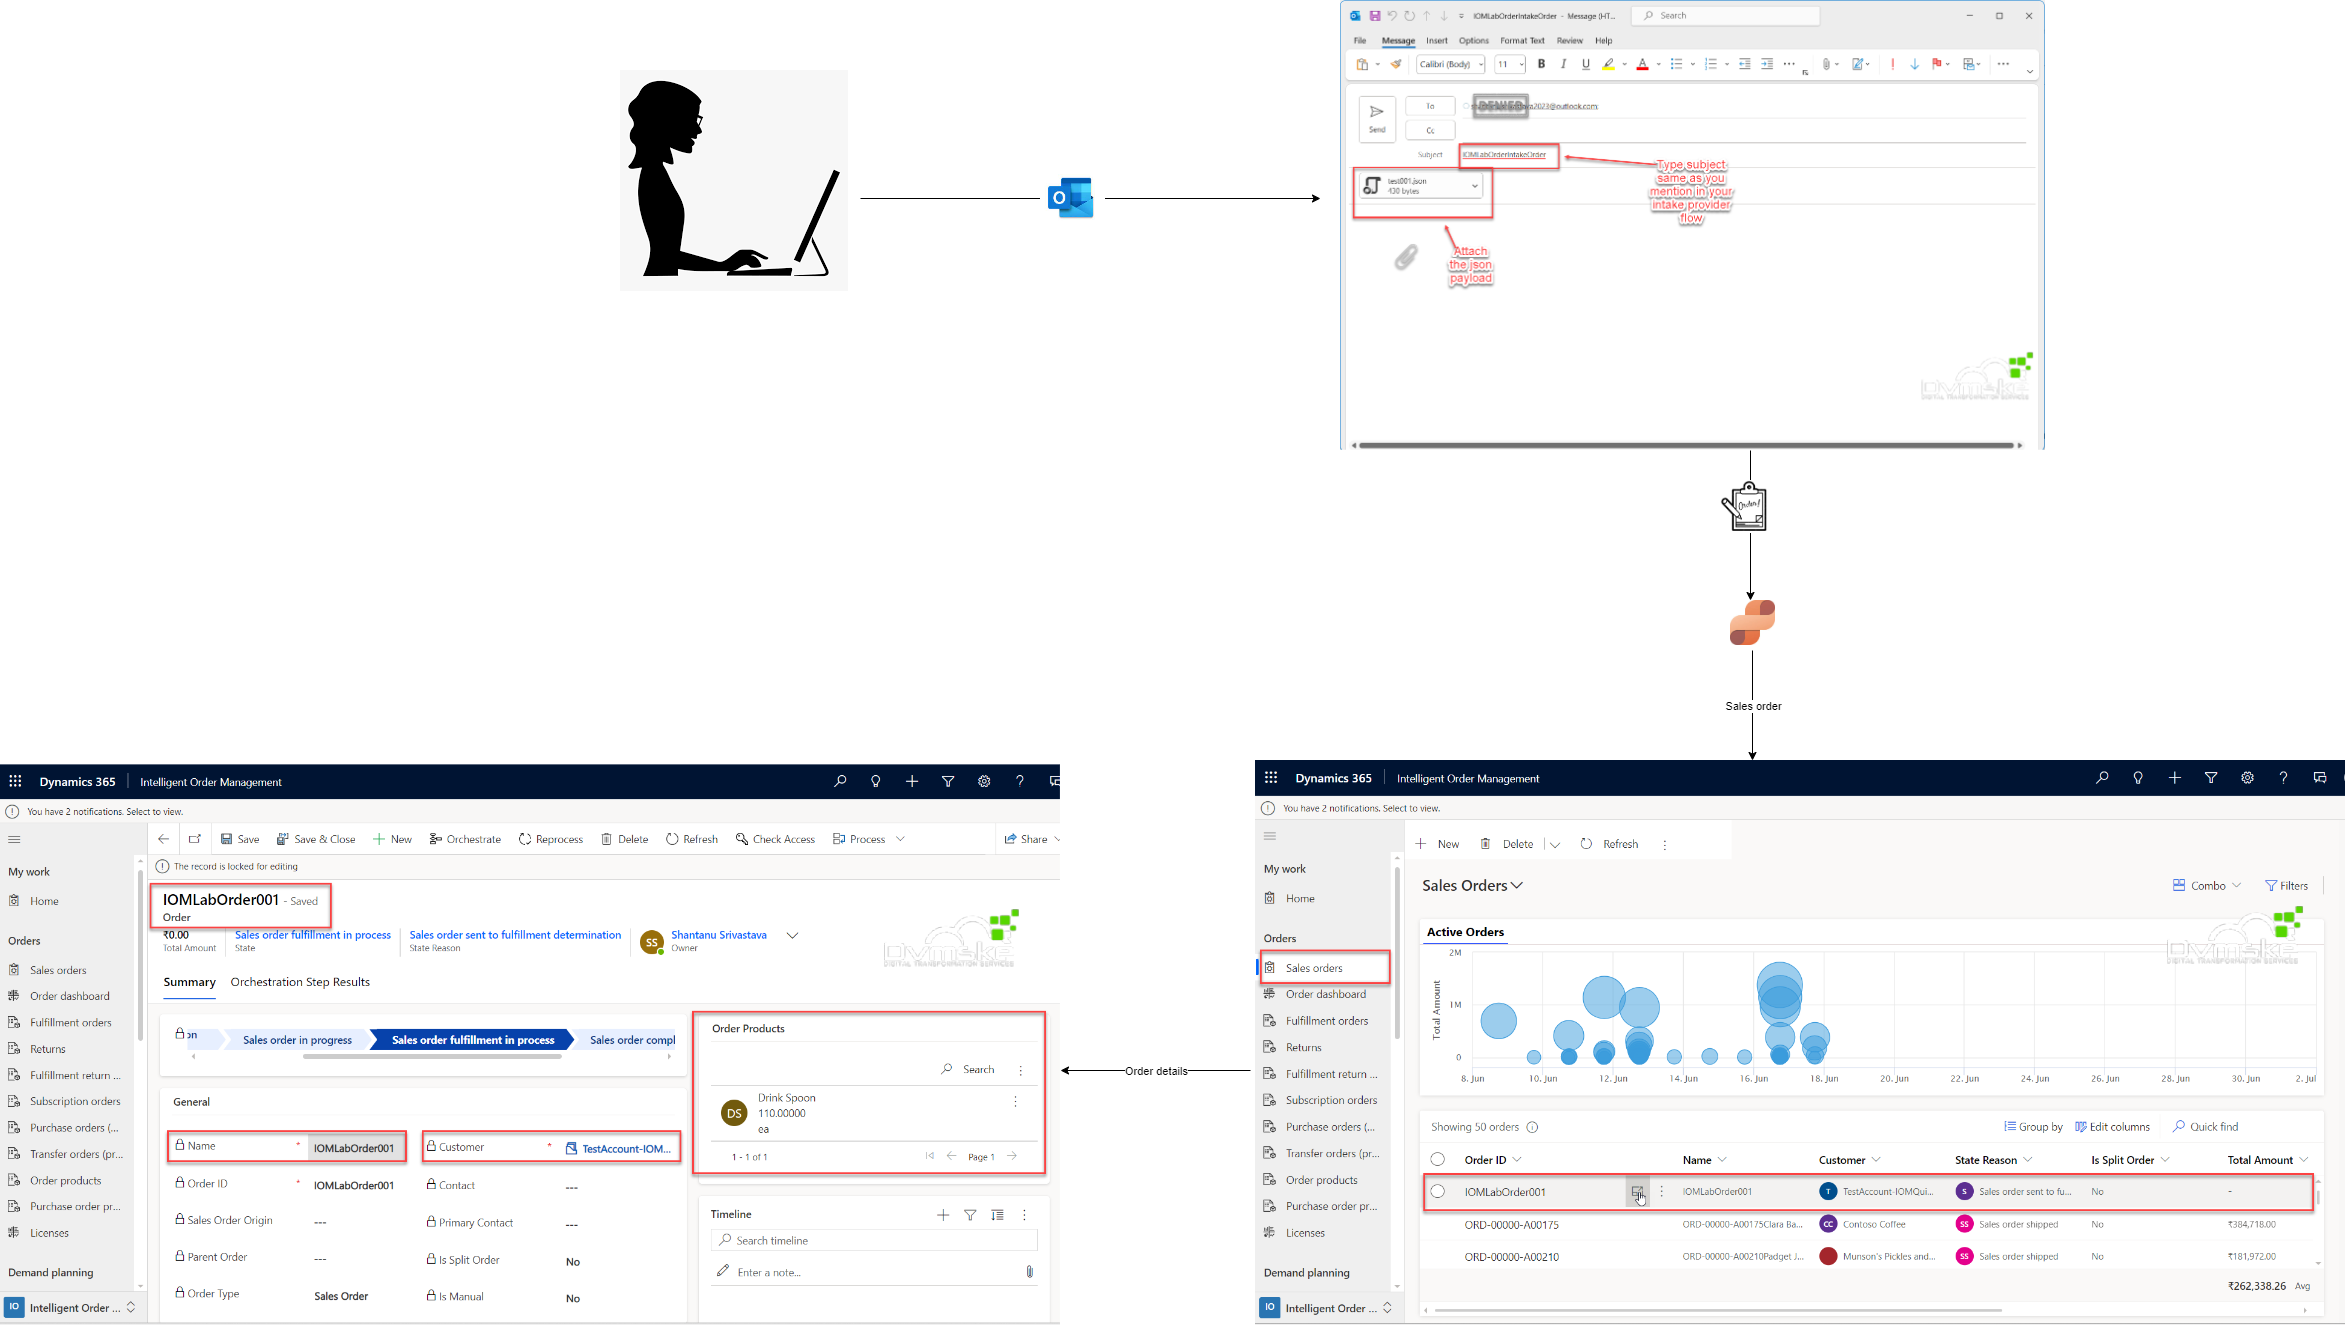
- Order comes into Intelligent Order Management as email attachment.
- Then it will validate order header to make sure “ship to”” country is US.
- After that validate order line to make sure quantity is greater than 1.
- Route order based on quantity.
- If quantity >= 100, send to Seattle store.
- If quantity < 100, send to Chicago store.
- If order is routed to Seattle store, emails with fulfillment order attached will be sent.
- If order is routed to Chicago store, requests with fulfillment order as payload will be sent to RequestBin.
Step3.Test
a.Test Run 1
- To complete test run 1, follow these steps.
- Save the sample sales order payload as a JSON file and attach it to an email with the subject “IOMLabOrderIntakeOrder”.
- Send the email to the Outlook account used previously to set up IOMLabOrderIntake provider.
You will receive two emails back with attachment with fulfillment details. The order status reason will be set to “Sent To Fulfillment”.
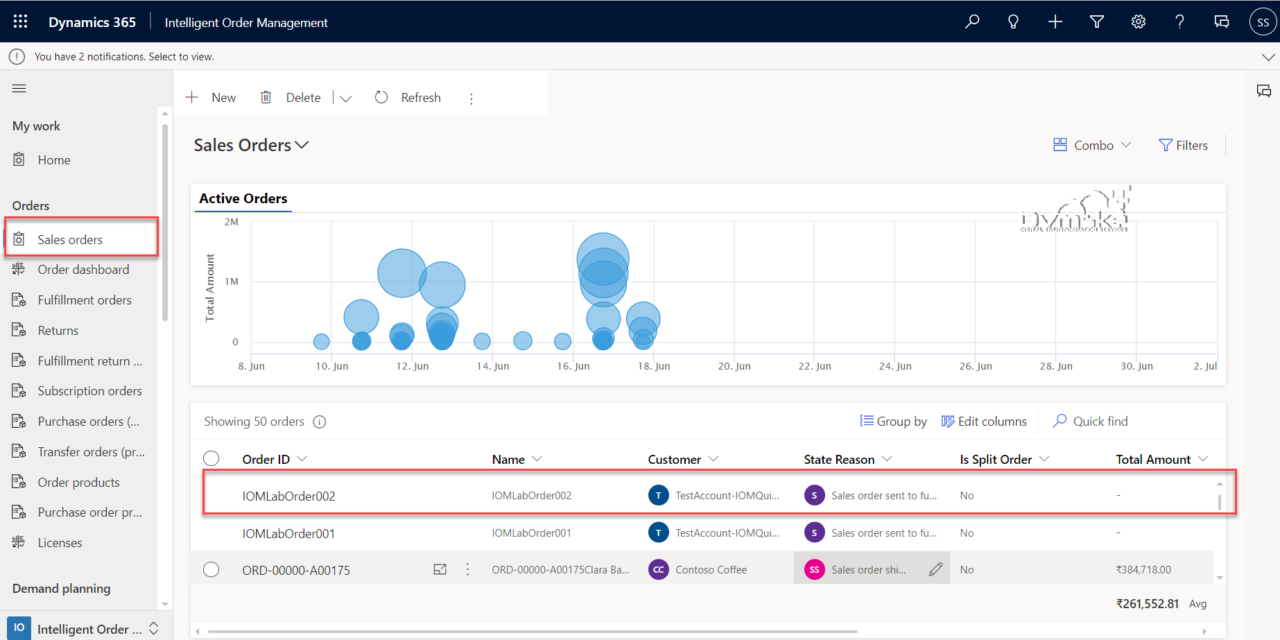
b.Test Run 2
- To complete test run 2, follow these steps.
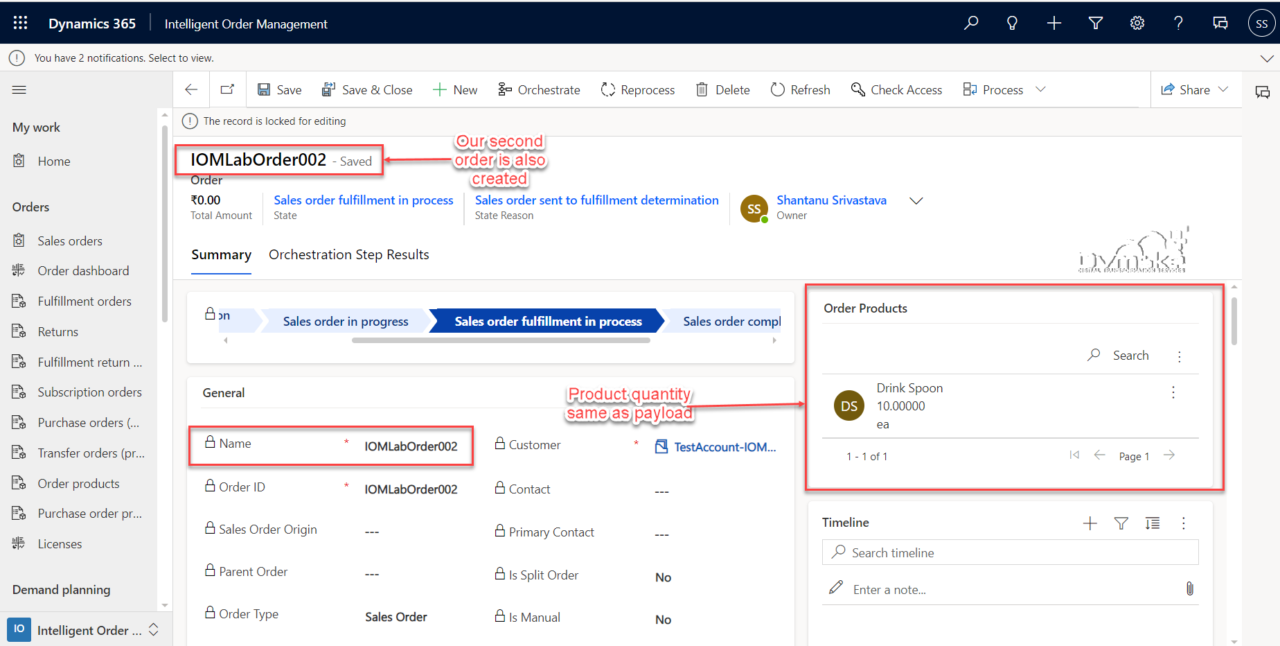
- Change the ordernumber value to “IOMLabOrder002” and the quantity value to 10.
- Save the sample sales order payload as a JSON file and attach it to an email with the subject “IOMLabOrderIntakeOrder”.
- Send the email to the Outlook account used previously to set up IOMLabOrderIntake provider.
You will receive two requests with fulfillment details in your RequestBin. The order status reason will be set to “Sent To Fulfillment”.

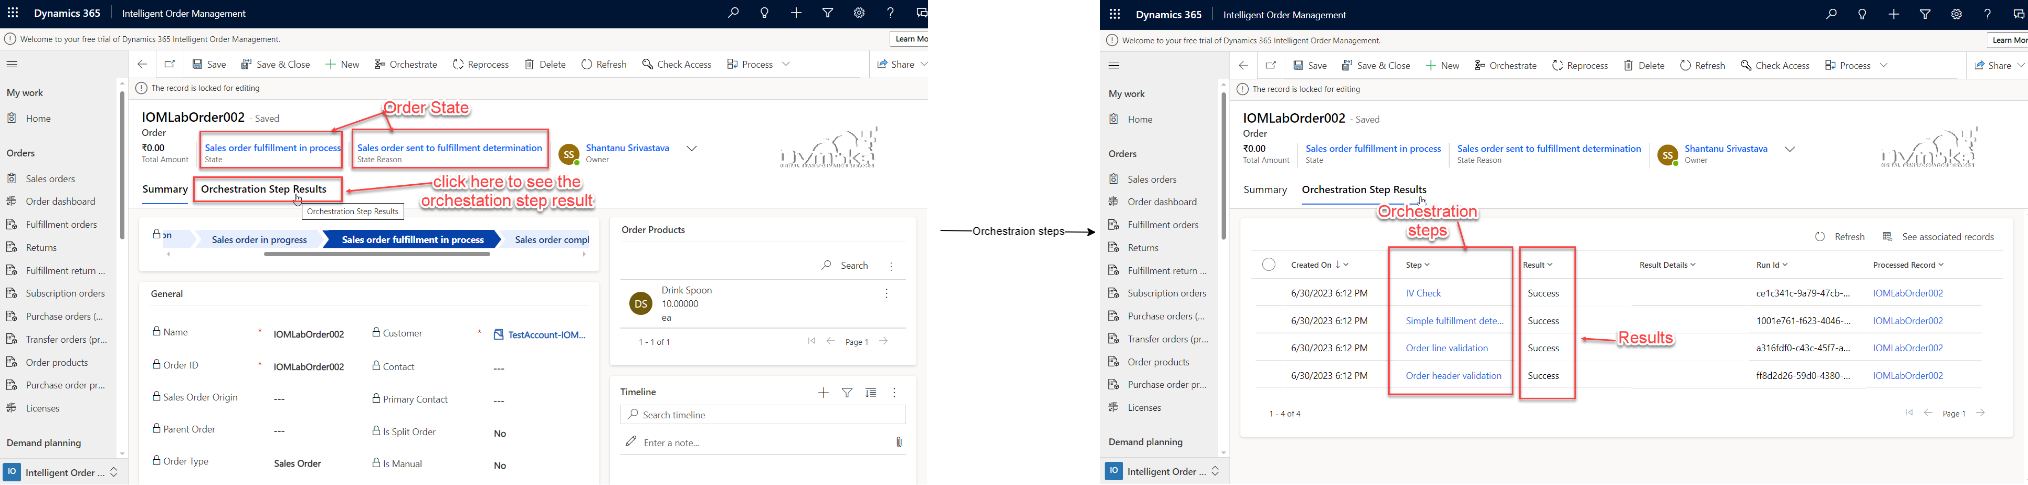
c.Step-Check Order orchestration
- You can check the orchestration step by clicking on Orchestration step result.
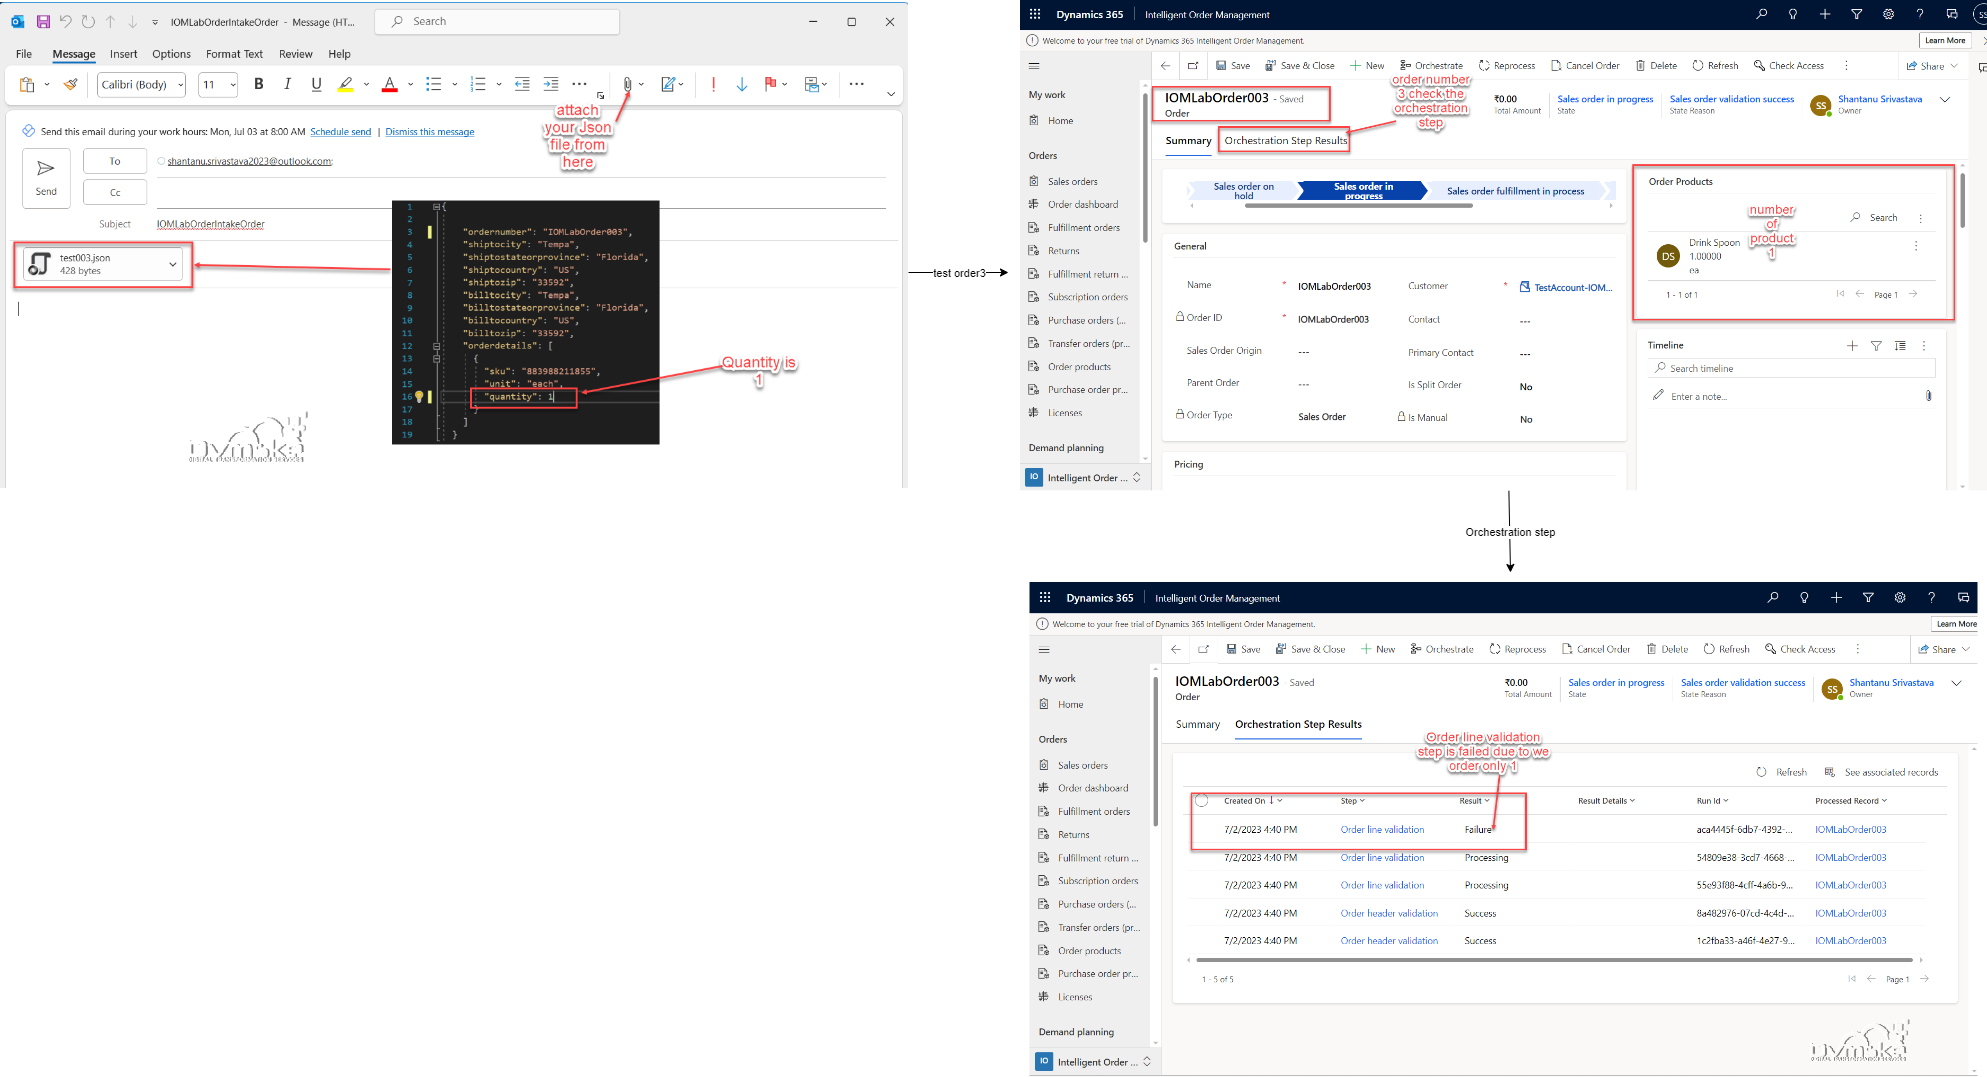
d.Test Run 3
- To complete test run 3, follow these steps.
- Change the ordernumber value to “IOMLabOrder003” and the quantity value to “1”.
- Save the sample sales order payload as a JSON file and attach it to an email with the subject “IOMLabOrderIntakeOrder”.
- Send the email to the Outlook account used previously to set up IOMLabOrderIntake provider.
The order will fail the line minimum quantity validation, with the header status reason “Order Validation Failed” and the line status reason “Order Line Validation Failed”.
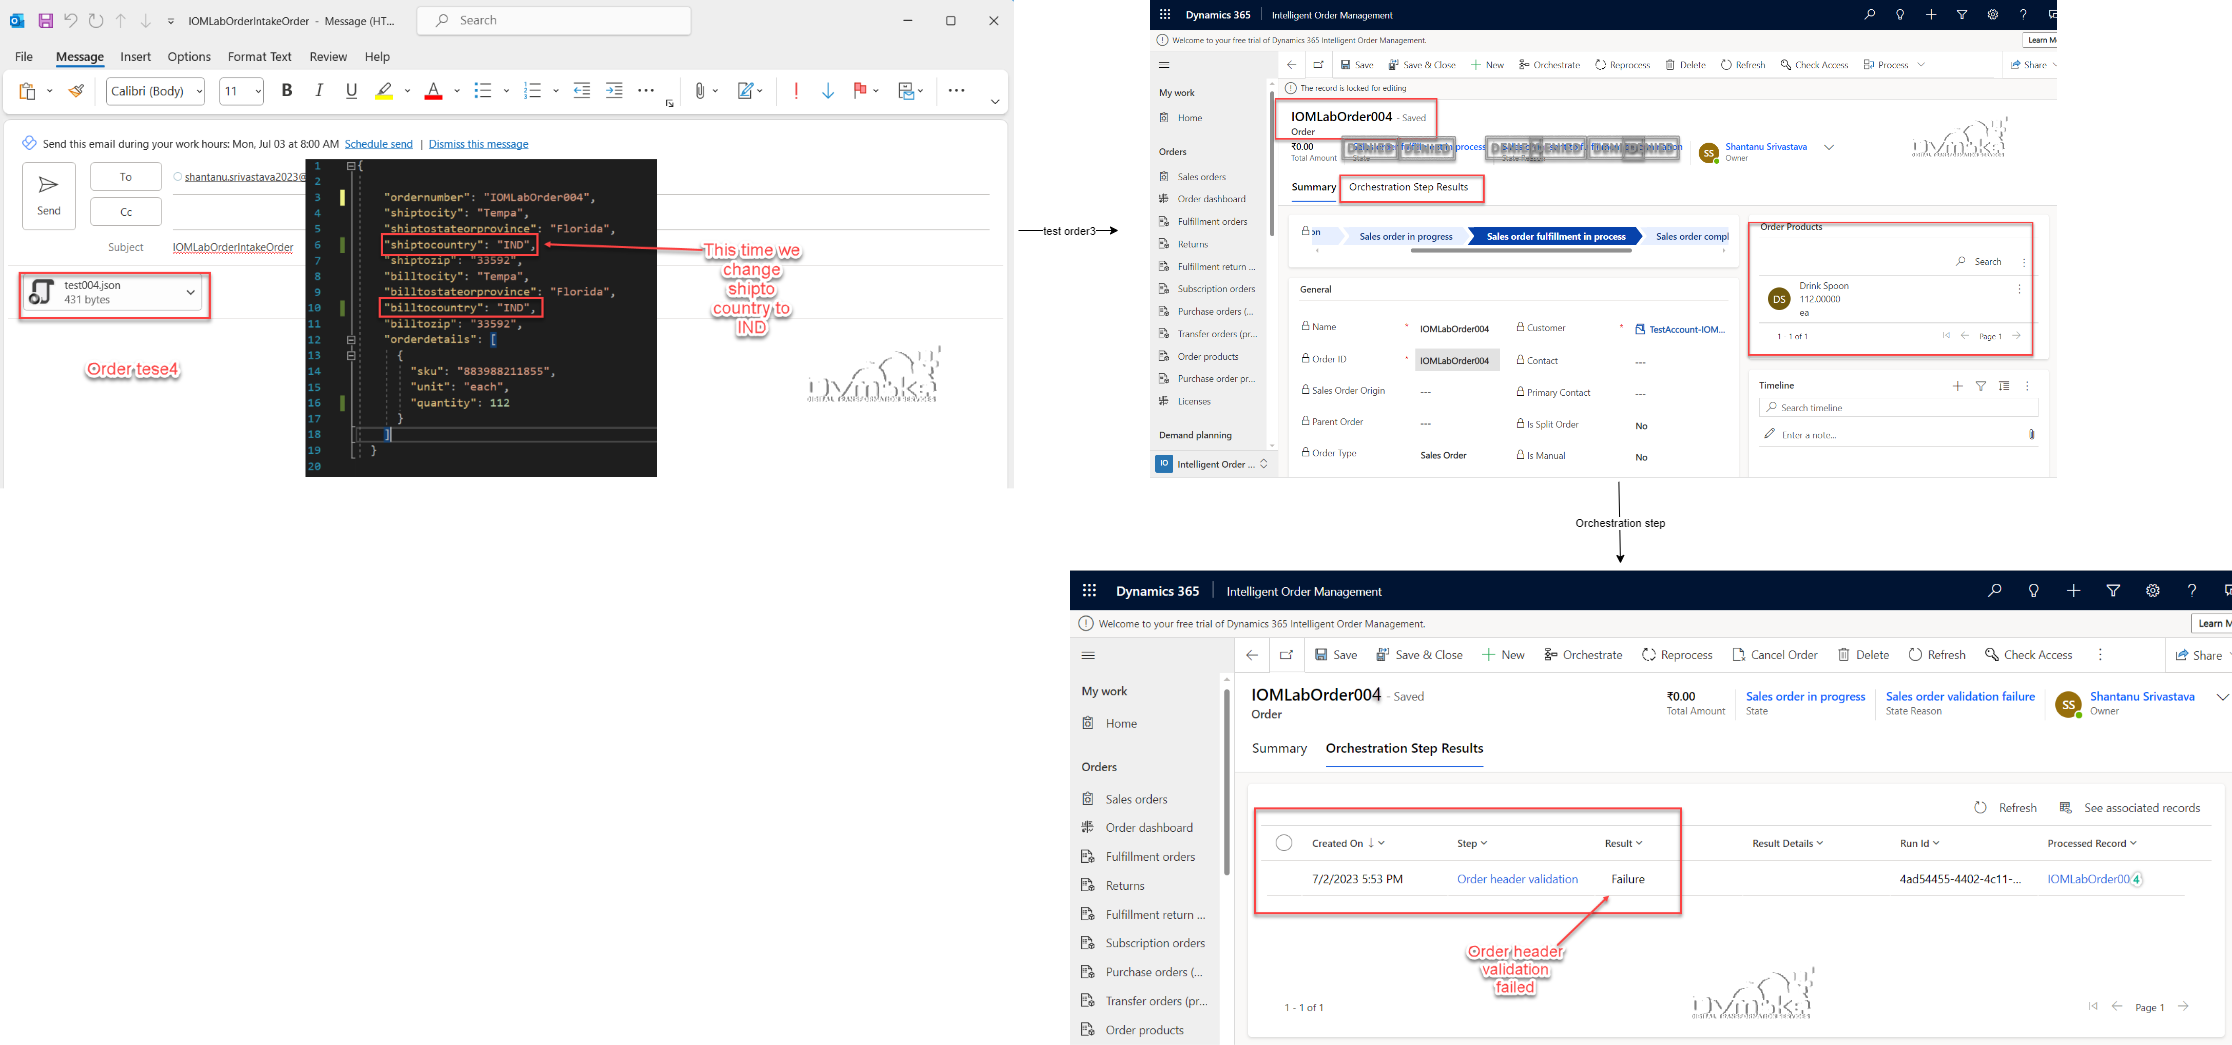
e.Test run 4
- o complete test run 4, follow these steps.
- Change the ordernumber value to “IOMLabOrder004” and the shiptocountry value to “IND”.
- Save the sample sales order payload as a JSON file and attach it to an email with the subject “IOMLabOrderIntakeOrder”.
- Send the email to the Outlook account used previously to set up IOMLabOrderIntake provider.
The order will fail the header ship to country validation, with status reason “Order Validation Failed”.
- Thats it for IOM quick lab scenario.
- Please leave your feedback on these chain of blogs.
