Microsoft Dynamics 365 Intelligent Order Management IOM Step by Step Tutorial
Follow Below Steps
Step 1 - COMPLETEDCreate the free 30 Days Trial Version Environment for the Microsoft Dynamics 365 Intelligent Order Management
Step 2 - COMPLETEDSet up an IOM environment / Configure platform connection references in Microsoft Dynamics 365 Intelligent order Management
Step 3 - COMPLETEDCreate a new solution for PROVIDER Customization in Microsoft Dynamics 365 IOM / Create a provider solution
Step 4 - COMPLETEDCreate RequestBin Custom connector (Power Platform) for Step by Step Microsoft IOM Tutorial
Step 5 - COMPLETEDCreate new intake provider definition for Step by Step IOM Tutorial Scenario- Microsoft Dynamics 365 Intelligent Order Management / Register a new Provider in Library
Step 6 - COMPLETEDCreate a provider message request handler for Quick Start Lab Scenario for Microsoft Intelligent order Management IOM tutorial
Step 7 - COMPLETEDCreate Fulfillment provider in Microsoft Dynamics Intelligent Order Management IOM – Order to Fulfillment in IOM
Step 8Add a provider definition logic definition to the Outlook Provider Definition in Microsoft Dynamics Intelligent Management IOM
Step 9Create a provider action - Power Automate Flow - to send a fulfillment Order payload to RequestBin
Step 10Activate the Intake, Fulfillment, & Internal Application Service provider created in Previous Step by Step IOM Tutorial
Step 11Create Orchestration policies and their associated rules for Quick Start Lab Scenario in Microsoft Dynamics 365 Intelligent Order Management IOM
Step 12Create Sales Order Orchestration flow in Microsoft Dynamics Intelligent Order Management IOM
Step 13Set up Customer(Account) and product mapping in Microsoft Dynamics Intelligent order Management IOM
Step 14Run a sample order orchestration flow in Microsoft Dynamics 365 Intelligent Order Management - END TO END DEMO IOM
PREVIOUS STEP 7 - COMPLETEDCreate Fulfillment provider in Microsoft Dynamics Intelligent Order Management IOM – Order to Fulfillment in IOM
Create provider action to send a fulfillment payload to Outlook
To add a provider definition logic definition to the Outlook provider definition, follow these steps.
- Go to Providers > Library.
- Select the newly-created IOMLabFulfillmentProvider.
- Select Edit on the menu bar.
- Select the Logic definitions tab.
- Select + New IOM Provider Definition Logic Definition.
- For Display Name, enter “IOM Lab Send to Fulfillment (Outlook)”.
- For Logical Name, enter “msdyn_LabSentToFulfillmentOutlook”.
- For Provider Definition, enter “IOMLabFulfillmentProvider”.
- For Logic Type, enter “Provider Action”.
- For Workflow Name, enter “IOM Lab Send to Fulfillment (Outlook)”.
- For Timeout Minutes, enter “2”.
- For Max Retry Attempts, enter “3”.
- For Description, enter “IOM Lab Send to Fulfillment (Outlook)”.
- For Action Type, enter “Send to Fulfillment”.


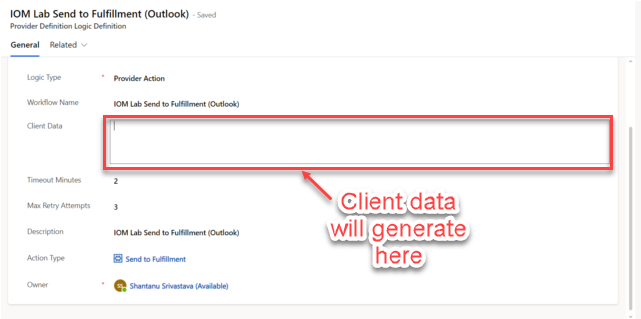
15.Select Save. This will generate a JSON representation of the message handler cloud flow and populate the Client Data field.
16.Replace the placeholder email with provider parameter as follows:
-
- Copy the text block in the Client Data field and paste it into Notepad.
- In the text block, find “placeholder@placeholder.com” and replace it with “{{IOMLabOutboundFulfillmentEmail}}“.

- 3. Copy the modified text block back into the Client Data field.
- 4. Select Save and close.
- 5. Select Connections. You should see both the Microsoft Dataverse and Outlook.com connection reference definitions listed.

Add provider definition connection references to IOMLabProviders solution
- To add provider definition connection references to the IOMLabProviders solution, follow these steps.
- Go to the Power App Maker portal and navigate to the newly-created solution IOMLabProviders.
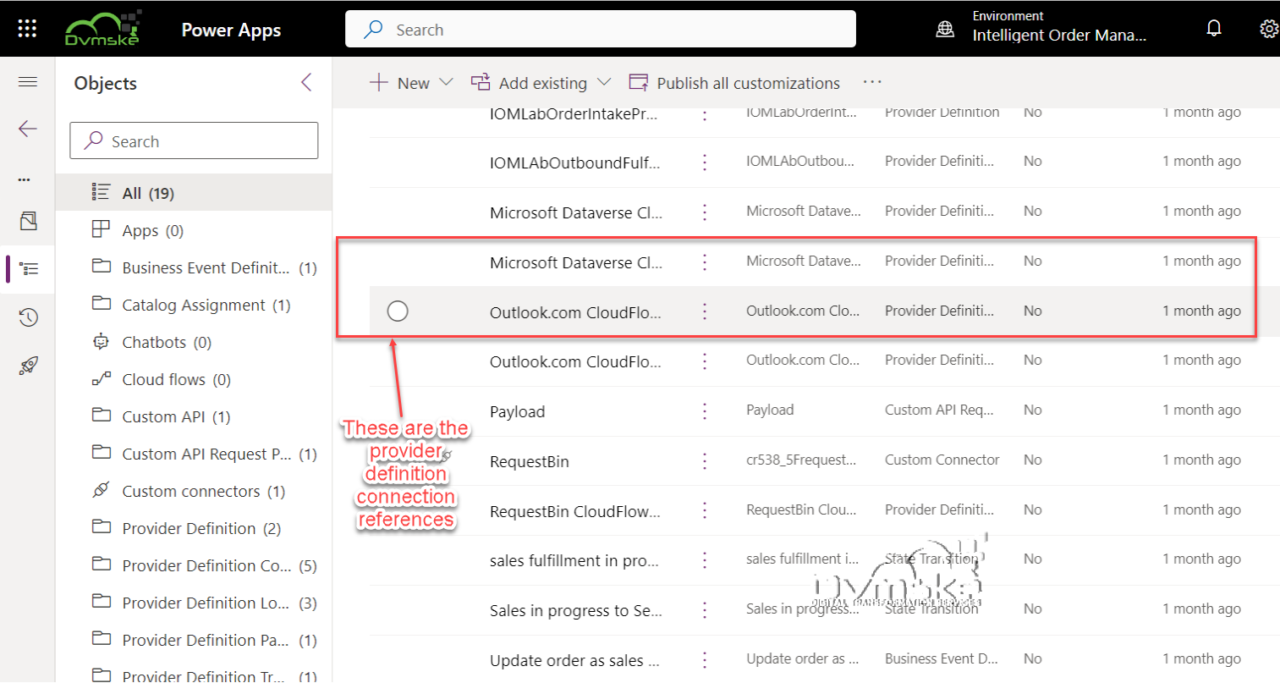
- Select Add existing > Provider Definition Connection Reference.
- Select both the Microsoft Dataverse and Outlook.com provider definition connection references, and then select Add to add them to the solution.


